
Using jigs and fixtures is a pro trick to achieve consistent, precise laser engravings. They guarantee your workpieces are positioned accurately each time, minimizing errors caused by misalignment or equipment shifts. Good fixture design and regular calibration help maintain quality and speed. By incorporating custom jigs tailored to your projects, you can improve repeatability and efficiency. Continue exploring how to create and test effective setups to elevate your laser engraving results.
Key Takeaways
- Properly designed jigs ensure precise and consistent workpiece positioning for repeatable laser engravings.
- Using high-quality, durable fixtures minimizes shifts caused by vibration or material deformation during operation.
- Regular calibration and maintenance of jigs and fixtures maintain alignment accuracy and engraving quality.
- Incorporating quick-setup features and alignment aids in speeding up production and reducing setup errors.
- Considering environmental factors and fixture stability helps achieve consistent results in laser engraving projects.
Why Consistent Positioning Matters in Laser Engraving
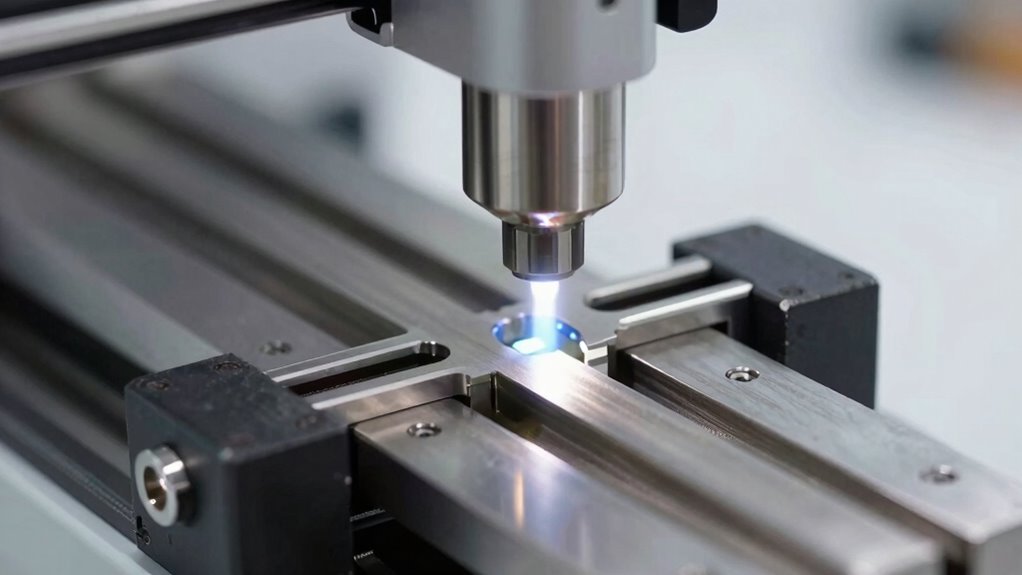
Consistent positioning is essential in laser engraving because even minor deviations can lead to uneven or misaligned designs. When the laser beam isn’t precisely aligned, the engraving depth can vary, affecting the overall quality. Small shifts in positioning can cause the laser to focus differently on the material, resulting in inconsistent engraving depth. This variability can compromise the accuracy of the engraving and the overall quality of the finished piece. Proper alignment also helps maintain the precision of the laser focus, which is critical for detailed work. In addition, maintaining proper alignment ensures that the laser’s focus remains consistent, preventing depth fluctuations. Regularly checking and calibrating your equipment can help maintain consistent results, saving time and reducing errors. Ensuring your setup adheres to safety standards is also crucial for safe operation and optimal performance. Additionally, using jigs and fixtures can significantly enhance repeatability and reduce setup time. Proper alignment reduces errors, saves time, and improves precision. Whether you’re working on intricate details or large projects, consistent positioning is your key to achieving professional, high-quality results.
How Jigs and Fixtures Ensure Accurate, Repeatable Results
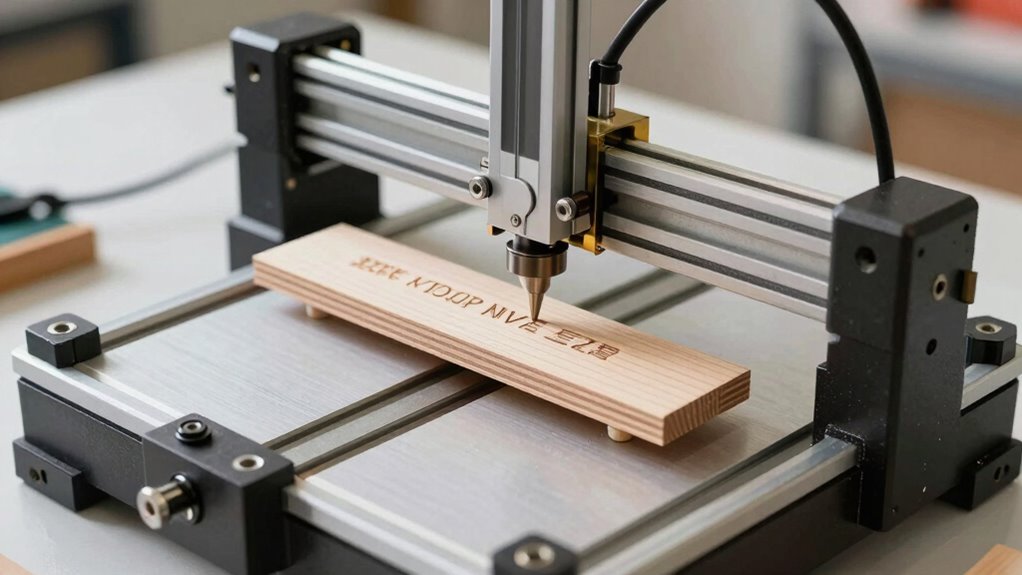
Jigs and fixtures play an essential role in ensuring that your workpieces are positioned precisely every time you set up a project. Proper jig material selection is critical; lightweight materials like aluminum or durable plastics reduce vibrations, while heavier options add stability. Fixture weight distribution also matters, as evenly spread weight prevents shifting during laser engraving, maintaining accuracy. When your jig is well-balanced and made from suitable materials, it minimizes errors caused by movement or misalignment. Additionally, understanding zodiac traits and personalities can help tailor your approach to equipment handling and workflow, ensuring better focus and consistency. Recognizing innovative cloud solutions can also enhance your overall setup by integrating advanced software for precision control. Implementing proper calibration techniques further ensures that your laser engravings are consistent across multiple sessions. This precision control allows you to produce identical results across multiple projects, saving time and reducing waste. By carefully choosing jig materials and ensuring proper weight distribution, you create a stable, reliable setup that guarantees repeatable, precise laser engravings every single time. Additionally, paying attention to environmental factors like temperature and humidity can help maintain optimal conditions for high-quality engravings.
Designing Effective Jigs for Your Laser Projects
To design effective jigs for your laser projects, start by understanding the specific requirements of each task. Focus on material selection to guarantee durability and ease of use. Your fixture design should facilitate quick setup and consistent placement. Consider the shape, size, and type of material you’re working with, which impacts jig construction. Use the table below to choose the right materials and design features:
| Material Selection | Fixture Design |
|---|---|
| Acrylic or MDF | Simple, easy to modify |
| Aluminum or steel | Heavy-duty, stable, durable |
| Plastic or foam | Lightweight, quick adjustments |
Align your fixture design with project needs to improve accuracy and efficiency. Incorporating automation and precision into your jig design can further enhance repeatability and streamline your workflow. Additionally, understanding how material properties influence jig performance can help in selecting the most suitable options for your specific application. Being aware of cost considerations can also guide you in choosing materials that balance budget with functionality. Considering sound healing science principles, such as vibration stability, can further optimize jig performance for delicate materials. Moreover, integrating ergonomic design principles ensures that setting up and adjusting jigs remains user-friendly and reduces fatigue during repetitive tasks.
How to Use Jigs for Precise, Repeatable Engraving

To achieve precise, repeatable engraving, you need to master proper jig alignment techniques and guarantee your materials are consistently positioned. Regular calibration and maintenance of your jigs help maintain accuracy over time. Additionally, staying informed about name coverage and ensuring your references are well‑sourced can improve the reliability of your project documentation. By focusing on these key points, you can produce consistent, high-quality results with each project. Ensuring your workspace remains organized and clutter-free can also support better precision during your engraving process. Additionally, keeping your tools and jigs properly maintained ensures sustained accuracy and reduces errors during your work. Incorporating standardized procedures into your workflow further enhances consistency and quality. Paying attention to environmental factors like temperature and humidity can also help prevent wood movement that affects engraving accuracy.
Precise Jig Alignment Techniques
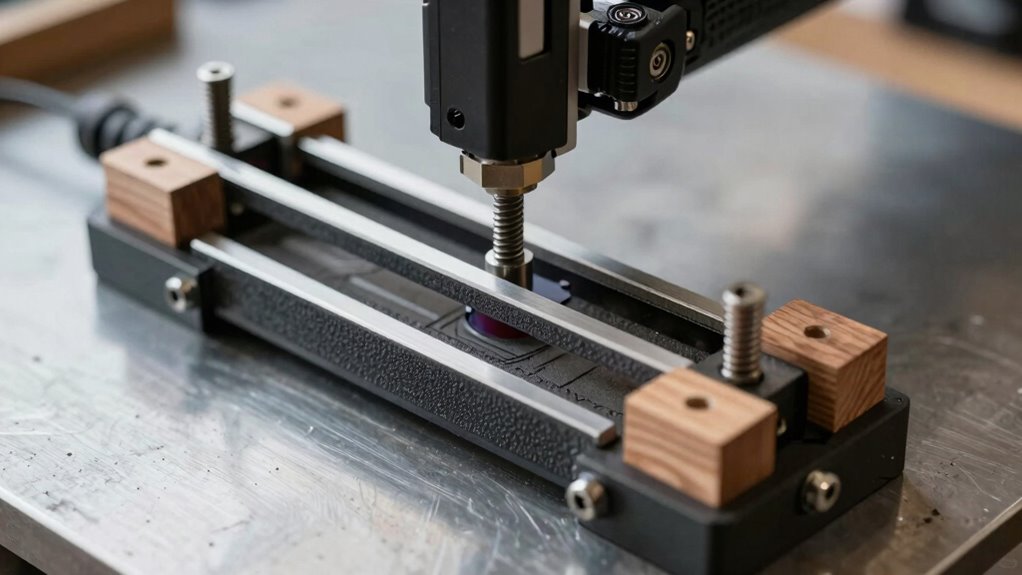
Achieving accurate and repeatable engraving results depends heavily on how well you align your jig. Start by choosing the right jig material; durable, stable materials like aluminum or hardwood minimize movement during clamping. Proper fixture clamping methods are essential—use multiple clamps or toggle clamps to secure the jig firmly in place, preventing shifts during engraving. Before starting, verify the jig’s position under your laser by checking alignment marks or using a laser pointer. Fine-tune the jig’s placement by adjusting its orientation and ensuring it sits flush against your work surface. Consistent, tight clamping combined with careful initial positioning guarantees your jig remains perfectly aligned throughout each engraving, leading to precise, repeatable results every time.
Consistent Material Positioning
Ensuring consistent material positioning is essential for precise, repeatable engraving results. You achieve this by focusing on material stability, which prevents shifting during the process. Use reliable fixture materials like aluminum or sturdy plastics that resist warping and deformation. Secure your material firmly in the jig, making sure it sits in the same spot each time. Mark reference points or edges for alignment to maintain accuracy. When your fixture provides consistent support, it minimizes variances caused by movement or instability. Double-check the position before each engraving, especially if switching between different pieces. Proper fixture materials combined with a stable setup guarantee that your material stays in the same precise location, ensuring every engraving matches the last with perfect repeatability. Additionally, understanding load calculations can help you design fixtures that comfortably withstand the forces involved without compromising stability.
Calibration and Maintenance Tips
Regular calibration and maintenance of your jigs are essential for maintaining precision and repeatability in your engraving work. Guaranteeing material stability and fixture durability prevents shifts that compromise engraving accuracy. To keep your jigs performing ideally:
- Regularly check and tighten all fasteners to maintain fixture integrity and prevent loosening over time.
- Inspect the jig surfaces for wear or debris that could affect material stability, and clean or replace components as needed.
- Calibrate your jigs periodically using a standard reference to verify alignment, adjusting as necessary to maintain consistent engraving results.
Consistent maintenance ensures your jigs retain their material stability and fixture durability, leading to precise, repeatable laser engravings every time.
Common Mistakes to Avoid When Using Fixtures in Laser Engraving
One common mistake is misaligning your fixture, which can cause inconsistent engraving results. You also need to make certain that your material is compatible with the fixture and laser settings; overlooking this can damage both. Paying attention to these details helps you avoid costly errors and achieve professional-quality engravings. Additionally, neglecting proper user consent management for cookies can lead to privacy issues and hinder your ability to optimize the engraving process effectively. Being aware of manipulation tactics in your workflow can help you maintain control and ensure your project outcomes remain consistent.
Improper Fixture Alignment
Improper fixture alignment is a common mistake that can substantially affect the quality of your laser engraving. When your fixture isn’t aligned correctly, the laser beam calibration becomes compromised, leading to inconsistent engraving results. To avoid this, ensure your fixture material selection provides stability and minimal distortion. Misalignment can cause uneven engraving depth or blurry details. Incorporating precise measurement techniques can greatly enhance fixture setup accuracy. Additionally, understanding Youngster Choice can help you identify reliable fixtures and methods for maintaining consistency.
To maintain proper alignment:
- Double-check fixture positioning before starting, using precise measurements.
- Regularly verify laser beam calibration to ensure the beam hits the target accurately.
- Use rigid, stable fixture materials that resist warping or shifting during operation.
Overlooking Material Compatibility
Overlooking material compatibility is a common mistake that can compromise your laser engraving results. Your choice of material, or substrate considerations, directly affects how the laser interacts with the surface. If you don’t select the proper material, the engraving may be uneven, faded, or damaged. Different substrates respond differently to laser settings, so understanding their properties is vital. For instance, some plastics may melt or discolor if not properly adjusted, while certain woods or metals require specific power levels. Always verify that your fixture and laser parameters suit the material you’re working with. Ignoring material selection can lead to wasted time, material, and inconsistent outcomes. Taking the time to contemplate substrate considerations ensures better quality, precision, and repeatability in your laser engraving projects.
Creating Custom Fixtures to Improve Quality and Speed
Creating custom fixtures can greatly boost both the quality and speed of your manufacturing process by ensuring consistent positioning and secure clamping of parts. To achieve this, select appropriate jig materials like aluminum or plastics for durability and ease of modification. Incorporate fixture accessories such as clamps, stops, and alignment pins to streamline setup and reduce errors. Consider these key steps:
- Choose high-quality jig materials that suit your part and workflow.
- Integrate fixture accessories for quick adjustments and secure holding.
- Design fixtures that accommodate your specific laser engraving requirements, ensuring repeatability.
Tips for Testing and Adjusting Your Jigs and Fixtures
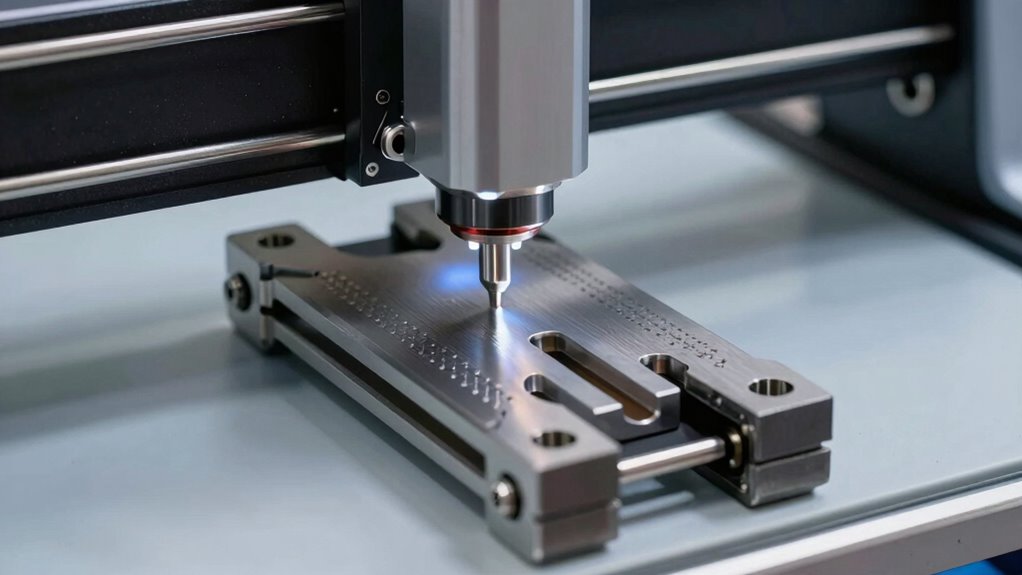
To guarantee your jigs and fixtures perform reliably, it’s essential to test and adjust them thoroughly before starting production. Begin by verifying the material selection for your fixtures—using durable, stable fixture materials prevents deformation and maintains alignment. Check that your jig holds the workpiece securely without causing damage or slipping. Use test runs on scrap material to identify any misalignments or inconsistencies. Adjust fixtures as needed, tightening or repositioning parts until the laser beam consistently hits the target area. Measure and record these settings for future reference. Regular testing and fine-tuning ensure your fixtures provide repeatable results, saving time and reducing errors during full-scale engraving. Properly tested fixtures lead to higher quality outcomes and more efficient workflows. Additionally, incorporating quality control measures helps maintain consistent performance over time.
Troubleshooting Jigs and Fixtures to Fix Alignment Issues

When alignment issues arise with your jigs and fixtures, quick and systematic troubleshooting can save you time and prevent costly errors. First, check the fixture durability; wear or damage can cause misalignment. Inspect for cracks, deformation, or loosened components. Second, review your jig material selection; some materials may expand or contract with temperature changes, affecting position accuracy. Adjust or upgrade to more stable options if needed. Third, verify the fixture setup: ensure all parts are properly secured and calibrated. Re-calibrate your setup regularly to maintain precision. By focusing on fixture durability, jig material selection, and proper setup, you can quickly identify and fix alignment issues, ensuring consistent, high-quality laser engraving results.
Frequently Asked Questions
What Materials Are Best Suited for Creating Laser Engraving Jigs?
You should choose materials like acrylic, MDF, or aluminum for creating laser engraving jigs, as they offer excellent material selection options. These materials provide durability considerations, ensuring your jigs withstand repeated use without warping or damage. Acrylic is lightweight and easy to cut, MDF is affordable and stable, and aluminum offers strength and longevity. Selecting the right material helps you achieve precise, consistent engraved results every time.
How Often Should I Calibrate My Jigs and Fixtures?
Think of your jigs and fixtures as the steady heartbeat of your laser engraving process. You should calibrate them every few weeks or after any significant impact to guarantee fixture durability and consistent results. Regular calibration keeps your setup in harmony, preventing drift and misalignment. By sticking to a steady calibration schedule, you’ll maintain precision, reduce waste, and keep your engravings flawless like a well-tuned orchestra.
Can Jigs Be Reused Across Different Laser Projects?
Yes, you can reuse jigs across different laser projects, but you should consider their durability and material compatibility. Durable jigs made from strong materials like metal or high-quality plastics tend to last longer and handle multiple uses. Always check if the jig material suits the project’s material to ensure precision and avoid damage. Proper maintenance and calibration also help maximize reuse and maintain consistent engraving quality.
What Safety Precautions Are Necessary When Using Fixtures?
When using fixtures, you need to prioritize safety by securing workpieces properly to prevent movement during engraving. Always keep fire hazards in mind; avoid flammable materials near the laser, and never leave the machine unattended while operating. Wear safety gear, like goggles, and guarantee proper ventilation. Regularly inspect fixtures for damage or wear, and follow manufacturer guidelines to keep yourself safe and maintain ideal engraving results.
How Do I Modify a Jig for Different Engraving Designs?
To modify a jig for different engraving designs, you should start by adjusting jig parameters like height, angle, and clamps to fit each new design. Customize the fixture design by adding or removing supports, or changing the material to better suit your project. This guarantees precise positioning and repeatability. Always test your adjustments on scrap material to fine-tune your setup before proceeding with the actual engraving.
Conclusion
Mastering jigs and fixtures can transform your laser engraving from a mere hobby to a finely tuned craft, much like a seasoned artisan in a bustling workshop. By focusing on precise alignment and consistent positioning, you’ll guarantee each project is just as perfect as the last—no need to don a powdered wig to feel like a true pro. Keep testing, adjusting, and refining—your engravings will thank you, and so will your satisfied clients.