
Layer height is a key setting in 3D printing that determines how thick each printed layer will be. Adjusting it affects the surface finish, detail, and strength of your print. Smaller layers give smoother, more detailed results but take longer, while larger layers speed up production but can reduce quality. Understanding how to choose and fine-tune this setting can help you achieve professional-looking prints, and if you keep exploring, you’ll discover even more ways to improve your results.
Key Takeaways
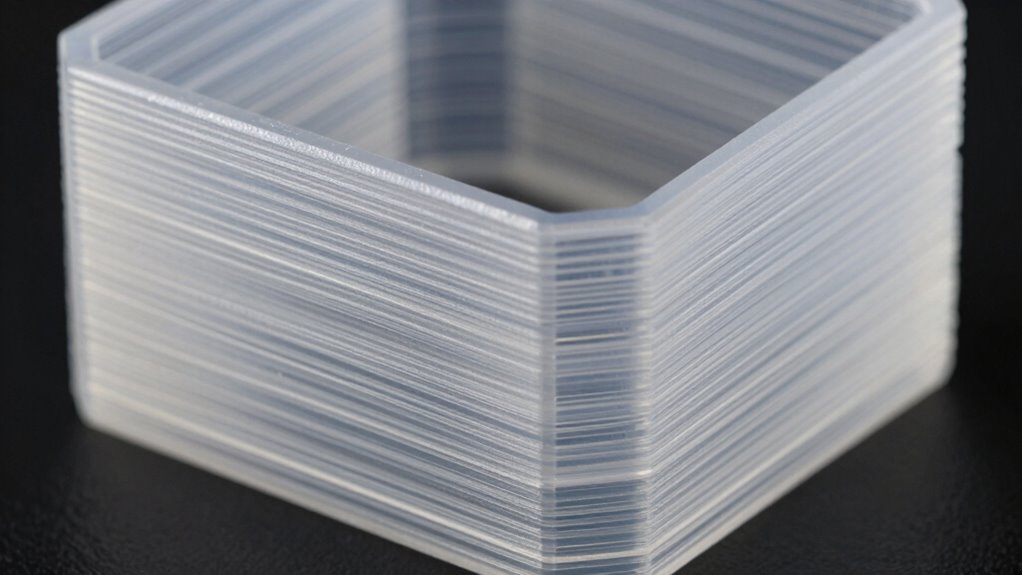
- Smaller layer heights produce finer details and a smoother surface finish, giving your print a professional look.
- Larger layer heights speed up printing but may compromise surface quality and detail.
- Proper calibration of layer height ensures consistent layer adhesion and prevents surface imperfections.
- Matching layer height with filament type and print settings optimizes strength and appearance.
- Testing different layer heights helps find the ideal balance between quality, speed, and durability.

FLASHFORGE Adventurer 5M 3D Printer with Fully Auto Leveling, Max 600mm/s High Speed Printing, 280°C Direct Extruder with 3S Detachable Nozzle, CoreXY All Metal Structure, Print Size 220x220x220mm
One-Click Automatic Printing: Experience hassle-free 3D printing with the Adventurer 5M Series. Enjoy automatic bed leveling for flawless…
As an affiliate, we earn on qualifying purchases.
As an affiliate, we earn on qualifying purchases.
What Is Layer Height and Why Does It Matter in 3D Printing?

Layer height refers to the thickness of each individual layer in a 3D print, and it plays a crucial role in determining the quality and strength of your final object. Choosing the right layer height affects your print speed and filament compatibility. A smaller layer height results in finer detail but increases print time, so you’ll need to adjust your print speed accordingly to maintain quality. Larger layers can speed up printing but may reduce detail and surface smoothness. It’s important to match your layer height with compatible filament types, as some materials perform better at specific layer thicknesses. By understanding the balance between layer height, print speed, and filament compatibility, you can optimize your settings for better results and stronger, more precise prints. Additionally, considering layer height optimization can help you achieve the best possible print quality, especially when you take into account material properties and how they influence layer adhesion and overall durability. Incorporating layer height adjustment into your workflow allows for a more tailored approach to different projects and desired outcomes.

SUNLU PLA 3D Printer Filament PLA Filament 1.75mm, Neatly Wound 3D Printing Filament 1.75mm, Dimensional Accuracy +/- 0.02 mm, Fit Most FDM 3D Printers, 1kg Spool (2.2lbs), Black
①【SUNLU PLA 3D Printer Filament】PLA material is the perfect choice for 3D printing enthusiasts! SUNLU PLA filament is…
As an affiliate, we earn on qualifying purchases.
As an affiliate, we earn on qualifying purchases.
How Does Layer Height Impact Surface Finish, Detail, and Strength?
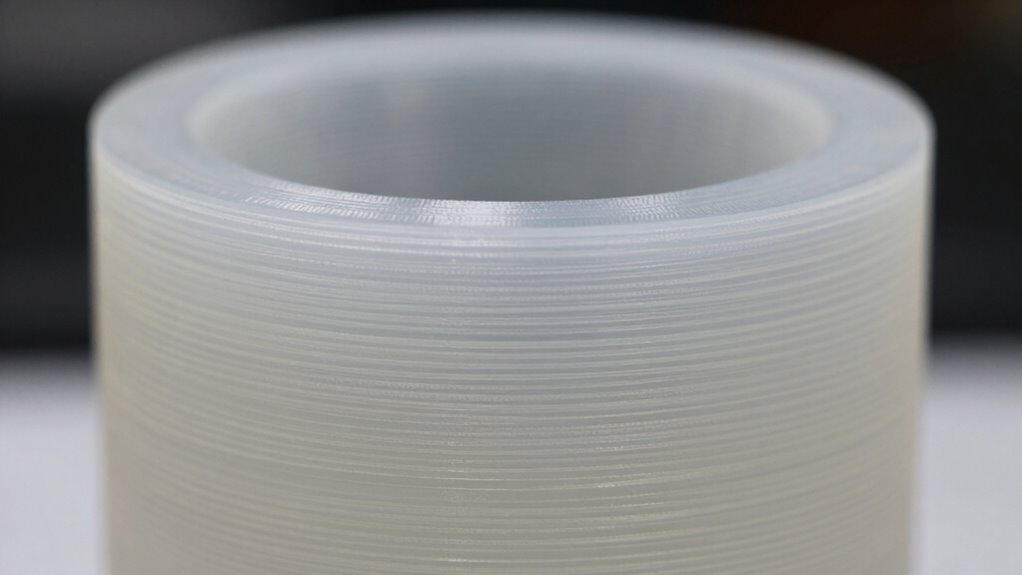
When you choose a smaller layer height, you’ll notice a significant improvement in surface finish and detail, as each layer is thinner and more precise. This enhances your print resolution, making surfaces smoother and details sharper. However, finer layers can sometimes reduce overall strength because the adhesion between layers may be less robust. Additionally, smaller layer heights often require filament compatibility with precise extrusion settings, as inconsistent filament quality can lead to print imperfections. While high-resolution prints look more professional, they also take longer to complete. Conversely, increasing layer height speeds up printing but may sacrifice surface quality and fine detail. Striking the right balance depends on your project’s needs, but understanding how layer height influences surface finish, detail, and strength helps you make better choices. Layer adhesion is also an important factor to consider, as it affects the overall durability of your print. Moreover, adjusting print speed can help optimize layer bonding and surface quality depending on your specific layer height setting. Additionally, proper temperature control plays a crucial role in achieving consistent layer bonding and optimal print quality. To further refine your results, being aware of how material properties interact with layer height can guide you toward more reliable and aesthetically pleasing prints.

Premium 3D Print Removal Tool Kit – Durable 3D Printer Tools with Sturdy Comfort Grips, Sharp and Hardened Blades for Easy Separation of Prints, Knife and Spatula Set of 2 – Enhanced Version
Durable, rigid construction; Solid rivets keep the blades in place, no more repurposed artist palette spatulas with spinning,…
As an affiliate, we earn on qualifying purchases.
As an affiliate, we earn on qualifying purchases.
How Do You Choose the Best Layer Height for Your Projects?
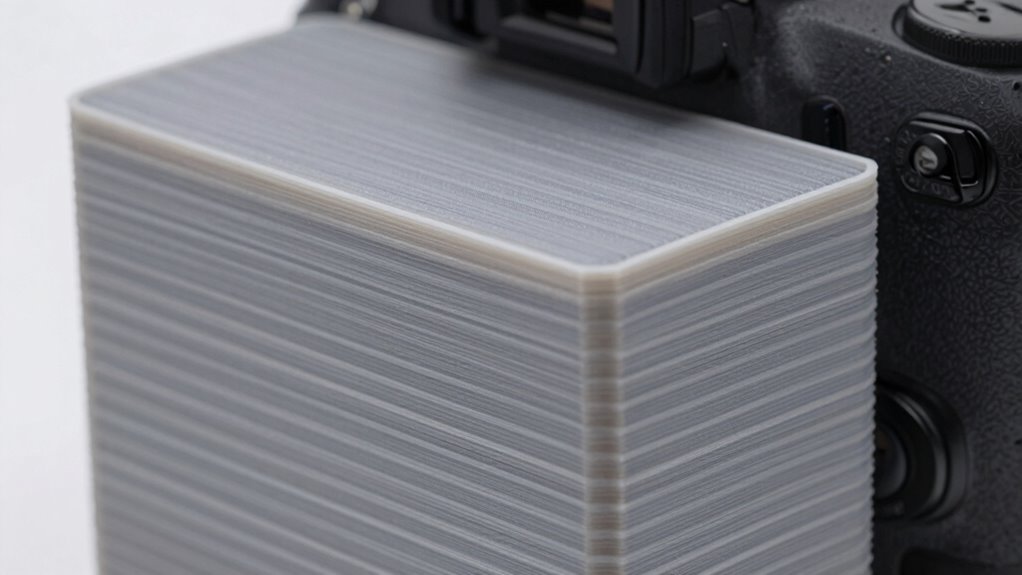
Choosing the right layer height for your project depends on balancing your priorities for quality, speed, and strength. Start by considering filament selection, as different materials may perform better at specific layer heights. For example, flexible filaments often require thicker layers for better bonding, while finer layers suit detailed filaments like resin or PLA. Ensuring proper printer calibration is essential; a well-calibrated printer produces consistent layer heights, improving overall results. If you want a quick print, opt for a larger layer height, but for detailed or high-quality finishes, go smaller. Testing different settings with sample prints to find the sweet spot that matches your project’s needs is crucial because layer height consistency directly impacts surface finish and dimensional accuracy. Remember, choosing the best layer height involves understanding your filament’s properties and maintaining your printer’s calibration. Additionally, proper calibration techniques help ensure your layers are accurately formed, leading to better print quality. Incorporating advanced monitoring tools can further enhance your calibration process by providing real-time feedback on print accuracy. Moreover, understanding how material properties influence layer adhesion can help you select optimal settings for different filaments and achieve better results.
SUNLU PLA 3D Printer Filament PLA Filament 1.75mm, Neatly Wound 3D Printing Filament 1.75mm, Dimensional Accuracy +/- 0.02 mm, Fit Most FDM 3D Printers, 1kg Spool (2.2lbs), Black
①【SUNLU PLA 3D Printer Filament】PLA material is the perfect choice for 3D printing enthusiasts! SUNLU PLA filament is…
As an affiliate, we earn on qualifying purchases.
As an affiliate, we earn on qualifying purchases.
How Can You Adjust and Fine-Tune Layer Height Settings in Your Slicer?

To effectively adjust and fine-tune your layer height settings in your slicer, start by locating the layer height parameter within the software’s interface. Adjusting this setting impacts print quality and speed, so consider your desired balance. When changing layer height, think about your filament type; some materials, like PLA, handle thinner layers better, resulting in smoother finishes. Keep in mind that decreasing layer height often requires reducing your print speed to maintain precision and avoid print defects. Conversely, larger layers can speed up printing but may compromise detail. Fine-tuning involves experimenting with small adjustments, printing test models, and observing results. By carefully balancing layer height, print speed, and filament type, you achieve a professional look without sacrificing efficiency.
Troubleshooting Common Layer Height Problems and How to Fix Them
Layer height issues are common obstacles that can compromise the quality of your 3D prints, but many problems are easily fixable with the right troubleshooting steps. If you experience poor print adhesion, double-check your layer height; too high or too low can cause layers to separate or not stick properly. Confirm your filament compatibility; some filaments need specific layer heights for ideal bonding. If layers appear uneven or rough, try reducing the layer height slightly for smoother results. Also, verify your extruder calibration and cooling settings, as they influence layer consistency. Adjusting these factors can help resolve common problems like warping or surface imperfections, leading to cleaner, more professional-looking prints. Proper troubleshooting will improve your print quality and overall success.
Frequently Asked Questions
How Does Layer Height Affect Print Time and Material Usage?
You’ll notice that smaller layer heights increase print time and use more material, but they improve detail and smoothness. Conversely, larger layer heights reduce both time and material costs, but may sacrifice print quality. Layer height optimization depends on your project’s needs; finding the right balance involves understanding the print quality trade-offs. Adjusting this setting lets you customize your prints for faster results or finer detail.
Can Changing Layer Height Improve Print Adhesion?
Yes, changing layer height can improve print adhesion. Using finer layers can help materials bond better, especially when combined with proper adhesion techniques like a heated bed and surface treatments. Make sure your bed is well-leveled; this guarantees consistent contact between the print and bed, enhancing adhesion. Adjusting layer height alongside good bed leveling practices creates a stronger foundation, resulting in fewer print failures and better overall quality.
What Are the Best Practices for Printing Complex Geometries?
Think of printing complex geometries like traversing a mountain trail; support material acts as your safety ropes, keeping fragile parts stable. Use adequate support material and optimize infill density to prevent sagging or warping. Start with moderate support and adjust as needed, ensuring details stay crisp without overusing material. This approach helps you achieve precise, durable prints, even with intricate designs.
How Does Layer Height Influence Support Material Removal?
You’ll find that a smaller layer height creates a smoother support surface, making support material removal easier. Thinner layers result in finer contact points between the support and your print, reducing adhesion strength and minimizing damage during removal. Conversely, larger layer heights produce rougher surfaces, which can complicate support removal. Adjusting layer height allows you to balance print quality with support surface smoothness, streamlining the support removal process.
Are There Specific Layer Heights Suited for Flexible Filaments?
Like a well-tailored suit, choosing the right layer height for flexible filaments guarantees smooth, high-quality results. For ideal layer resolution, stick to a slightly higher layer height, around 0.2-0.3mm, which balances flexibility with detail. Flexible filament compatibility improves with these settings because they reduce nozzle clogging and layer separation, making your prints more durable and easier to remove support material.
Conclusion
Choosing the right layer height can transform your prints from rough sketches to polished masterpieces. While a smaller layer height offers smooth surfaces and fine details, it also requires more time and effort. Think of it as a balance—like walking a tightrope between speed and quality. Mastering this setting lets you create professional-looking results without sacrificing efficiency. So, experiment, troubleshoot, and find that perfect middle ground—your prints will thank you.