TL;DR

Prime made for students and young adults
- Fast, free delivery for dorm and study essentials
- Prime Video and Amazon Music included
- Member-only deals
Educational science kits for kids turn ideas about chemistry, engineering, nature, and space into hands-on experiments. Choose a kit that fits your child’s age and interests, check its safety guidance, and favor activities with room to observe, predict, and try again. A few household materials and an adult’s questions can make a small kit useful long after the first afternoon.
A paper bridge can sag under a single coin, then hold a whole stack after one small fold. That moment—when your child sees an idea change what happens—is the real magic of a science kit.
Educational science kits for kids make big subjects tangible, from fizzing chemistry to simple machines. Here’s how to choose a kit that fits your child, get more from each experiment, and keep curiosity alive after the box is empty.
Choose by your child’s interests, reading ability, and experience, using the age label as a starting point.
Check the kit’s activity length, extra-supply needs, workspace, and safety directions before buying.
Ask your child to predict, test, change one feature, observe, and explain the result.
Use everyday connections—a paper bridge, a garden seed, or a night-sky observation—to extend the kit’s ideas.
Supervise based on the actual activity and the child; follow the maker’s directions for handling and cleanup.
What Do Kids Actually Learn From a Science Kit?
Educational science kits for kids teach more than facts: they give children a safe way to test an idea, notice evidence, and change their minds. When a paper helicopter spins faster after you shorten its blades, your child can connect a small design change to a visible result. That connection matters because it shifts learning from remembering a rule to seeing how evidence supports an explanation.
The process also makes room for uncertainty. A test can produce a result that differs from a child’s prediction, and that mismatch is useful: it prompts them to ask whether the idea was wrong, the setup changed, or the observation needs another look. Kids practice following steps, using tools carefully, describing what they observe, and working through surprises. “The taller tower fell sooner” is a meaningful observation that can guide the next design, even if the project did not match the picture on the box.
For instance, ask your child to predict which of two toy boats will float higher, then test both in a basin. The water’s wobble, the boats’ different loads, and a pencil mark at the waterline make abstract ideas about floating concrete. They also show why a fair comparison matters: if one boat carries more weight, the result may reflect the load as much as the boat’s shape.
The experiment matters less than the thinking around it: predict, test, notice, and explain. Repeating a test or changing one feature at a time helps children tell the difference between a pattern and a one-off result.
How Can You Match a Kit to Your Child’s Age and Interests?
Educational science kits for kids work best when the instructions feel challenging but manageable for the child who will use them. Check the age guidance, reading load, motor skills required, and whether an adult needs to handle any steps; age labels help, but your child’s experience and attention span matter too. A kit that is too easy may hold attention for only one activity, while one with too many difficult steps can make a child feel that an adult must do the real work.
A five-year-old who loves puddles may enjoy a simple weather or nature kit with large pieces and picture-led steps. A nine-year-old who takes apart broken gadgets may prefer gears, circuits, or bridge building, where they can tweak a design and compare what happens. Matching the theme to an existing interest gives the child a reason to return to the activity; matching the task to their abilities lets them take ownership once that interest is sparked.
Before you buy, look beyond the bright box. A kit may promise dozens of activities, but some rely on the same few parts or require extra household supplies. Check whether those supplies are easy to find and whether activities can be repeated. A focused kit with six experiments that invite variation can keep a curious child busy longer than a crowded box of one-time tricks, though a child who enjoys quick novelty may prefer a broader set of short activities.
- For younger children: Look for sturdy pieces, clear pictures, short activities, and an adult-led pace.
- For school-age kids: Choose projects with simple measurement, recording, or design choices.
- For older kids: Favor kits with room to troubleshoot, repeat tests, or build a more complex model.
If your child loses interest when directions dictate every move, pick a kit that asks them to make choices. If they feel more confident with structure, a clear recipe-style experiment can be a satisfying starting point. The right balance can change over time: once a child understands the basic steps, invite them to choose one variation so the kit remains approachable while offering more independence.
Which Science Kit Type Fits the Afternoon You Have?
Educational science kits for kids fall into a few practical categories, and each suits a different kind of curiosity and family setup. The format shapes the experience: a short chemistry activity might deliver a dramatic fizz, while a construction kit may offer quieter work that can stretch across several sessions. Thinking about the time, space, and attention you have helps avoid buying an activity whose best part happens after the afternoon you planned for it.
Imagine you have forty minutes before dinner and a child eager to see something happen. A crystal-growing kit may need days of waiting, while a paper-plane challenge gives you quick rounds of folding, flying, and adjusting. The first trades immediate feedback for observing a change over time; the second makes iteration easy, but may offer less practice with patience. Neither is better in every situation. Choose for your available time, space, and tolerance for mess, and consider whether you want a satisfying result today or a question to return to tomorrow.
| Kit type | What kids explore | Good fit when |
|---|---|---|
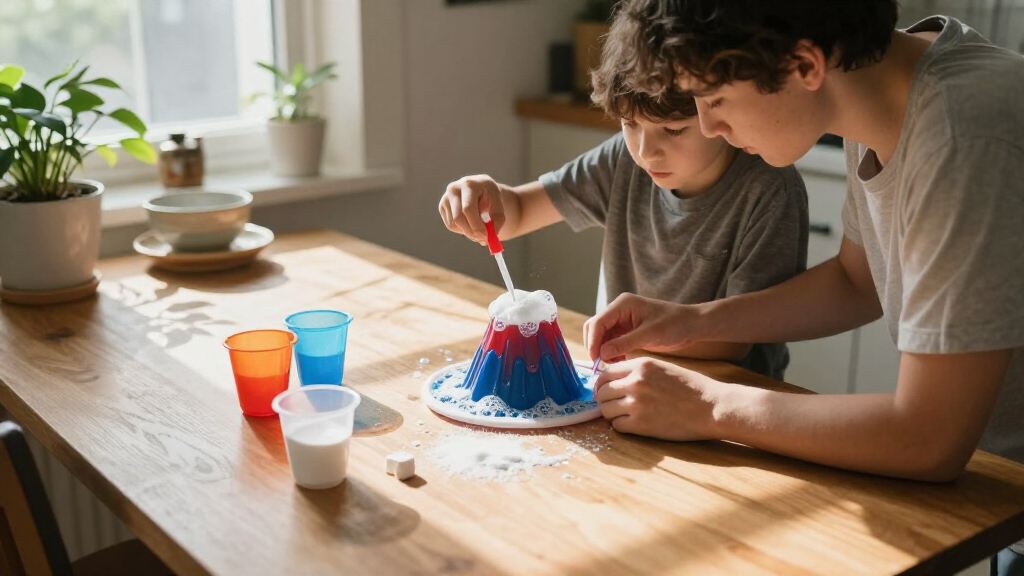
| Chemistry | Mixing, dissolving, color changes | You can supervise and protect the work surface |
| Engineering | Structures, gears, bridges, simple machines | Your child likes building, testing, and rebuilding |
| Nature and earth science | Plants, rocks, weather, or habitats | You want activities tied to a garden, park, or window |
| Electricity and robotics | Circuits, switches, sensors, or movement | Your child is ready to follow careful assembly steps |
| Space science | Planets, light, motion, and observation | You can pair a model or activity with a clear night sky |
For example, a family in a small apartment might choose a tabletop circuit kit over a digging activity that needs outdoor space. That choice can reduce setup and cleanup, which makes it more likely the kit will actually be used. A child who loves collecting stones may get more from a geology kit and a walk around the block than from a flashy volcano demonstration: the walk connects the activity to objects they can inspect themselves, while the volcano may be more immediately exciting. The better fit depends on whether your child is drawn to observing, building, or a dramatic result.
How Can You Turn One Experiment Into Better Questions?
To get more learning from a science kit, let your child make a prediction, change one thing, observe the result, and explain what happened. This simple sequence turns a set of instructions into an investigation, even if the activity takes only ten minutes. Changing one feature at a time is useful because it gives you a clearer clue about what caused a difference; changing several at once may produce a surprising result without showing why it happened.
- Ask for a prediction. “Which paper bridge do you think will hold more coins?” A prediction gives the test a question to answer, but it is not a promise that the child must get right.
- Run the first test. Keep the setup steady and count each coin aloud. A consistent setup makes it easier to compare the designs fairly.
- Change one feature. Fold the paper into an accordion shape, leaving other parts the same. This helps isolate the effect of the fold.
- Compare the results. Record the number of coins each design held. The numbers may show a pattern, though repeating the test can reveal whether a small difference was reliable.
- Let your child explain. Ask what they noticed and what they might change next. Their explanation shows what they think the test revealed and gives them a starting point for another trial.
You don’t need a lab notebook with perfect handwriting. A scrap of paper with two bridge sketches and their coin counts is enough. If the second bridge holds fewer coins, ask what might have affected the test before declaring the design a failure. A bridge may have been placed differently or a coin may have landed off-center; noticing those possibilities teaches that evidence depends on how a test is carried out.
Keep your own explanations short at first. “What changed?” and “What do you think caused that?” give children room to reason, while “The answer is…” can close the conversation too early. When frustration rises, pause, reset the workspace, and try a smaller change together. The goal is not to make every test succeed; it is to help your child see how a new question or a more careful comparison can make an unexpected result useful.
How Do You Keep Experiments Safe Without Taking Over?
A science kit stays fun when you read its safety directions, prepare the work area, and match adult supervision to the activity. Follow the manufacturer’s age guidance and instructions, and check for cautions about small parts, heat, liquids, or protective equipment before you begin. These details determine which tasks a child can handle independently and which need an adult nearby; an age label alone cannot account for a child’s experience or the exact experiment.
Set up a tray or washable table covering, gather only the listed supplies, and keep food and drinks away from the work area. If an activity involves materials you are unsure about, check the kit’s directions rather than guessing or substituting. For younger children, an adult should stay close enough to guide handling and keep small components out of reach of toddlers. Preparing the space first reduces distractions and spills, leaving more attention for the activity itself.
Say what your child can do, not just what they can’t: “You can pour the water into this cup; I’ll handle the hot part.” That keeps them involved while setting a clear boundary. The distinction also helps children learn that safety rules are tied to specific hazards, rather than feeling like an arbitrary reason to stop participating. Afterward, follow the kit’s cleanup and disposal directions, wash hands, and store pieces where younger siblings cannot reach them.
Some kits are designed for independent work by older children, but that depends on the specific activity and the child’s experience. A child who carefully follows steps may need less prompting than a sibling who rushes to see the reaction. Stay available, and make the safety instructions part of the experiment—not an afterthought. When a step needs closer supervision, explain what the child can observe or record while you handle it; they can remain involved without taking on a task that is not suited to them.
What Can You Do When the Kit Runs Out of Experiments?
When a kit runs out of its printed activities, keep the science going by repeating a project with one planned change or connecting it to something at home. The empty box can be the start of a new question, not a signal that the learning is over. Repeating an activity helps a child notice what stays consistent and what changes; adapting it gives them practice deciding which question to explore next.
After building a paper tower, your child could compare a wide base with a narrow one or test what happens when they add a cross-brace. If you tried a kit’s seed activity, they might compare two plants placed in different light, following the directions and using safe, appropriate materials. A fair comparison means keeping other conditions as similar as possible, so the child can better connect a difference in growth to the light rather than to several changes at once.
Keep new experiments within the kit maker’s safety guidance and use familiar supplies only when an activity calls for them. You can also visit a library, science museum, or community program for fresh ideas. A library book about bridges, for example, might inspire your child to sketch a better design before rebuilding the tower. These resources can help when the original kit offers little room to adapt, while a child who prefers independence may be ready to invent a small variation from an activity they already know.
Take a photo, save a drawing, or write down a surprising result. These small records help your child see progress over time: the first wobbly tower beside the later one that holds a toy car. They also make it easier to revisit an earlier question and see how the child’s thinking changed. And the next time a science kit catches their eye, you’ll have a clearer sense of which questions keep them interested and which kinds of activities fit your family’s time and space.
Frequently Asked Questions
What age is best for educational science kits?
There is no single best age: kits serve preschoolers through teens when the instructions and tasks suit the child. Use the maker’s age guidance, then consider reading ability, small-part awareness, patience, and whether an adult must help.
Are science kits safe for young children?
Many kits are made for younger children, but safe use depends on the specific activity and close attention to its instructions. Check age guidance and cautions, supervise as directed, keep small parts away from toddlers, and follow the cleanup steps.
How much should you spend on a science kit?
Price alone does not tell you how much a child will learn or enjoy. Compare the number of usable activities, included supplies, replacement-part availability, and whether the kit lets your child repeat or adapt experiments.
What if my child gets a different result than the instructions promise?
Treat the difference as a chance to investigate. Check whether the steps were followed, ask what changed, and repeat the test if it is safe; room temperature, measurements, or setup can affect some results.
Conclusion
Choose a kit that meets your child where their curiosity already lives, then give them room to make a prediction and test it. One wobbly paper bridge can lead to an afternoon of redesigns—and a child who sees the kitchen table as a place to ask better questions.
Fall Picks
fall essentials
As an affiliate, we earn on qualifying purchases.