
To avoid damaging your model with support structures, choose support options like breakaway or soluble supports designed for easy removal. Use support blockers and strategic placement to protect delicate features, and optimize your slicer settings to minimize support contact points. designing supports with gentle contact surfaces and planned removal techniques helps prevent marks and cracks. Keep exploring these methods to learn more about creating support structures that protect your model’s integrity.
Key Takeaways
- Use breakaway or soluble supports designed for easy removal to minimize damage to your model’s surface.
- Optimize support placement by avoiding delicate areas and utilizing support blockers for targeted support removal.
- Adjust support density and style to ensure stability without excessive contact, reducing surface impact during removal.
- Incorporate design features like chamfers and self-supporting angles to lessen the need for supports altogether.
- Apply gentle removal techniques, such as softening supports with heat or solvents, followed by careful post-processing.

VEVOR Charging Cart, 32 Device Mobile Charging Station, Up to 15.6 in Screen Size, Office and Classroom Mobile Charging Cart, for Chromebook, Tablet and Laptop
Efficient Space Management: This charging cart is thoughtfully designed with 32 slots, providing an organized space management solution....
As an affiliate, we earn on qualifying purchases.
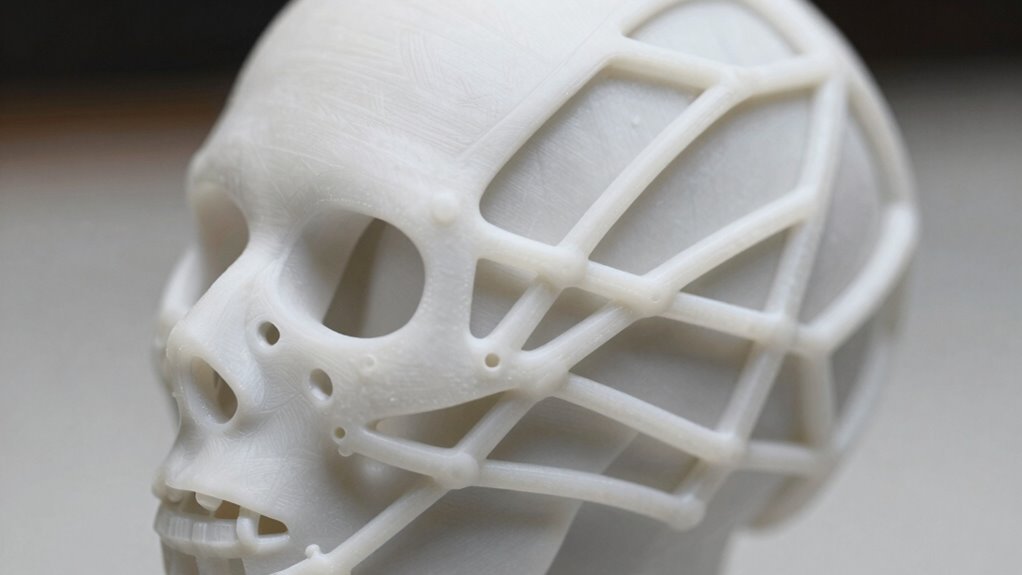
Why Support Structures Are Needed and When You Can Skip Them

Have you ever wondered why support structures are essential in 3D printing? They’re crucial when your model has large print overhangs, which can’t be printed successfully without support material. Support structures hold up parts of your print that hang freely, preventing sagging or collapse. You can often skip supports if your design avoids significant overhangs or if the angles are gentle enough for the filament to bridge naturally. Understanding when to use supports helps you save time and reduces post-processing. While supports are vital for complex geometries, simple models with minimal overhangs might not need them. Recognizing these scenarios ensures your print remains high-quality without unnecessary support material, making your printing process more efficient and your models cleaner. Additionally, employing energy-efficient materials and optimized support structures can further enhance the sustainability of your 3D printing projects. Moreover, choosing the right support settings in your slicing software can optimize material usage and ease of removal, improving overall print quality.

Heltec Handheld GPS Land Meter, High Accuracy GNSS Surveying Equipment for Land Measurement & Hiking 6 Satellite System Positioning IP65 Waterproof 18H Battery Slope/Mountain Mode Real-Time Graphics
High-Accuracy GNSS Land Measurement: This handheld GPS for surveying delivers professional-grade precision with ±1% error for large areas...
As an affiliate, we earn on qualifying purchases.
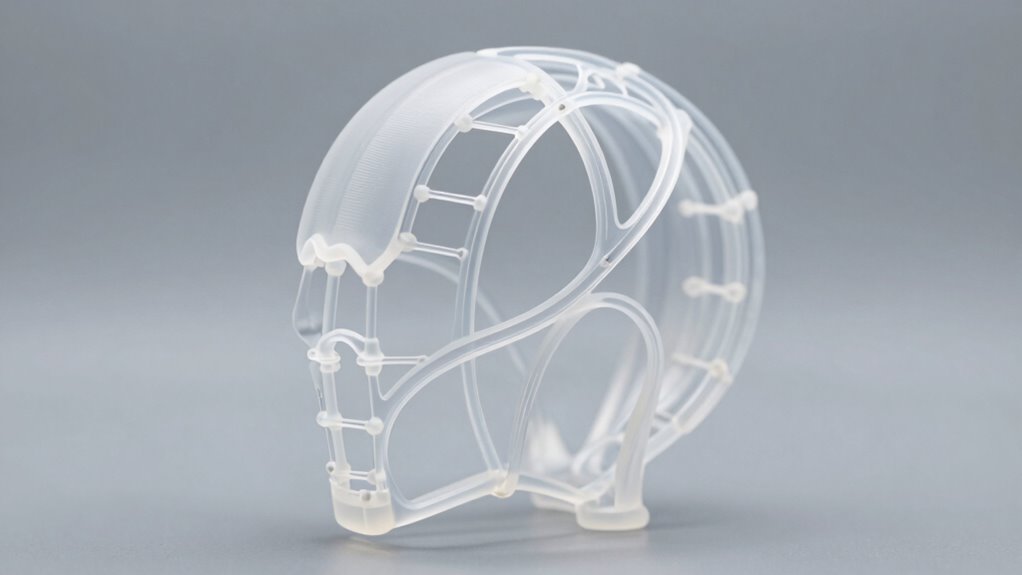
How to Choose the Best Support Type for Your 3D Print

Choosing the right support type is essential to guarantee a successful 3D print while minimizing cleanup. The support material you select impacts removal difficulty and surface quality. Consider these factors:
- Support material compatibility with your filament
- Support density, balancing stability and ease of removal
- Support style (grid, tree, or linear) based on overhang complexity
- Support contact points to reduce surface damage
- Ease of support removal for minimal cleanup
Adjusting support density helps optimize stability without making removal too difficult. Tree supports often require less support material and are easier to detach, while grid supports provide more stability but are tougher to remove. Your choice depends on your print’s geometry and your preferred balance between support strength and post-processing effort.
SWIFT Trinocular Stereo Zoom Microscope with 56-Bulb LED Ring Light,3.5X-90X Magnification,WF10X Eyepieces,0.7X-4.5X Zoom Objective, 0.5X 2.0X Additional Objectives,Table Pillar Stand
Professional stereo microscope for researchers, gemologists, engravers, collectors and anyone in semiconductor and electronics industries. It is also...
As an affiliate, we earn on qualifying purchases.
Designing Supports to Minimize Damage During Removal

To minimize damage during support removal, focus on designing supports with easy detachment in mind. Choose support material that’s compatible with your print bed and easy to break away without harming your model. Use minimal contact points, such as thin support interfaces or breakaway supports, to reduce stress on your print. Position supports where they’re less likely to affect visible surfaces, and avoid placing them in hard-to-reach areas that require excessive force to remove. Consider the orientation of your model to lessen support contact and make removal simpler. Properly designed supports not only protect your print from damage but also streamline post-processing. Additionally, understanding support removal techniques can help improve your results and reduce potential damage. Being aware of different pinball machine weights can also inform how you handle larger or heavier supports during removal, ensuring safety and minimizing damage. Employing support removal tools can further aid in achieving cleaner results with less risk of harm to your model.
Vision Scientific VS-5FZ-IFR07 Simul-Focal Trinocular Zoom Stereo Microscope,10x WF Eyepiece,0.7X-4.5X Zoom,3.5X—90x Magnification,0.5X & 2X Auxiliary Lens, Double Arm Boom Stand, 144-LED Ring Light
45° inclined trinocular head that rotates 360°. The Simul-Focal trinocular port allows you to connect a digital camera...
As an affiliate, we earn on qualifying purchases.
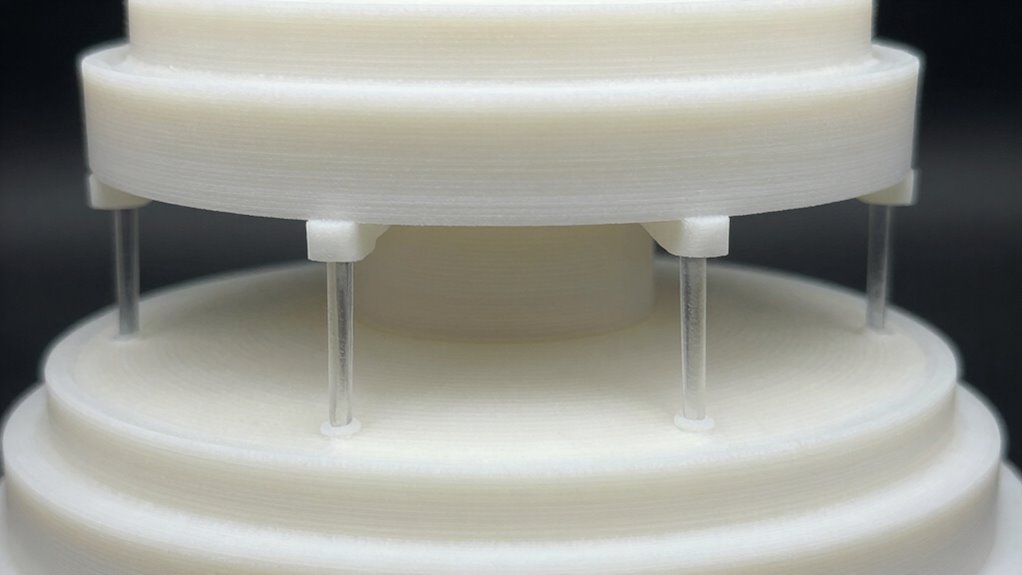
Optimizing Slicer Settings to Reduce Support Footprint
Optimizing slicer settings is essential for minimizing the support footprint and making removal easier. Adjusting support material parameters helps you use just enough support without overdoing it, reducing the risk of damaging your model. Focus on support density; lower support density means less support material, which simplifies removal and reduces potential damage. You can also tweak the overhang angle to limit where supports are generated, cutting down on unnecessary contact points. Consider using support interface layers to make removal smoother and cleaner. Additionally, enable options like support z-distance to prevent supports from fusing too tightly with your model. Remember, fine-tuning these settings balances stability with minimal support, preserving your model’s surface quality. Small adjustments can make a big difference in support efficiency and safety. Understanding the support contact points can further help in reducing post-processing efforts and protecting delicate features.
Support Removal Tips: Avoiding Damage to Your Model
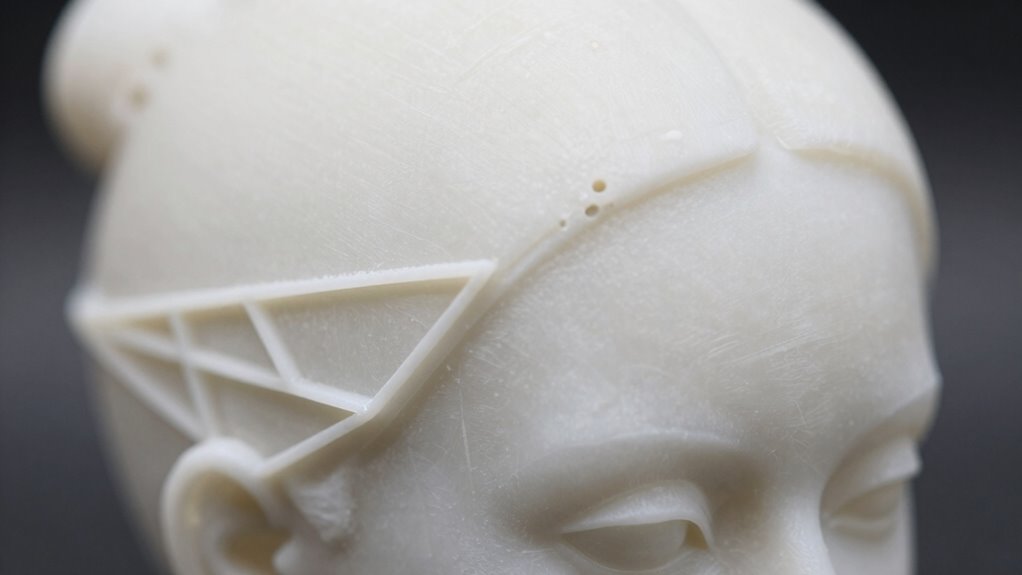
When removing supports from your 3D print, careful techniques can prevent damage to your model’s surface. Start by gently loosening support material with a pair of pliers or tweezers, working slowly to avoid gouging the print. Use a hobby knife to carefully trim any remaining support remnants, especially near delicate areas. Always support your print on a stable print bed to minimize movement, which can cause surface scratches during removal. Applying heat slightly can soften support material, making it easier to peel away without harming the model. Avoid pulling support structures abruptly; instead, peel them away gradually. Taking your time ensures you preserve fine details and maintain a smooth surface finish, especially on complex or intricate parts. Additionally, understanding the importance of proper support removal techniques can help you develop confidence and consistency in your 3D printing process.
Using Support Alternatives: Soluble and Breakaway Supports
Using support alternatives like soluble and breakaway supports can make post-processing easier and reduce the risk of damaging your model. You should consider the compatibility of these materials and techniques with your printer and filament choices. Understanding their proper utilization helps ensure cleaner removal and better final results. Supporting materials play a crucial role in maintaining the integrity of your models during the printing process. Additionally, selecting the appropriate support structures can prevent warping and improve overall print quality. Familiarity with printability considerations can help optimize the use of these support options for different projects. Being aware of material compatibility ensures you choose the best support options for your specific printing setup. Knowing how to select support options based on your printer’s capabilities can further enhance your printing success.
Soluble Support Materials
Have you ever struggled to remove support structures without damaging your 3D print? Soluble support materials offer an elegant solution. They dissolve in liquids like water or specialized solutions, eliminating the need for manual removal. When choosing soluble supports, consider filament compatibility to ensure your support and main material work well together. Support material costs can be higher, but the ease of cleanup often justifies it. Key benefits include:
- Precise support removal without surface damage
- Reduced post-processing time
- Compatibility with complex geometries
- Use with multiple filament types
- Cleaner finish on delicate features
While they may increase material costs, their ability to preserve your model’s surface quality makes soluble supports a valuable investment, especially for intricate designs.
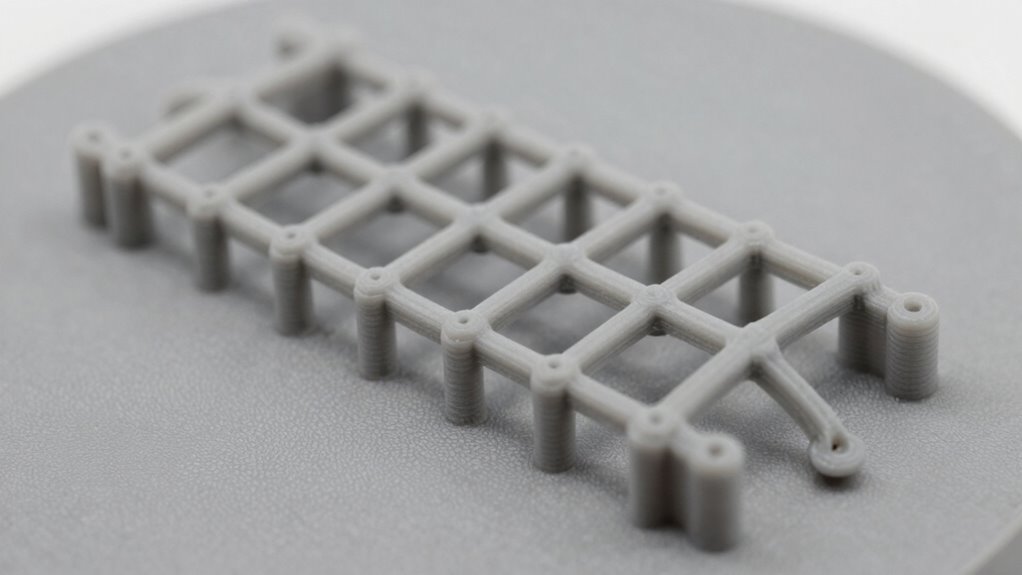
Breakaway Support Techniques
Breakaway supports provide an effective alternative to traditional support removal methods by allowing you to detach supports easily after printing. These supports are designed to be broken away manually, minimizing damage to your model’s surface. When planning support design, consider using breakaway supports for complex geometries or delicate features, as they reduce the risk of surface imperfections. Proper support design with breakaway supports ensures a clean separation, making support removal straightforward and less labor-intensive. You can optimize your prints by choosing support structures that are easy to break away without tools or excessive force. This approach helps preserve fine details and overall quality, saving time and reducing the need for post-processing. Breakaway supports are especially valuable when working with models sensitive to surface damage. Additionally, understanding the support material properties can help you select the best support type for easy removal and minimal surface impact. Incorporating free floating supports can further enhance your ability to print complex models with ease and precision.
Compatibility and Usage
Choosing the right support method depends on your model’s design and the materials you’re using. Soluble and breakaway supports are excellent alternatives that minimize damage during removal, but their effectiveness relies on support material compatibility and support structure durability. When selecting, consider how easily the support material dissolves or breaks away without harming your model. Compatibility issues can cause print failures or damage if incompatible materials interact poorly. Breakaway supports offer durability for complex geometries, while soluble supports excel in intricate areas requiring clean removal. Keep in mind that the support material’s strength and dissolving properties directly impact your print quality. Properly balancing support structure durability with ease of removal ensures your final model remains intact and smooth. For optimal results, understanding the support material’s compatibility with your filament and printer setup is crucial.
How to Use Support Blockers and Custom Placement Effectively

To get the most out of support blockers and custom placement, you need to optimize where you put them and how they interact with your support settings. Properly customizing support removal zones helps protect critical details while reducing post-processing. Combining blockers with support configurations lets you fine-tune your print for cleaner results and easier cleanup.
Optimizing Support Blocker Placement
Effective support blocker placement can substantially reduce post-processing cleanup and prevent damage to your model. To do this, carefully position support blockers where support material is unnecessary or hard to remove. Place blockers away from delicate features and areas prone to damage. Use custom placement to avoid support on the print bed where it’s not needed, preserving surface quality. Consider the overhang angles and ensure support blockers are properly aligned to minimize contact points. Keep these tips in mind:
- Target areas with complex or fragile features
- Avoid blocking surfaces that require a smooth finish
- Position blockers away from the print bed when possible
- Use support blockers to prevent support material from touching critical sections
- Adjust blocker size for precise control without hindering the print
These strategies help optimize support placement, making removal easier and protecting your model.
Customizing Support Removal Zones
By customizing support removal zones, you gain precise control over where support material interacts with your model. Using support blockers and custom placement, you can prevent supports from damaging delicate areas or ruining surface finishes. This targeted approach allows for a cleaner and more efficient post-processing experience. This approach allows you to optimize support material selection and refine support structure design for easier removal. Consider these factors:
| Support Material Selection | Support Structure Design |
|---|---|
| Hard for stability | Light for easy removal |
| Flexible for surface finish | Dense for internal supports |
| Easy to remove | Precise placement |
Adjusting removal zones ensures supports are only where necessary, reducing post-processing work and improving overall quality. Proper use of support blockers and custom zones helps achieve clean, accurate prints with minimal damage. Incorporating evidence-based techniques can further enhance support effectiveness and surface quality. Additionally, understanding the support interaction with different materials can help you tailor support choices to your specific model and filament type. Being aware of how thermal behavior impacts support adhesion can also inform your support placement strategy, especially for complex geometries. Developing a clear understanding of material properties can assist in predicting support behavior and optimizing removal methods. Furthermore, experimenting with print settings such as temperature and speed can influence support adhesion and ease of removal, leading to better print quality.
Combining Blockers With Support Settings
Combining support blockers with custom support settings allows you to tailor your print’s support structure precisely where it’s needed—and nowhere else. By strategically placing support material blockers, you prevent support from touching delicate areas or regions on the print bed where removal is difficult. This targeted approach reduces excess support, saves filament, and simplifies cleanup. Use support blockers to protect overhangs, intricate details, or areas prone to damage during removal. Adjust support settings to control density, contact point size, and overhang thresholds for ideal results. Additionally, understanding how to support removal techniques can further streamline the process and protect your model’s quality.
Techniques for Printing Complex Geometries Without Supports
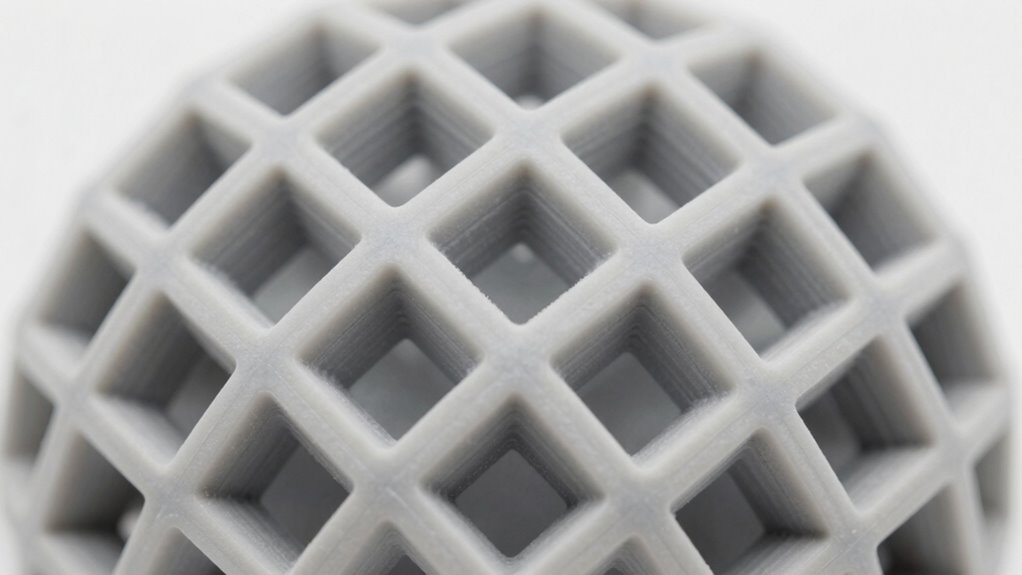
Printing complex geometries without supports is possible by leveraging advanced design techniques and cutting-edge printer capabilities. You can optimize your model with support material in mind, adjusting overhang angles and wall thicknesses to minimize the need for support structures. Design considerations include breaking complex parts into simpler sections or incorporating self-supporting angles, typically above 45 degrees. This approach reduces the need for support removal and preserves surface quality. Visualize your model with these configurations:
| Overhang Angle | Support Material Needed | Surface Finish |
|---|---|---|
| 30° | Yes | Rough |
| 45° | Optional | Smooth |
| 60° | No | Perfect |
Troubleshooting Support Adhesion and Removal Problems
Support adhesion and removal issues are common hurdles that can compromise your print’s quality. To improve support material adhesion, check your print orientation—tilting models can reduce contact points and make removal easier. If supports are stubborn, experiment with different support settings or increase the support interface thickness for easier peeling. Proper bed leveling and temperature control also help supports stick without damaging the model. When removing supports, use tools like a spatula or flush cutters carefully to avoid gouging your print. Softening supports with a little warmth or solvent can ease removal further. Be patient and avoid force, which can crack or deform your print. Adjusting print orientation and support parameters will give you cleaner removal and better overall results. Additionally, utilizing advanced support strategies can optimize support placement for easier removal and minimal impact on surface quality.
Final Tips for Achieving Clean, Support-Free 3D Prints
To achieve clean, support-free 3D prints, start by optimizing your model design. Use features like chamfers and fillets to reduce overhangs that require support material. Incorporate proper angles so your model naturally minimizes unsupported sections. When supports are unavoidable, choose support settings that make removal easier, such as grid or tree supports. Pay close attention to your print orientation to lessen contact points, which simplifies removal techniques. After printing, carefully use tools like tweezers or fine knives to detach support material without damaging the surface. Post-processing techniques like sanding or applying a solvent can smooth out residual marks. By designing with removal in mind and selecting the right support settings, you’ll achieve cleaner, support-free results with less cleanup effort. Additionally, understanding the support structures used in 3D printing can help you select the most suitable options for your specific model and reduce post-processing work. Being aware of the print orientation also plays a crucial role in minimizing support needs and simplifying cleanup.
Frequently Asked Questions
Can Supports Be Reused for Multiple Prints?
Yes, supports can be reused for multiple prints if you practice support material recycling and support design optimization. Carefully removing and cleaning supports allows you to recycle the material for future projects, saving time and resources. Optimizing support design minimizes waste and makes reuse easier. Just make certain you inspect supports thoroughly before reuse to prevent issues, and always adapt your support settings to suit each specific print for the best results.
How Do Different Filament Types Affect Support Removal?
Different filament types are like dance partners, each with its own rhythm affecting support removal. PLA supports come off like gentle breezes, thanks to its easy support material compatibility. ABS, however, may cling tighter, demanding more effort due to filament adhesion considerations. Always match your support material to your filament, ensuring a smooth exit—like a well-choreographed dance—without damaging your masterpiece.
Are There Eco-Friendly Support Material Options Available?
Yes, eco-friendly support material options are available. You can use biodegradable supports made from plant-based or compostable materials, which break down naturally without harming the environment. Additionally, support material recycling programs let you reuse supports, reducing waste. By choosing biodegradable supports and recycling them, you minimize your environmental impact while maintaining high-quality 3D prints, making your process more sustainable and eco-conscious.
How Do Support Structures Impact Print Time and Material Costs?
Think of support structures like scaffolding on a skyscraper—they add time and cost. They increase print time because support removal slows down your process, and they use extra material, raising costs. Support removal takes effort, and longer print speeds can cause inaccuracies. To save both, optimize your design to minimize supports, which keeps your project efficient and budget-friendly while maintaining quality.
What Are the Best Practices for Supporting Fragile or Delicate Models?
You should use customizable support settings to tailor support structures for fragile models, reducing contact points and ease of removal. Opt for support removal techniques like gentle breaking or dissolving to prevent damage. Additionally, consider minimizing support density and using finer support materials. By adjusting these parameters, you safeguard delicate details, streamline post-processing, and make certain your fragile or delicate models come out pristine without risking breakage during support removal.
Conclusion
Remember, crafting support structures is like steering a delicate dance—you want stability without sacrificing your masterpiece. With thoughtful choices and careful adjustments, you can achieve flawless prints that honor your design, much like a sculptor revealing beauty from chaos. Embrace patience and precision, and soon you’ll be turning out models that look as if they were carved straight from a single block—no damage, just perfection. Your next masterpiece awaits—support wisely, print confidently.