
To simplify your 3D printing process, focus on creating clean, simple geometries with smooth connections and moderate overhang angles. Set wall thickness around 1-2 mm for strength, while keeping clearances between parts 0.1-0.3 mm for easy assembly. Use fillets and chamfers to strengthen corners, and optimize print orientation to reduce supports and improve surface quality. Master these straightforward geometric rules to save hours and produce reliable, high-quality prints—stay tuned for more essential tips.
Key Takeaways
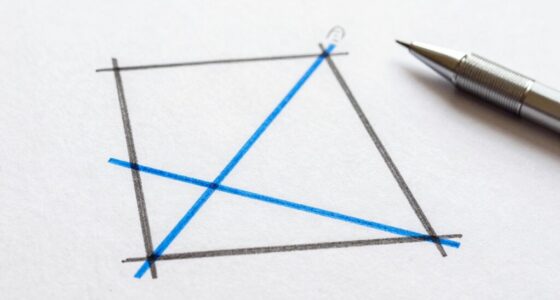
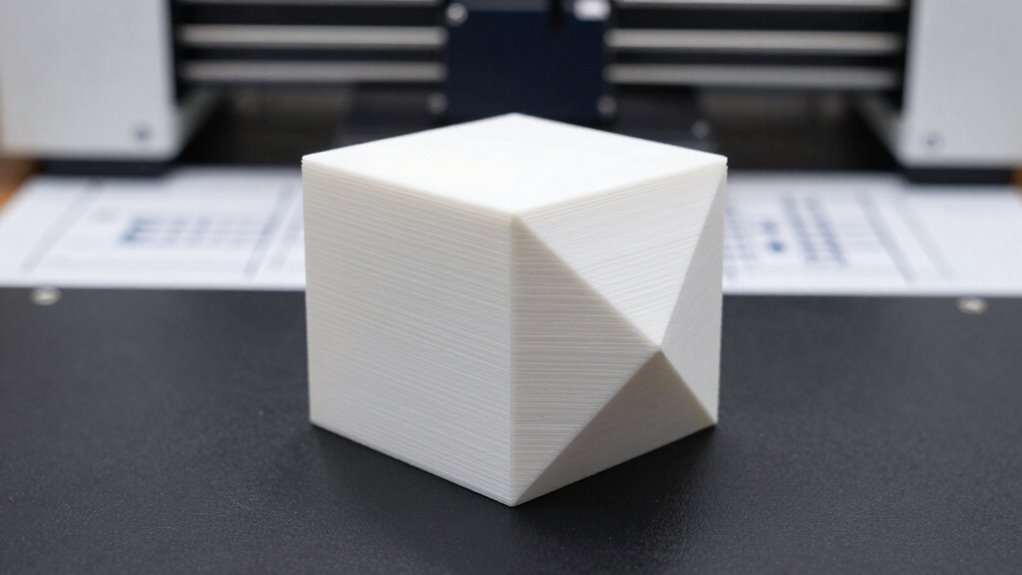
- Use simple, smooth geometries with minimal sharp edges to reduce print errors and post-processing time.
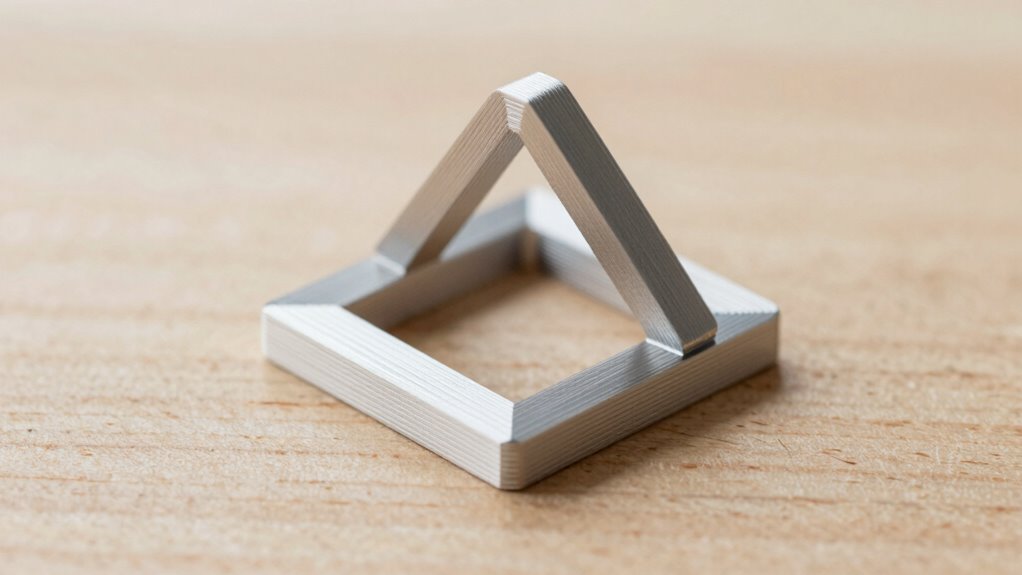
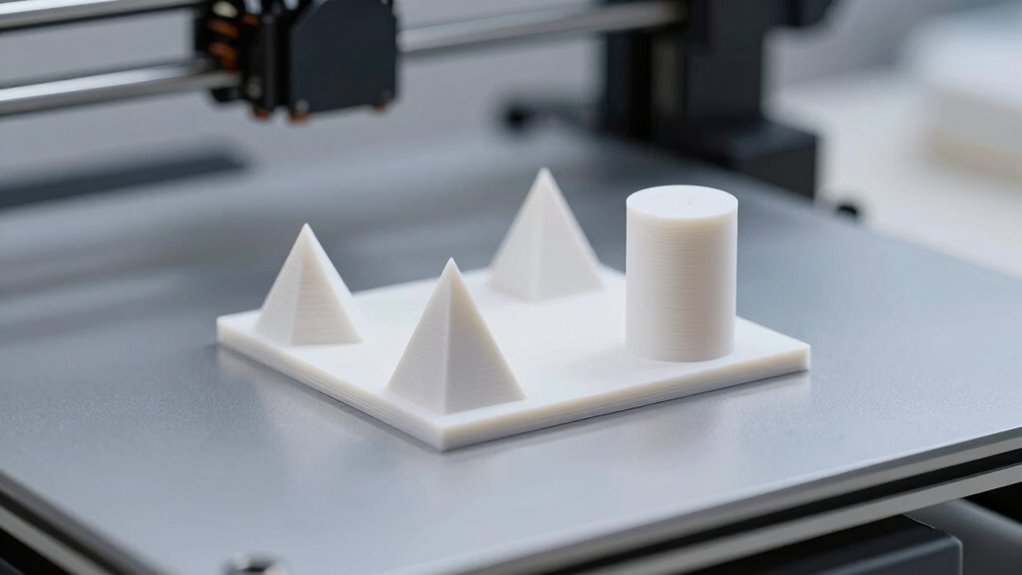
- Optimize overhang angles to stay within 45 degrees, minimizing support material and cleanup efforts.
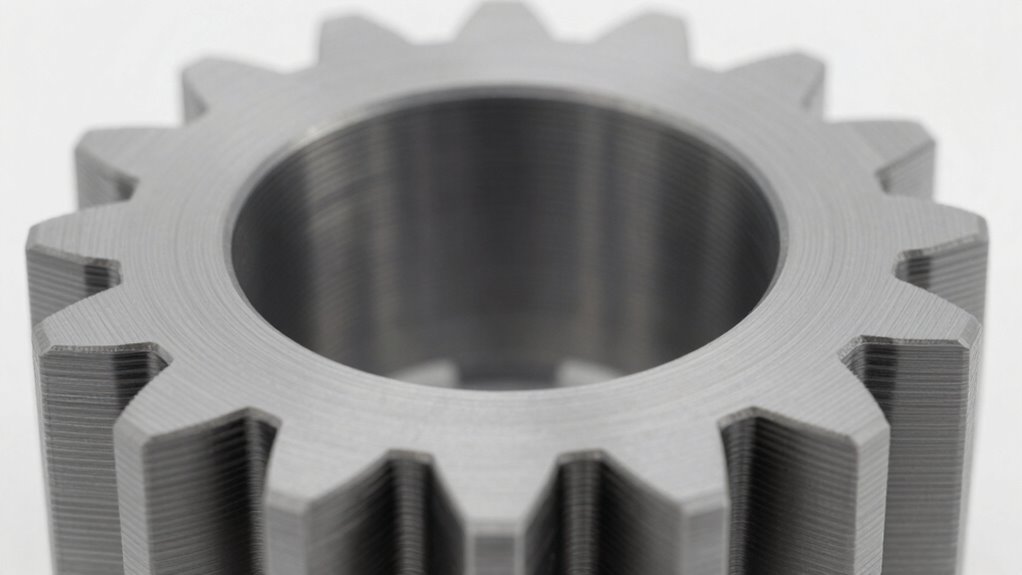
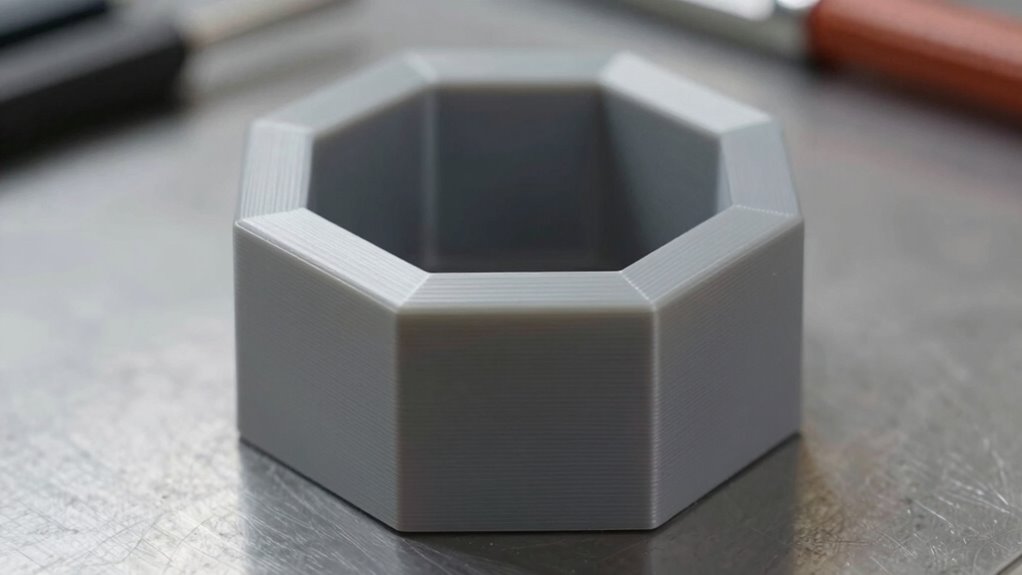
- Design parts with consistent wall thickness (1-2 mm) for strength and easier printability.
- Incorporate chamfers or fillets on edges to improve layer adhesion and reduce support needs.
- Orient models strategically to decrease support use, enhance surface quality, and speed up printing.

250g PLA Filament 1.75mm Bundle, SUNLU 3D Printer Filament Neatly Wound, Individually Vacuum Packed, 250g Spool, 8 Rolls, White+Red+Orange+Yellow+Green+Blue+Cyan+Purple
【Beginner-Friendly Small Spool Filament Pack】Perfect for 3D printing beginners! This 250g × 8-color PLA filament bundle uses compact…
As an affiliate, we earn on qualifying purchases.
As an affiliate, we earn on qualifying purchases.
What Are the Key Geometry Principles for Successful 3D Printing?

To guarantee successful 3D printing, understanding key geometry principles is essential. Your design aesthetics play a vital role in how well a model prints and looks afterward. Simple, clean geometries reduce print errors and improve surface quality. Additionally, material selection influences how your design should be optimized; some materials require thicker walls or specific angles to prevent warping or cracking. Avoid overly complex shapes that can cause overhang issues or excessive supports. Focus on minimizing sharp corners and making smooth connections to improve print reliability. Incorporating innovative cloud solutions can streamline the design process and facilitate collaboration across teams. Recognizing design constraints related to geometry helps you create models that are both visually appealing and structurally sound. These fundamental geometry principles keep your prints accurate, efficient, and high-quality.

3D Printer Tools Kit, 34pcs 3D Printer Accessories for All FDM/SLA Printers Includes Nozzle Cleaning, Removal Scrapers, Finishing Tools, 5 Types of Files,Brushes, Wire Cutter, Engraving Knife
【3D Printer Tools Expedite Your Workflow, 1-Year Warranty】Designed and Selected by a 15-Year 3D print enthusiasts team, this…
As an affiliate, we earn on qualifying purchases.
As an affiliate, we earn on qualifying purchases.
How to Set Wall Thickness and Clearances for Strong, Reliable Prints?
Setting appropriate wall thickness and clearances is essential for making sure your 3D prints are both strong and reliable. For wall thickness, aim for at least 1-2 mm, depending on your printer’s capabilities and filament type. Thicker walls provide strength without adding unnecessary weight. When designing moving parts, consider a clearance fit—typically 0.1-0.3 mm—to ensure parts slide smoothly without being too loose or too tight. Proper clearance fit prevents sticking or failure during assembly. Keep in mind that too tight a clearance can cause stress, while too loose weakens the connection. Balancing wall thickness with appropriate clearances guarantees your prints are durable, functional, and easy to assemble, saving time and reducing post-processing. Understanding print tolerances is crucial for achieving reliable and precise assemblies.

Creality 2kg Black & White PLA 1.75mm Filament Bundle for 3D Printing with No-Tangling Strong Bonding and Overhang Performance, Accuracy +/- 0.02mm
Cost-Effective Filament Bundle: Get 2 "1kg" spools of PLA filament for the price of 1 with classic black…
As an affiliate, we earn on qualifying purchases.
As an affiliate, we earn on qualifying purchases.
Design Tips to Minimize Overhangs and Reduce Support Material?
To reduce the need for supports, focus on optimizing overhang angles so your design naturally minimizes steep sections. You can also take advantage of built-in support features in your slicer software to control where supports are used most effectively. Implementing these tips helps you create cleaner prints with less post-processing. Additionally, understanding print orientation can significantly impact support material requirements and overall print quality. A good understanding of contrast ratio can also help in visualizing how different surface finishes and lighting conditions affect the final appearance of your print. Being aware of layer adhesion principles can further improve the strength and surface quality of your 3D prints.
Optimize Overhang Angles
Optimizing overhang angles is crucial for reducing the need for support material during 3D printing. Effective overhang optimization involves managing angles to stay within your printer’s capabilities, typically around 45 degrees or less. By adjusting your design to favor shallower overhangs, you minimize the necessity for supports and streamline printing. Focus on angle management by reviewing each overhang’s orientation and modifying the geometry to keep it within ideal ranges. This might mean adding chamfers or changing the direction of certain features. Proper overhang angle management not only reduces support material but also improves print quality, decreases post-processing time, and saves you hours. Additionally, understanding market trends and insights can help you anticipate design changes that enhance printability and reduce support requirements. Recognizing the importance of net worth of individuals can also inspire you to make smarter investment decisions in your 3D printing tools and materials. Staying aware of evolving design standards ensures your projects remain efficient and cost-effective. Incorporating advanced software features can further assist in automatically optimizing overhangs for better results. Moreover, maintaining an awareness of industry innovations can lead to more effective design strategies and improved print outcomes.
Use Built-in Supports
Using built-in supports in your 3D design software can considerably reduce the need for external support material during printing. These supports are automatically generated, often aligning with natural overhangs, which makes support removal easier and faster. By selecting the right support options, you can minimize support contact points, reducing post-processing time and the risk of damaging your print. Built-in supports help you create cleaner overhangs, decreasing the amount of support material used and simplifying support removal. This not only saves time but also reduces material waste. Adjust support density and overhang angles within your software to optimize the balance between stability during printing and ease of support removal. Leveraging these features streamlines your workflow and results in cleaner, more precise finished parts. Additionally, understanding navigation and mapping in your printer’s firmware can improve print success by preventing support interference and optimizing print paths.

SUNLU PLA+2.0 3D Printer Filament, Upgrade PLA+ Filament 1.75mm, Tougher and Stronger, Neatly Wound PLA Plus Filament, Dimensional Accuracy +/-0.02mm, 1KG Spool(2.2lbs), Black
Upgrade PLA+ Filament: Compared to standard PLA+ filament, SUNLU PLA+ 2.0 is more resistant to brittleness and cracking,…
As an affiliate, we earn on qualifying purchases.
As an affiliate, we earn on qualifying purchases.
How to Use Fillets and Chamfers to Strengthen Your Models?
Have you ever wondered how small design tweaks can substantially improve your 3D models’ durability? Using fillet techniques and chamfer applications can significantly enhance strength by reducing stress concentrations at sharp edges. Applying fillets smooths out corners, distributing forces more evenly and preventing cracks. Chamfers, on the other hand, bevel edges to improve layer adhesion and reduce the risk of breakage during printing. These features also help with print removal and finishing, making your models more resilient in real-world use. When incorporating fillets and chamfers, focus on critical stress points and load-bearing areas. Properly used, these simple geometry rules not only boost durability but also improve the overall quality of your prints, saving you time and effort during post-processing.
Creating Internal Structures for Strength and Material Efficiency?

Incorporating internal structures into your 3D models can greatly enhance their strength while reducing material use. Using internal lattice or specific infill patterns allows you to optimize weight and durability. Using internal lattice structures provides a lightweight yet sturdy core, ideal for functional parts. Choose from various infill styles like honeycomb, grid, or gyroid, each offering different strength-to-material ratios. Adjusting infill density helps balance strength and material savings. When selecting an infill pattern, considering the material properties ensures your parts will perform reliably under real-world conditions. Here’s a quick comparison:
| Infill Pattern | Strength | Material Efficiency |
|---|---|---|
| Honeycomb | High | Moderate |
| Grid | Moderate | Good |
| Gyroid | Very high | Excellent |
Best Practices for Orienting Your Model for Successful Printing?
To get the best results, focus on positioning your model to minimize the need for support material. Proper orientation can improve print quality and reduce post-processing time. By balancing these factors, you’ll achieve stronger, cleaner prints with less effort. Additionally, considering model stability during setup can prevent shifting or failure during printing. Ensuring your model is properly oriented also helps in reducing material waste, making the process more efficient. Understanding print orientation techniques can further optimize your print outcomes and save time. Being aware of factors like ear wax odor can also help you understand how environmental conditions may affect your workspace and equipment.
Optimal Print Orientation
Choosing the right orientation for your 3D model is crucial to guarantee a successful print. Your model’s orientation affects not only print quality but also material selection and finishing techniques. For example, orienting your part to minimize overhangs reduces the need for supports and improves surface finish. Consider the anisotropic strength of materials—aligning layers with the forces the part will face enhances durability. Additionally, select an orientation that reduces print time by decreasing the number of layers or complex features. Proper orientation also simplifies finishing, as smoother surfaces often face upward, making post-processing easier. Understanding the layer adhesion properties of your filament can help you choose an orientation that maximizes strength in critical areas. Balancing these factors ensures a more efficient print and a better final product, saving time and effort while optimizing material use and surface quality.
Support Material Reduction
Ever wonder how to minimize the amount of support material needed during 3D printing? Support material reduction starts with designing for minimal support. You can achieve this by orienting your model to reduce overhangs and steep angles, which often require supports. Keep key features aligned with the build platform to avoid complex supports that are hard to remove. Simplify overhangs by adding chamfers or fillets, making them easier to print without support. Also, break complex models into parts that can be printed separately and assembled later. Using these strategies, you’ll cut down on support material, saving time and filament. Not only does this improve print efficiency, but it also results in cleaner, easier-to-finish models. Design smartly for minimal support to streamline your 3D printing process.
Scaling and Tolerance Rules for Precise Fit and Function?
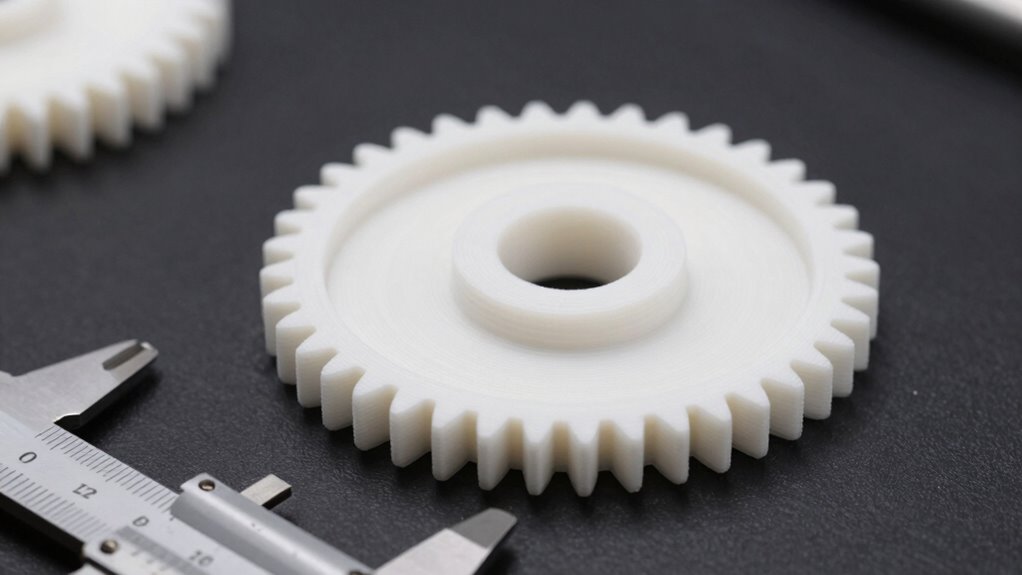
Achieving a precise fit in 3D printed parts requires understanding how scaling and tolerances influence the final dimensions. When designing, consider scaling accuracy to guarantee parts fit together seamlessly. Tolerance fit is essential for moving or assembled components, so account for printer variability. Use the table below to understand common tolerance ranges:
| Fit Type | Description | Typical Tolerance (mm) |
|---|---|---|
| Clearance Fit | Parts slide freely | 0.2 – 0.5 |
| Transition Fit | Slight interference or loose fit | 0.1 – 0.2 |
| Interference Fit | Parts press together tightly | 0.05 – 0.1 |
| Loose Fit | Minimal contact | >0.5 |
| Tight Fit | High precision, minimal movement | <0.05 |
Adjust your models accordingly to optimize scaling accuracy and achieve ideal tolerance fit. Proper understanding of these tolerance ranges helps in designing parts that meet specific functional requirements.
Frequently Asked Questions
How Can I Optimize Print Speed Without Sacrificing Quality?
To optimize print speed without sacrificing quality, focus on maintaining a good print speed and quality balance. Increase your print speed gradually while monitoring details and layer adhesion. Use appropriate layer height and infill settings to guarantee strength and detail aren’t compromised. Simplify complex geometries and avoid unnecessary supports. This approach helps you save time while keeping your prints crisp and durable.
What Are Common Mistakes to Avoid in 3D Model Design?
Ever wonder what design mistakes can ruin your 3D prints? You should avoid common geometry pitfalls like overly complex shapes, thin walls, or unsupported overhangs. These issues can cause warping or failed prints. Make certain your model has proper tolerances, avoid sharp angles that weaken parts, and keep details within your printer’s resolution. Do you double-check your model for hidden errors before printing? Prevention saves time and material.
How Does Material Choice Affect Geometry Considerations?
Your material choice influences geometry considerations because different materials have varying compatibility with complex shapes and overhangs. Consider how material properties affect surface finish; for example, some plastics produce smoother surfaces, reducing post-processing. You should design geometries that match the material’s strength and flexibility to prevent warping or breakage. By choosing the right material, you optimize both the print quality and structural integrity, saving time and resources.
Can Complex Geometries Be Printed Reliably Without Supports?
Think of complex geometries as climbing a steep mountain; support-free printing is like taking a clear, natural trail. While some overhang challenges can be met with clever design tweaks, truly intricate shapes often need supports for reliable printing. With careful planning, you can minimize supports, but expect to face overhang challenges. Good orientation and geometry optimization help guarantee your print stays support-free and successful.
How Do I Troubleshoot Common Print Failure Issues Related to Geometry?
When troubleshooting print failures related to geometry, start by checking support structures, especially for overhang challenges. If your print warps or sags, add supports or reduce overhang angles to improve stability. Make certain your model’s geometry is optimized, avoiding unnecessary complex overhangs. Adjust your print speed and cooling settings, which can also mitigate issues with unsupported or challenging geometries, leading to more successful prints.
Conclusion
Now that you’ve mastered these simple geometry tricks, your prints will be as flawless as a unicorn’s horn—if unicorns needed supports, that is. With your newfound knowledge, you’ll glide through designs like a hot knife through butter, avoiding the chaos of failed prints and wasted filament. So go ahead, create with confidence, and watch as your models come out looking so perfect, even the 3D printer will give a satisfied sigh.