
To build your own polyhedron model at home, start by gathering sturdy materials like paper or craft foam and essential tools such as scissors and glue. Learn about different polyhedron shapes and their properties before sketching accurate templates. Carefully cut, fold, and crease along your lines to create precise edges. Assemble the faces securely, ensuring proper alignment, and add final touches for stability and visual appeal. Keep exploring for more detailed tips to perfect your model.
Key Takeaways
- Gather durable materials like cardstock, craft foam, or lightweight plastic, along with scissors, glue, and rulers for precise construction.
- Sketch accurate polyhedron shapes, paying attention to symmetry, angles, and proportions before cutting and folding.
- Use scoring techniques and straight edges to fold and crease the model precisely, ensuring clean, sharp edges.
- Align edges and vertices carefully when assembling, applying glue sparingly and holding joints until secure.
- Add final touches such as coloring, smoothing edges, and displaying with stability for an attractive and durable polyhedron model.
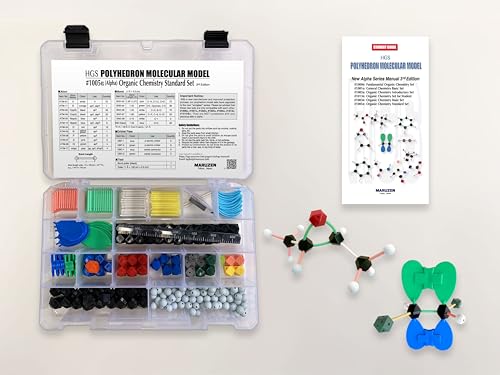
HGS 1005Alpha Polyhedron Molecular Model Organic Chemistry Standard Set
As an affiliate, we earn on qualifying purchases.
As an affiliate, we earn on qualifying purchases.
Gathering Materials and Tools
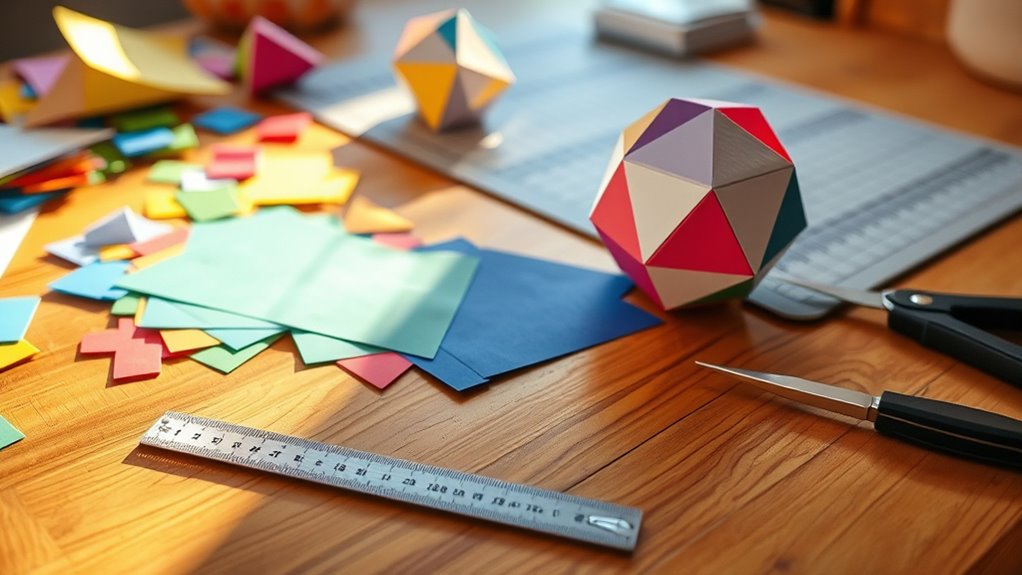
Before you begin building your polyhedron model, it’s important to gather all the necessary materials and tools. Focus on material selection to guarantee your components are durable and easy to work with, such as sturdy paper, lightweight plastic, or craft foam. Choose tools like scissors, a craft knife, glue, and a ruler for precise measurements. Always follow safety precautions when handling sharp tools—use a cutting mat, keep blades away from fingers, and work in a well-lit area. Organizing your materials beforehand to streamline the process and prevent interruptions. Proper preparation minimizes risks and assures you have everything you need for a smooth building experience. Additionally, selecting safe and eco-friendly materials can contribute to a more sustainable project and ensure child safety if kids are involved. Taking these steps helps create a safe workspace and sets the foundation for a successful DIY project.

Crafare 12X8X1 Inch Craft Foam Blocks 4 Pack Polystyrene Foam Sheet Rectangle Foam Blocks for Arts School Projects Sculptures Floral Arrangements Modeling and Centerpieces
Dimension:4 Pack polystyrene foam block measures 12x8x1in diameter great work with flowers,paint,rope,twine,ribbon,button,sequin,lace and embellishments to create handmade craft…
As an affiliate, we earn on qualifying purchases.
As an affiliate, we earn on qualifying purchases.
Understanding Polyhedron Types and Shapes
Understanding polyhedron types and shapes is essential to designing your model accurately. Polyhedron classification helps you identify different shapes based on their geometric properties, such as the number of faces, edges, and vertices. Recognizing these properties allows you to select the right type of polyhedron for your project, whether it’s a simple cube or a complex dodecahedron. Geometric properties also influence how you’ll construct each face and connect the elements. For example, regular polyhedra have congruent faces and equal angles, making them easier to model. By understanding these classifications and properties, you gain insight into the structure and symmetry of different polyhedra, which helps you create precise, well-balanced models. Additionally, understanding bedroom design principles can inspire creative ways to display your finished model as part of a decorative element. This knowledge guarantees your project is both accurate and visually appealing.

Fiskars Micro Trip Scissors, SoftGrip Precision Cutting Shears, Non-Stick Stainless Steel Blades, 5 inches
Fiskars Scissors help to elevate your creativity by providing unique design and blade coating for intricate cuts on…
As an affiliate, we earn on qualifying purchases.
As an affiliate, we earn on qualifying purchases.
Drawing the Base and Faces of Your Polyhedron
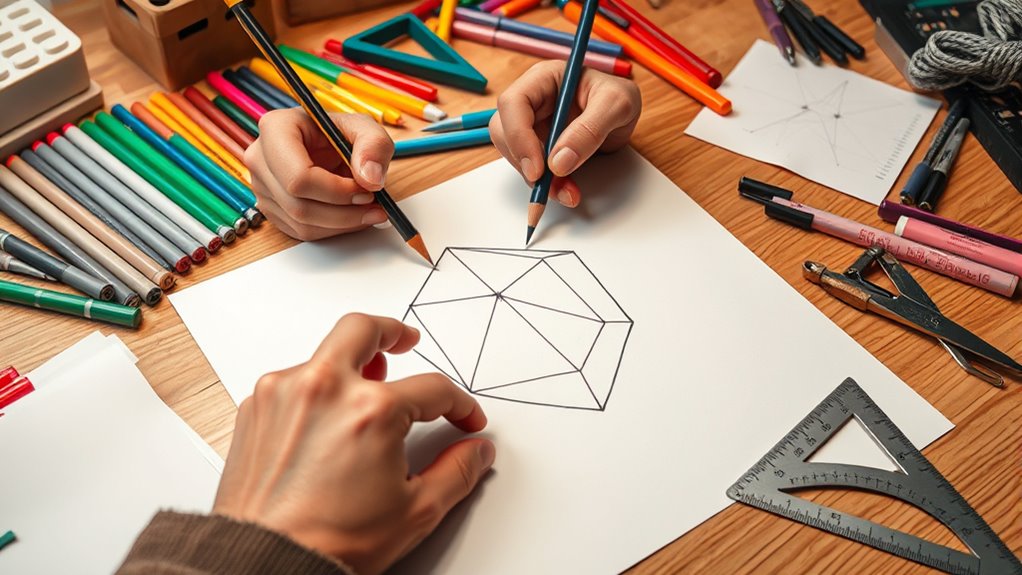
Start by sketching the base shape clearly on your paper, making sure to get the proportions right. Then, add the face patterns, paying attention to symmetry and angles. These steps will set a solid foundation for building your polyhedron model. Incorporating crochet styles for locs can inspire creative patterns and textures for decorative elements on your model.
Sketching the Base Shape
Sketching the base shape is a crucial first step in creating your polyhedron model. It sets the foundation for accurate construction and helps you visualize the final structure. To guarantee precision, focus on geometric symmetry, which guides proportional relationships between faces and vertices. Use effective sketching techniques like light, initial outlines, and clean lines for clarity. Start by drawing a simple outline of the base, then refine the shape, maintaining symmetry throughout. Keep your lines straight and consistent, checking measurements often. This process helps you identify any errors early and makes the next steps smoother. Remember, a well-drawn base shape simplifies the process of building a precise and attractive polyhedron.
- Establish the overall outline
- Use light sketching for adjustments
- Maintain symmetry in all faces
- Refine with clean, confident lines
Detailing Face Patterns
Building on your carefully drawn base shape, focus now on detailing the face patterns to bring your polyhedron to life. Start by adding face pattern symmetry, ensuring each face mirrors adjacent ones for a balanced look. Use light pencil strokes to sketch decorative surface detailing, such as lines, dots, or textures, that enhance visual interest. Symmetry in your face patterns creates harmony across the polyhedron, making it more aesthetically appealing. Pay attention to consistent spacing and alignment so the patterns look uniform from all angles. Once satisfied, reinforce your designs with darker lines or color. This step transforms your simple shape into an intricate, decorative masterpiece, highlighting the beauty of geometric symmetry and surface detailing.
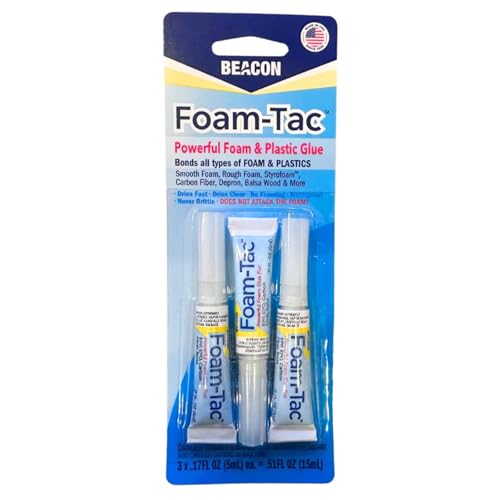
BEACON Foam-Tac Minis Powerful Glue – Fast-Drying, Waterproof, Ideal for Foam, Plastics, Balsa Wood, and Carbon Fiber – Perfect for RC Builders, .17-Ounce, 3-Pack
Foam-Tac is perfect for use with a variety of materials, such as EPP, EPO, DEPRON foam, balsa wood,…
As an affiliate, we earn on qualifying purchases.
As an affiliate, we earn on qualifying purchases.
Cutting Out the Shapes Accurately
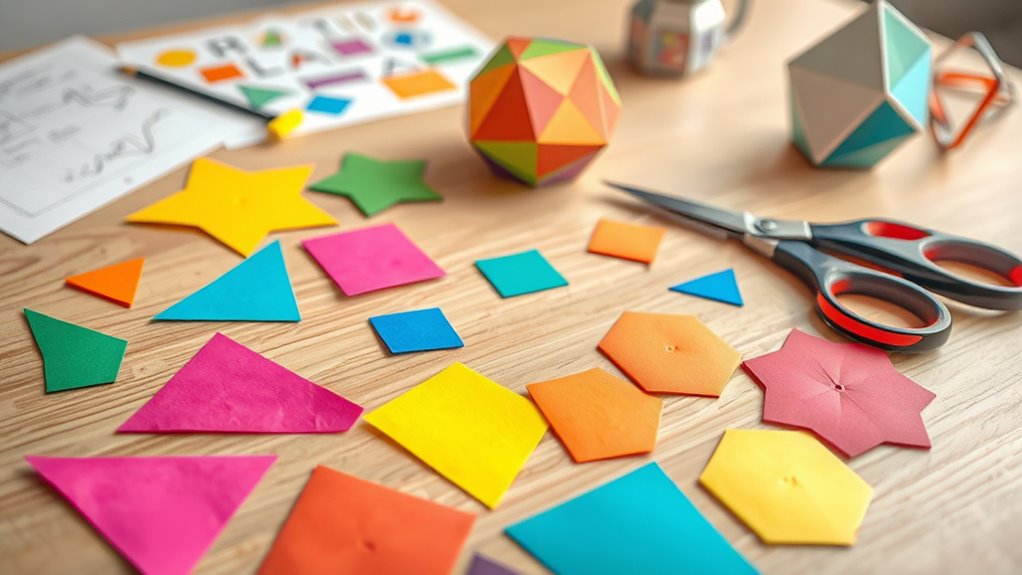
To guarantee your polyhedron model comes together correctly, you need to cut out each shape with precision. Start by carefully measuring angles to ensure accurate edges. When choosing paper types, opt for sturdy yet easy-to-cut materials like cardstock or thick construction paper. Use a sharp craft knife or scissors for clean cuts, avoiding tearing or uneven edges. Make sure to follow these steps:
- Measure angles precisely with a protractor before cutting.
- Select appropriate paper that holds shape well.
- Cut along marked lines smoothly and steadily.
- Double-check measurements before final cuts.
- Be mindful of sound vibrations during cutting, as they can influence your focus and precision.
Accurate cutting ensures your shapes fit perfectly during assembly, resulting in a flawless polyhedron model. Taking your time with these steps will make the entire process smoother and more satisfying.
Folding and Creasing for Precise Edges
Once you’ve cut out your shapes accurately, the next step is to fold and crease along the lines to create sharp, precise edges. Focus on edge alignment, ensuring each fold matches perfectly with adjacent edges. Use a ruler or straight edge to guide your creases for crease precision. Lightly score the fold lines before making full creases to prevent uneven edges. Press firmly along the creases to lock in sharpness. Here’s a visual guide:
| Step | Tip | Result |
|---|---|---|
| Fold along lines | Use a straight edge for accuracy | Sharp, aligned edges |
| Score before creasing | Lightly score to prevent tearing | Clean, precise folds |
| Press firmly | Apply consistent pressure | Crisp edges |
Proper folding and creasing ensure your model’s edges stay true and neat. Additionally, maintaining consistent pressure during creasing can help achieve creased edge sharpness for a more professional finish.
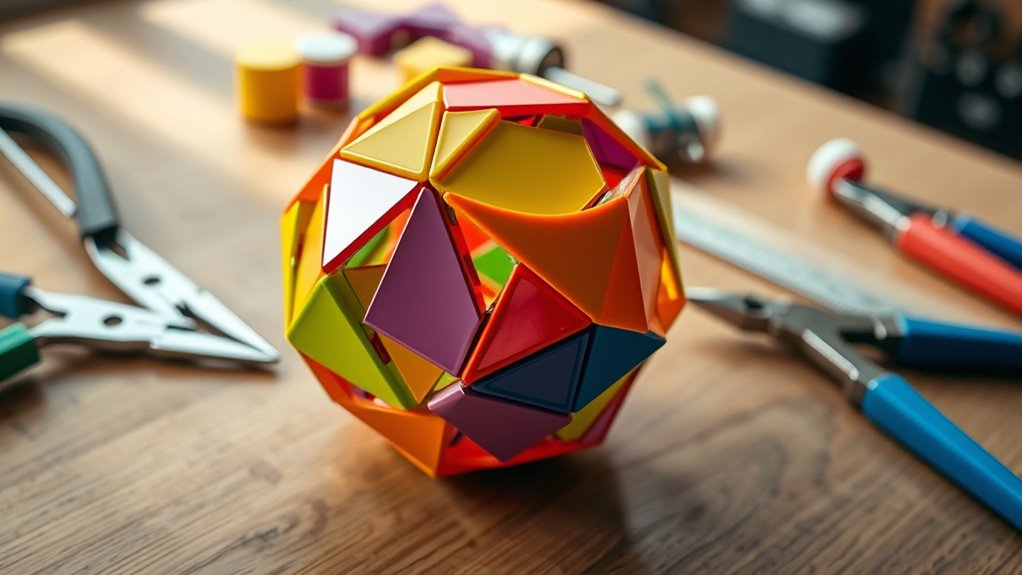
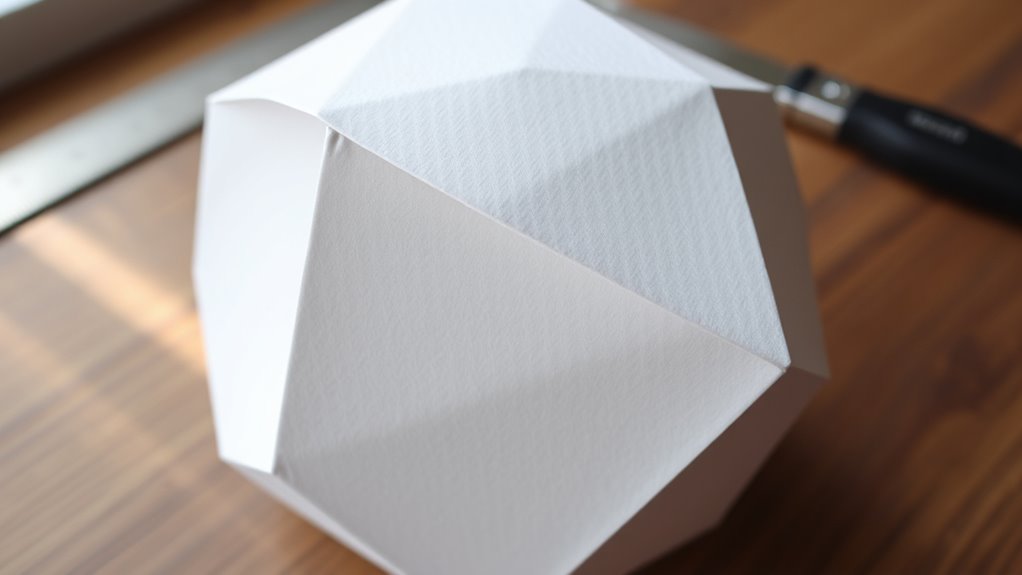
Assembling the Faces and Connecting Edges
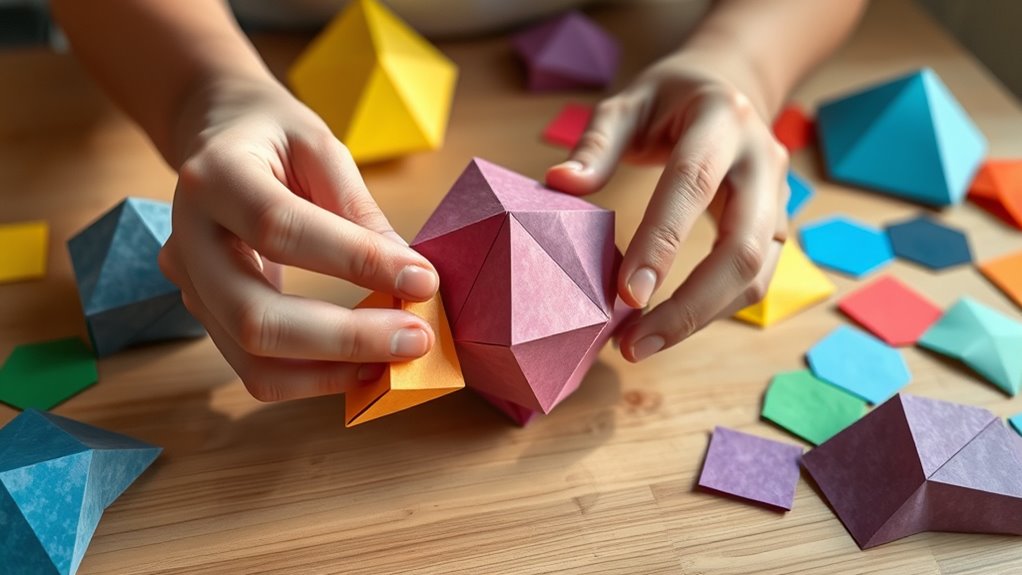
To assemble your polyhedron, start by attaching each face securely to guarantee stability. Carefully link the edges so they align perfectly, creating clean, sharp angles. Precision here is key to achieving a professional-looking model that holds together well. Paying attention to the structural integrity of your model ensures it remains durable and well-formed over time.
Attaching Faces Securely
Attaching the faces securely is essential to ensuring your polyhedron holds its shape firmly. Use proper gluing techniques to prevent weak joints, applying a thin, even layer of adhesive along edges. For added strength, consider joint reinforcement by holding faces in place until the glue sets completely. To achieve solid connections, follow these tips:
- Align edges precisely before gluing.
- Use clamps or tape to hold faces steady during drying.
- Avoid excess glue to prevent mess and weak bonds.
- Double-check each joint for stability before moving on.
- Ensure the adhesive you use is suitable for the material to maximize bond strength.
Linking Edges Precisely
Linking edges precisely is essential for ensuring your polyhedron’s stability and accurate shape. To do this, focus on proper edge alignment, making sure each edge lines up perfectly with its neighboring faces. Carefully check that vertices match exactly where edges meet; mismatched vertices can distort the shape. Use your tools to hold edges in place as you connect them, ensuring consistent angles and alignment. Take your time to verify each connection before gluing or securing it. Proper vertex matching guarantees that all faces fit together seamlessly, maintaining the integrity of your model. When edges are linked precisely, your polyhedron will be sturdy and true to its geometric form. Precision in connecting edges makes the difference between a wobbly model and a professional-looking finished piece. Additionally, paying attention to the accuracy of measurements helps ensure all components fit together perfectly.
Securing the Joints With Adhesive
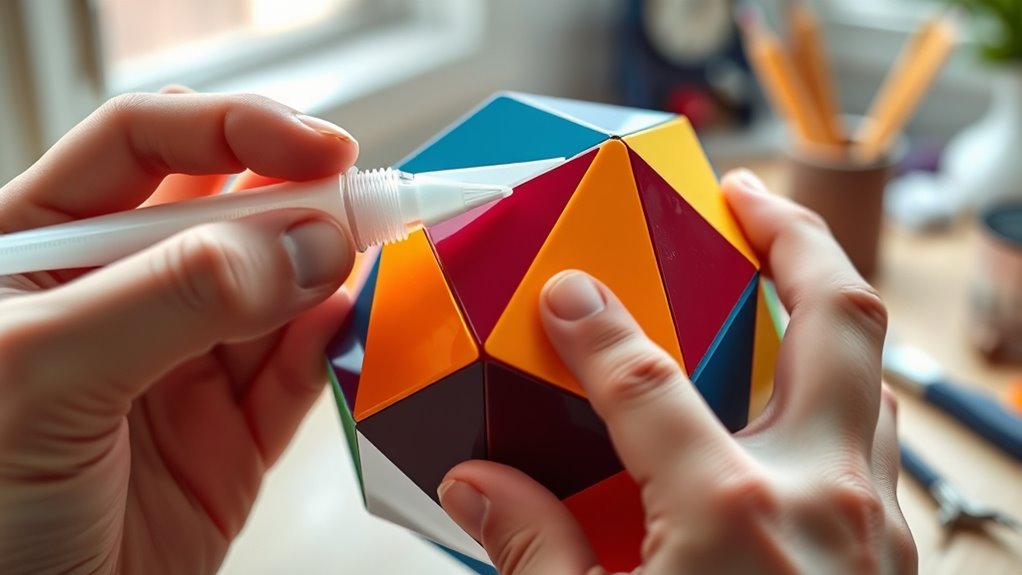
Securing the joints with adhesive is a crucial step to guarantee your polyhedron holds its shape firmly. The right gluing techniques and adhesive choices ensure durability and a clean finish. First, apply a small amount of adhesive to the edges, avoiding excess that could seep out. Second, hold the joints in place for a few seconds to let the glue set. Third, consider using clamps or rubber bands to keep parts tight during drying. Fourth, allow ample drying time before handling further. Your choice of adhesive should match your material—glue sticks, super glue, or epoxy work well. Proper application prevents weak spots and maintains the geometric integrity of your model. Using the appropriate adhesive type ensures a strong bond suitable for your specific material. With careful gluing, your polyhedron will stay solid and accurately shaped.
Final Touches and Display Tips
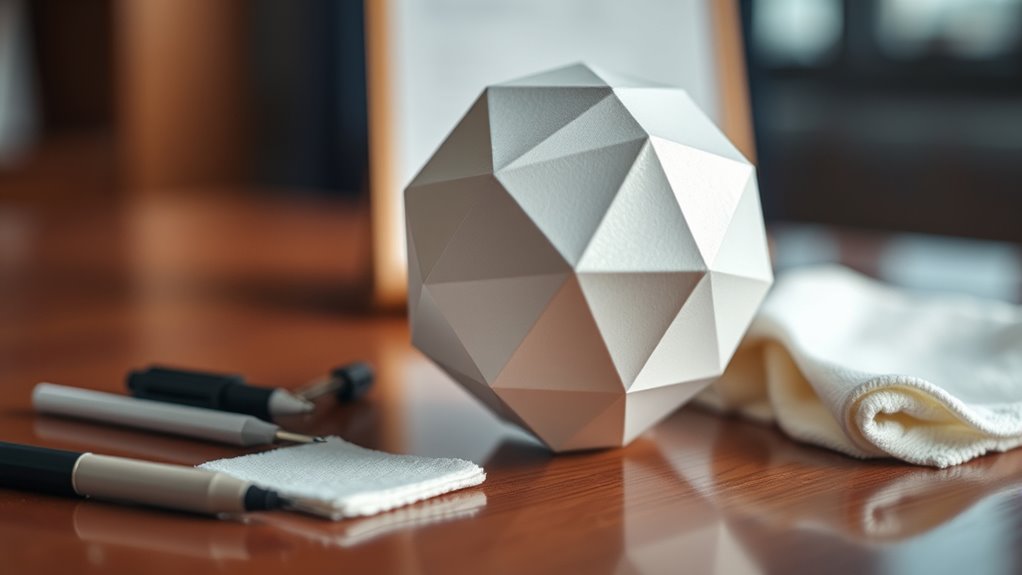
Once the adhesive has fully dried and your polyhedron model is solidly assembled, it’s time to focus on final touches that enhance its appearance and stability. Choose a cohesive color scheme to make your model visually striking—consider contrasting colors for different faces or a monochrome palette for elegance. Smooth any rough edges with fine sandpaper or touch up with paint if needed. When arranging your display, place the model in a well-lit area to highlight its geometric features. Use stands or mounts to stabilize it, especially if you plan to showcase it on a shelf or desk. Keep the display clean and dust-free to preserve its look. These small details will make your polyhedron model stand out and look professional. Paying attention to aesthetic details can significantly elevate the overall presentation of your model.
Exploring Variations and Custom Designs

Exploring variations and custom designs allows you to personalize your polyhedron model and challenge your creativity. You can experiment with different shapes, sizes, and color schemes to make your model unique. Material experimentation is key—try using foam, paper, or even metal to see how each influences the construction. Here are some ideas to get started:
- Incorporate non-traditional colors or patterns for a striking visual effect
- Combine multiple materials for added texture and durability
- Modify standard polyhedra into hybrid shapes for innovative designs
- Add decorative elements like LEDs or engravings for a custom touch
- Understanding geometric principles can help you design more complex and accurate models.
These custom design ideas help turn a simple model into a true reflection of your creativity, making the process both fun and rewarding.
Frequently Asked Questions
How Do I Choose the Right Size for My Polyhedron Model?
When choosing the right size for your polyhedron model, consider your space and display needs first. Think about scale considerations to guarantee it fits well and looks proportionate. Also, verify material compatibility; some materials are better suited for larger or smaller models due to weight or durability. Adjust the size based on your purpose, whether for decoration or education, and make sure it’s manageable to build and handle comfortably.
Can I Use Recycled Materials to Build My Polyhedron?
They say, “Waste not, want not,” and that’s especially true when building your polyhedron model. Yes, you can definitely use recycled materials—think cardboard, bottle caps, or paper scraps—as eco-friendly options. Not only does this reduce waste, but it also adds a unique touch to your project. Recycled materials are a creative, sustainable choice that lets you craft your model while being kind to the environment.
What Safety Precautions Should I Take During Construction?
When building your polyhedron model, you should prioritize safety. Always wear appropriate safety gear like goggles and gloves to protect your eyes and hands. Set up a clean, organized workspace with good lighting and ventilation to avoid accidents. Keep sharp tools and hazardous materials away from children and pets. Take your time, follow instructions carefully, and stay alert to guarantee a safe and enjoyable construction process.
How Long Does It Typically Take to Complete the Project?
Back in the day, building a polyhedron felt like assembling a spaceship! Generally, your assembly time depends on the complexity level—simple models might take an hour or two, while intricate designs could need several hours. If you stay organized and follow instructions carefully, you’ll finish faster. Expect about 2-4 hours for most projects, but don’t rush; patience guarantees a perfect result!
Are There Any Alternative Adhesives Suitable for Different Materials?
You wonder if there are alternative adhesives suitable for different materials. There are various adhesive types available, each designed for specific material compatibility. For example, use super glue for plastics, wood glue for wood, and craft glue for paper. Always check the label to guarantee the adhesive type matches your material. This way, you get a strong bond without damaging your project, making assembly smoother and more secure.
Conclusion
As you step back to admire your completed polyhedron, it’s almost like holding a tiny universe in your hands—each edge and face a reminder of your craftsmanship. The sunlight catches the angles just right, casting intricate shadows that dance across your space. With a little imagination, your model becomes more than paper; it transforms into a gateway to endless geometric wonder. Just like that, your homemade creation invites curiosity and sparks new designs, waiting for your next adventure.