The biggest mistake with a smart board is mounting it too high or at poor viewing angles, which makes interaction difficult and diminishes effectiveness. To fix this, you’ll want to make certain it’s positioned at eye level for the best visibility and comfort. Proper measurements, tools, and room considerations are key. Keep your setup safe and functional, and you’ll create a better experience for everyone. Keep going to find out how to get it just right.
Key Takeaways
- Mounting a smart board at eye level ensures optimal visibility and reduces neck strain for all users.
- Accurate measurements and proper tools prevent uneven installation and improve viewing angles.
- Considering room size, seating arrangement, and wall material helps determine the best mounting height.
- Testing for glare, dead zones, and clarity ensures the board’s position provides a comfortable, unobstructed view.
- Proper leveling and secure hardware are essential for safety, stability, and maintaining ideal viewing angles.
Why Mounting Height Is Critical for Smart Board Effectiveness

Mounting your smart board at the right height is essential for ensuring everyone can see and interact with the display comfortably. Proper height enhances visual ergonomics, reducing neck and eye strain during long sessions. When the smart board is positioned too high or low, sightline optimization suffers, making it difficult for viewers to focus without discomfort. By aligning the display at an ideal eye level, you create a natural viewing angle that promotes engagement and minimizes fatigue. This careful placement ensures that students and presenters can easily access the touchscreen features without awkward movements. Additionally, ergonomic considerations play a vital role in maintaining user comfort and preventing strain over extended use. Ultimately, correct mounting height not only improves usability but also fosters a more effective and comfortable learning or presentation environment. Proper placement is key to creating an organized and functional space that supports effective communication.
Common Installation Mistakes and How to Avoid Them

Many installation mistakes can undermine the effectiveness of your smart board, affecting both its functionality and longevity. One common error is neglecting proper mounting materials; using incompatible or low-quality hardware can cause instability. Additionally, ignoring wall compatibility can lead to unsafe mounting, risking damage or injury. To avoid these issues, check your wall type and choose suitable mounting materials designed for that surface. Proper planning ensures your smart board stays secure and functions correctly. Ensuring your installation aligns with best practices can further prevent potential problems. Paying attention to mounting height and viewing angles is crucial for optimal user experience and safety. Consulting installation guidelines can provide valuable insights to enhance safety and performance, especially considering smart home integration for seamless operation.
A thorough understanding of wall strength can help prevent accidental falls or damage over time.
Choosing the Right Tools to Measure Mounting Height

To guarantee your smart board is mounted at the perfect height, you need the right measuring tools. Selecting accurate tools helps you mark the correct height and avoid mistakes. Proper leveling techniques then ensure your installation stays straight and secure. Using measurement tools designed specifically for mounted displays can make the process more precise and efficient. Additionally, considering free floating concepts can help prevent the display from being affected by environmental factors or uneven walls, ensuring longevity and safety. Furthermore, understanding the ideal viewing angles is essential for optimal placement and user comfort. Employing visualization techniques can also assist in planning the optimal position before mounting, reducing the risk of misalignment and improving overall setup quality. Incorporating creative storytelling principles can help visualize how the space will be used, making sure the placement aligns with user needs and enhances engagement.
Measuring Tools Selection
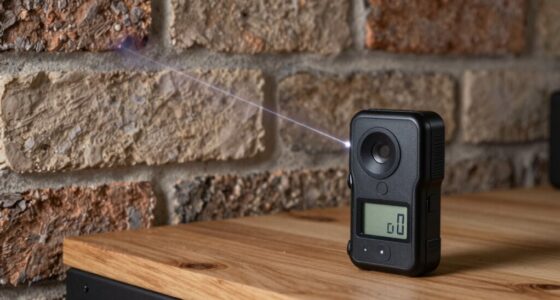
Choosing the right measuring tools is essential to guarantee your smart board is mounted at the correct height. Use a reliable tape measure or laser distance meter for precise measurements, reducing errors caused by manual misreading. A level ensures your mount is perfectly horizontal, preventing skewed viewing angles. When measuring, consider calibration procedures to maintain accuracy over time, especially if using digital tools. Proper cable management tools, like cable clips or conduits, help keep wires organized and out of the way during installation, ensuring a clean, professional finish. Select tools that are easy to handle and suitable for your workspace, reducing the risk of inaccuracies. Additionally, understanding mounting height guidelines can help you achieve optimal ergonomic positioning for all users. Properly measuring viewing angles ensures that the display is comfortable for everyone and reduces eye strain during extended use. Accurate measurements are also crucial for maintaining support and safety standards, which are important for both compliance and durability. Ensuring your workspace has good air quality considerations can also influence the overall comfort and safety of the installation environment. Incorporating proper lighting conditions can further improve visibility during installation, reducing mistakes. With the right combination, you’ll achieve a consistent, correctly positioned mount that enhances viewing comfort and safety.
Accurate Height Marking
Selecting the right tools to measure your mounting height is essential for guaranteeing your smart board is installed at the best level. Accurate height marking helps you achieve proper visual alignment, making it easier for users to view content comfortably. Use a laser level or a measuring tape combined with a pencil to mark the designated height precisely. Focus on establishing an ergonomic setup that minimizes strain and maximizes productivity. Double-check your measurements before drilling or mounting to prevent errors that could lead to misalignment. Keep in mind that consistent, accurate markings contribute to a professional-looking installation and improved user experience. Taking the time to mark the correct height ensures your smart board is positioned for optimal viewing angles and seamless interaction. Proper measurement techniques are fundamental in achieving a precise and reliable setup. Additionally, using appropriate tools can significantly reduce the likelihood of measurement errors, saving time and effort during installation. Ensuring the correct mounting height from the start also helps in maintaining compliance with ergonomic standards and reduces the need for adjustments later. Remember that precise measurement practices are vital for a safe and functional smart board installation. To enhance accuracy, consider incorporating digital measurement devices that leverage modern technology for even more precise results.
Proper Leveling Techniques
Using the right tools to measure your mounting height is essential for guaranteeing your smart board is perfectly level and securely installed. Accurate height measurement depends on choosing tools that provide high height accuracy, such as laser levels or calibrated measuring tapes. Before starting, double-check that your tools are properly calibrated to avoid errors that could affect the installation. Proper leveling techniques involve confirming the tool’s accuracy regularly and using them consistently across all measurement points. This consistency helps prevent measurement errors that could compromise your setup. Additionally, documenting your measurements helps ensure measurement consistency throughout the process. This ensures your smart board remains perfectly aligned and prevents uneven mounting that could cause viewing issues or damage. Remember, even small calibration discrepancies can lead to significant misalignments, so invest in quality, well-maintained tools and verify their calibration before each use. Proper leveling techniques involve careful measurement, consistent tool use, and ongoing calibration checks. Incorporating precise measurement methods is crucial for achieving a professional, safe, and functional smart board setup.
How to Find the Best Viewing Angle for Your Space

To find the best viewing angle, start by considering your room’s dimensions to guarantee the board fits comfortably. Adjust the height based on where people will be seated so everyone has a clear view. Remember, eye-level placement often provides the most natural and comfortable viewing experience.
Consider Room Dimensions Carefully
Before mounting your smart board, take a moment to measure your room’s dimensions carefully. Knowing your space helps determine the ideal mounting height and sightline considerations. Consider how far viewers will sit from the board and the width of the room. Use the table below to evaluate your room’s key features:
| Room Dimension | Impact on Mounting | Sightline Considerations |
|---|---|---|
| Width | Limits viewing angles | Avoid obstructed views |
| Length | Affects seating distance | Ensure everyone sees clearly |
| Ceiling Height | Dictates mounting height | Prevents glare and distortion |
Accurate measurements ensure your smart board is positioned for best visibility, enhancing the overall experience for every viewer.
Adjust for Seating Positions
Once you’ve measured your room and determined the ideal mounting height, it’s important to take into account where people will be seated. Seating arrangements influence the best viewing angles, so observe how students or team members will face the board. Consider varying seating positions, including front, middle, and back rows, to ensure everyone has a clear view. Adjusting for seating positions enhances visual ergonomics, reducing strain and improving engagement. If seats are spread out or angled differently, you might need to tilt or position the board slightly to accommodate these variations. Remember, the goal is to create a setup where every seat offers a comfortable, unobstructed view, ensuring effective communication and learning without compromising the board’s visibility.
Use Eye-Level Placement
Finding the right eye-level placement for your smart board guarantees everyone has a comfortable and clear view. Position the screen so that it aligns with the average eye level of your audience, typically around 4 to 5 feet from the floor. This promotes ergonomic comfort, reducing neck and eye strain during extended use. Ensuring the board is at an appropriate height also enhances visual accessibility for all users, including those seated or standing. Adjust the mounting height based on your space’s seating arrangements and user height. Keep in mind that a well-placed smart board minimizes glare and awkward viewing angles, making it easier for everyone to engage with the content. Prioritizing eye-level placement creates a more inclusive, comfortable environment for all viewers.
Adjusting Mounting Height for Different Room Sizes

Adjusting the mounting height of your smart board is essential to make certain of comfortable viewing and effective interaction, especially when considering different room sizes. In larger rooms, you may need to mount the board higher to ensure everyone can see clearly, while smaller spaces benefit from a lower placement. Pay attention to room acoustics, as echo and sound reflection can influence how well users perceive the content; a well-placed smart board reduces glare and minimizes distractions. Wall materials also matter—rough or textured surfaces might require different mounting hardware or height adjustments to ensure stability and ideal viewing angles. Take the time to analyze your room’s size, acoustics, and wall type to determine the best mounting height for a seamless experience.
Test and Verify Your Smart Board Setup for Comfort and Clarity

Before you start using your smart board regularly, it’s important to test and confirm that it provides clear visuals and comfortable interaction. Check the display for sharp images and ensure the brightness and contrast settings suit your room lighting. Interact with the smart board’s features, like touch responsiveness and gesture controls, to confirm they work smoothly. Also, verify software compatibility by opening your preferred apps and tools to see if everything runs seamlessly. Adjust the mounting if you notice glare, dead zones, or difficulty reaching certain areas. Testing these aspects early helps prevent frustration later and ensures everyone can engage comfortably. A well-verified setup guarantees your smart board enhances learning without technical distractions.
Tips to Maximize Smart Board Usability and Student Engagement

To maximize your smart board’s usability and boost student engagement, focus on creating interactive lessons that encourage active participation. Utilize the smart board’s interactive features, such as drag-and-drop activities, quizzes, and multimedia integration, to make lessons more dynamic. Guarantee your software is compatible with the smart board, so you can seamlessly incorporate various educational tools and resources. Regularly update your software to access new features and improve performance. Engage students by encouraging collaboration through shared screens or group tasks. Keep lessons visually appealing and easy to navigate, so students stay focused. By leveraging interactive features and maintaining software compatibility, you create an engaging learning environment that motivates students and enhances their understanding.
Frequently Asked Questions
How Does Ambient Lighting Affect Smart Board Visibility?
Ambient light can substantially reduce your smart board’s visibility if it causes glare or reflections. Bright or poorly controlled ambient light makes it harder to see content clearly, which hampers your teaching or presentations. To improve visibility, use glare control techniques like adjusting blinds, repositioning lights, or installing anti-glare screens. Managing ambient light ensures your smart board remains crisp and easy to read, even in well-lit rooms.
What Safety Considerations Are There During Installation?
During installation, prioritize mounting safety by using proper tools and secure brackets to prevent accidents. Follow installation precautions like checking wall strength and ensuring the mount can support the smart board’s weight. Wear safety gear, work with a partner if needed, and double-check all connections before finalizing. Taking these steps mitigates risks, ensures a stable setup, and keeps everyone safe during the entire installation process.
Can Adjustable Mounts Help With Different User Heights?
Yes, adjustable mounts help accommodate different user heights, improving user ergonomics. With these mounts, you can easily change the smart board’s height, ensuring comfortable viewing and interaction for everyone. This flexibility reduces strain and enhances collaboration. By using adjustable mounts, you create a more inclusive environment, allowing all users to engage with the technology comfortably, regardless of their height or physical ability.
How Often Should Smart Board Mounting Be Inspected?
You should inspect your smart board mounting at least twice a year to guarantee mounting stability and wall compatibility. Regular checks help identify loose bolts, shifting, or wall damage that could compromise safety. Investigating the theory that frequent inspections prevent costly repairs, it’s wise to set reminders for routine assessments, especially if your environment experiences temperature fluctuations or heavy usage, maintaining peak performance and safety.
What Are the Best Practices for Cable Management?
You should prioritize cable concealment and wire organization to keep your smart board setup tidy and safe. Use cable covers or conduits to hide wires along the wall, preventing tripping hazards and damage. Keep cables neatly bundled with cable ties or sleeves, and route them away from high-traffic areas. Regularly check and adjust cable management to maintain a clean, professional appearance and make certain access for maintenance or upgrades.
Conclusion
Don’t let poor mounting choices limit your smart board’s impact. Correct height and ideal viewing angles are easy to achieve with the right tools and a little planning. Even if space feels tricky, adjusting your setup can boost clarity and engagement for everyone. Trust me, taking the time now saves frustration later—so go ahead, make those tweaks, and watch your lessons come alive! Your students will thank you for it.