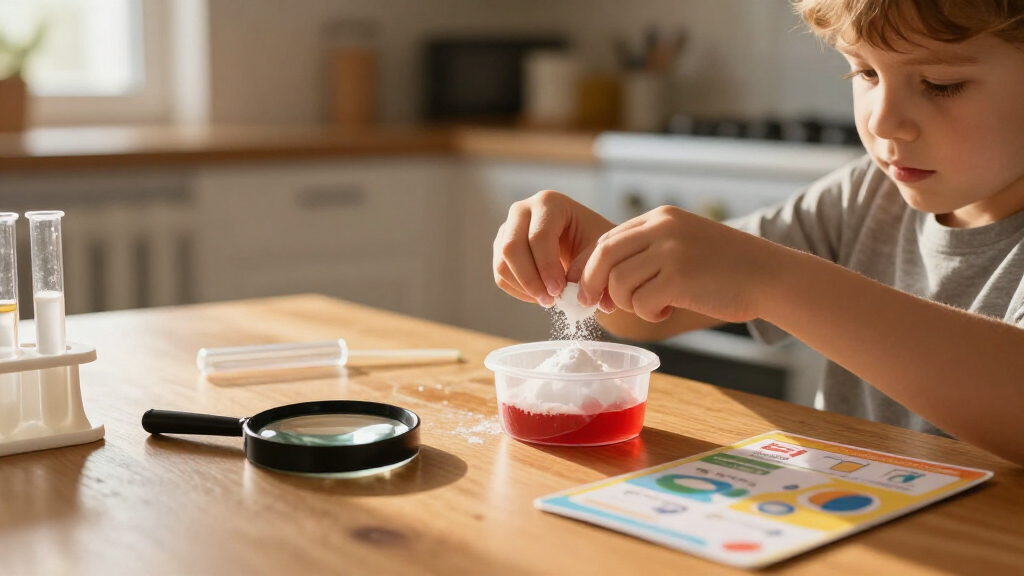
This guide shows you how to choose an educational science kit that matches your child’s age and interests, prepare a workspace, and run the activities so the experiments actually work and your child actually learns from them. It is written for parents, grandparents, and caregivers who want a hands-on science activity to go well on the first try — no teaching background or science degree required. Expect to spend 30–60 minutes choosing and preparing, and 30–90 minutes per session depending on the kit. By the end, you will have a completed kit session behind you and a child asking to do the next experiment.

Get school and study supplies delivered free — and shop member deals
- Fast, free delivery on millions of items
- Access to Prime Big Deal Days deals on October 6–7
- Prime Video, Amazon Music and more included

Doctor Jupiter Ultimate Science Experiments Kit for Kids Ages 8+
- ✔ Recommended age: 8+ years
- ✔ Number of experiments: 50+
- ✔ Instruction manual: Illustrated, step-by-step

Kuovei Science Kit for Kids with 80 Experiments
- ✔ Brand: Kuovei
- ✔ Experiments: 80
- ✔ Recommended age: Over 6 years (manufacturer states 36 months–12 years)
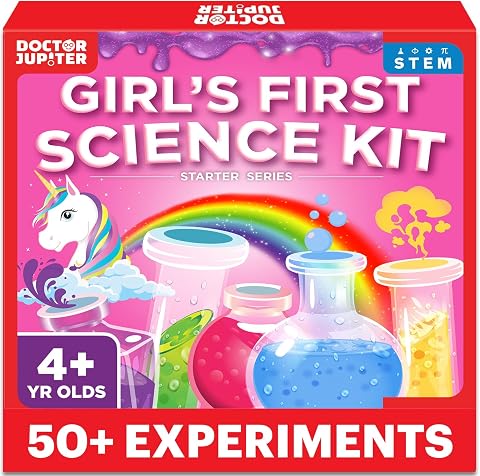
Doctor Jupiter First Science Experiments Kit for Kids Ages 4+
- ✔ Brand: Doctor Jupiter
- ✔ Age range: 4–12 years
- ✔ Number of experiments: 50+
Difficulty: Beginner | Time: 30-60 minutes of shopping and planning, plus 30-90 minutes per kit session
What You’ll Need
Tools & Materials:
- A science kit appropriate for your child’s age (chemistry, physics, geology, biology, electronics, or coding type)
- A flat, washable work surface (kitchen table, counter, or desk covered with newspaper or a plastic tablecloth)
- Paper towels or cleaning cloths and access to a sink
- A tray or baking sheet to contain spills and small parts
- Safety gear if the kit requires it: safety glasses, apron or old shirt, gloves
- Household extras many kits require: water, cups, spoons, tape, batteries, or scissors
- A notebook or camera to record results
Knowledge:
- Ability to read and follow printed step-by-step instructions
- Basic household safety habits (no tasting chemicals, wash hands after handling materials)
Read the kit box and instruction manual before the day you plan to use it. Many kits require tap water, batteries, or common kitchen items that are easy to buy in advance but frustrating to discover missing mid-experiment. Check the recommended age range and any supervision warnings on the box.
Doctor Jupiter Ultimate Science Experiments Kit for Kids Ages 8+
The Doctor Jupiter Ultimate Science Kit earns our top spot because it does the one thing many kits skip: it teaches the science, not just the steps. Across 50+ hands-on experiments — from color-changing volcanoes to rainbow crystals — each activity is paired with an illustrated guide that explains the underlying concept, turning a fun afternoon into a genuine STEM lesson. Compared with the Kuovei kit, it offers fewer experiments, but the depth per activity is noticeably stronger for kids old enough to ask follow-up questions.The age-8+ rating is well judged. Younger children will find some of the reasoning abstract, which is exactly why Doctor Jupiter makes a separate kit for the 4+ crowd. The ASTM F963-17 safety certification is another point in its favor over the Kuovei, whose listing does not state a comparable standard. The honest tradeoff: this is not a drop-in-the-lap activity. Several experiments need an adult for setup and oversight, so plan on participating rather than observing.
Pros:
- Over 50 experiments with genuine variety
- Explains the science behind each activity, not just the steps
- Illustrated, step-by-step instructions kids can follow
- ASTM F963-17 certified for safety
Cons:
- Some experiments require adult help
- Fewer total experiments than the Kuovei kit
Best for: Parents of kids 8 and up who want experiments that explain the science, not just produce a spectacle.
Not ideal for: Households looking for a fully independent, no-supervision activity for a child.
Bottom line: The most balanced kit in this lineup — deep enough to teach, varied enough to keep an 8-year-old coming back.
“The most balanced kit in this lineup — deep enough to teach, varied enough to keep an 8-year-old coming back.”
Kuovei Science Kit for Kids with 80 Experiments
If volume is what you are after, the Kuovei Science Kit wins on sheer breadth: 80 experiments with guidance cards covering both the steps and the scientific principles behind them. That is 30 more activities than either Doctor Jupiter kit, and it comes bundled with an impressively long parts list — goggles, test tubes, petri dishes, droppers, gloves, and a mini volcano setup. For a rainy weekend or a sibling pair working through projects together, this kit stretches further than anything else here.Where it falls short of our top pick is polish and precision. The guidance cards are helpful but less detailed than Doctor Jupiter’s illustrated manual, and the listing’s phrase "and other items" leaves the exact component count unclear — a small but real frustration when you are mid-experiment. Some activities use chemical materials that demand careful handling, so despite the manufacturer’s 36-month-and-up label, we would treat this as a 6+ kit with supervision. Compared with the Doctor Jupiter Ultimate, you get more experiments per dollar but less pedagogical depth per activity.
Pros:
- 80 experiments — the most in this comparison
- Guidance cards explain both steps and scientific principles
- Extensive included equipment: goggles, gloves, test tubes, measuring tools
- Encourages hands-on exploration and thinking skills
Cons:
- Some experiments involve chemical materials requiring careful handling
- Exact component count is vague ("and other items")
- No stated safety certification in the listing
Best for: Families who want maximum experiment count and variety for kids roughly 6 and up.
Not ideal for: Parents who want a precisely documented component list or a kit with a stated safety certification.
Bottom line: The quantity champion — best for buyers who value more experiments over deeper explanations.
“The quantity champion — best for buyers who value more experiments over deeper explanations.”
Doctor Jupiter First Science Experiments Kit for Kids Ages 4+
The Doctor Jupiter First Science Kit is the right starting point for the youngest scientists in the house. While it shares the 50+ experiment count of its Ultimate sibling, everything here is rebuilt for small hands and short attention spans: making squishies, oobleck, perfumes, face masks, and volcanoes. These are sensory, play-based activities rather than formal chemistry, which is exactly what a four-year-old needs — the mess and wonder come first, and the critical-thinking groundwork follows naturally.Compared with the Kuovei kit, it is a safer and more age-appropriate choice for pre-readers, with ASTM F963-17 certification and no ambiguous chemical handling. The flip side is that an older child — say, 9 or 10 — will blow through these activities quickly and find them light on real scientific explanation. The 4–12 age range on the box is optimistic at the top end. Like both other kits, adult assistance is needed for several experiments, so treat this as a shared activity rather than independent play.
Pros:
- Genuinely age-appropriate for ages 4 and up
- Over 50 sensory, play-based experiments
- Illustrated step-by-step instructions for adults and kids
- Screen-free STEM that builds critical thinking and problem-solving
Cons:
- Some experiments require adult assistance
- Activities may feel too simple for older kids
- Overlapping experiment themes with the Ultimate kit if you own both
Best for: Parents and grandparents of children 4–8 who want a screen-free, supervised introduction to science.
Not ideal for: Kids over about 8 who are ready for more sophisticated experiments and explanations.
Bottom line: The best first science kit for young children — playful, safe, and perfectly pitched for ages 4 to 8.
“The best first science kit for young children — playful, safe, and perfectly pitched for ages 4 to 8.”
As an Amazon Associate we earn from qualifying purchases.
Before You Start
Three things to sort out before you begin. First, buy by age band, not by ambition. A kit rated 12+ for a 7-year-old produces frustration; a kit rated 4+ for a 10-year-old produces boredom. Manufacturers test age ranges against fine-motor demands and reading level, so trust them. Second, check for hazards. Kits for older children may contain chemicals, sharp tools, small magnets, or heat sources — these need direct adult supervision and safe storage away from younger siblings. Third, accept that some experiments will fail. Cheap or poorly stored kits sometimes contain degraded reagents. Buy from reputable brands (Thames & Kosmos, National Geographic, Snap Circuits, Klutz, Learning Resources, and similar) and check reviews mentioning whether the experiments actually work.
Step-by-Step Instructions
Step 1: Match the kit to your child’s age and interests
Write down your child’s age and one or two things they are currently curious about — volcanoes, slime, robots, crystals, bugs, rainbows, anything. Narrow your kit search to products in the correct age band that touch those interests. Choose a dinosaur-loving child a fossil-dig kit over a generic chemistry set, even if the chemistry set is objectively more educational. Check that the number of experiments suits your child’s attention span: pick kits with 10–15 short activities for younger kids, and pick one big build (like a 100-piece circuit set) for older kids who like projects.
Tip: Read the critical reviews, not the five-star ones. Reviews mentioning “experiments didn’t work” or “missing pieces” are the most reliable quality signal.
Check: You have one specific kit in hand or in your cart, its age range matches your child, and its topic matches something they already like.
Step 2: Read the entire manual before opening the materials
Sit down alone with the instruction manual and read it cover to cover. Note which experiments need household items you don’t have, flag which ones create mess or smells, and mark which ones must be done in order. Identify any experiment that requires an overnight wait (crystal growing, some reactions) so you can schedule it first or set expectations with your child. Circle the experiments you’ll do in this first session — two or three is a realistic number.
Tip: Do not let your child open the kit before you’ve read the manual. Half of all kit chaos comes from a child unpacking everything at once while the adult reads page one.
Check: You can name which experiments you’ll do today, what extra supplies they need, and whether any has a waiting period.
Step 3: Set up a contained workspace
Clear a flat surface and cover it with newspaper, a plastic tablecloth, or a large tray. Lay out the household items the manual calls for (water, cups, spoons, batteries, towels) so nothing interrupts the flow mid-experiment. Place paper towels within arm’s reach. Move the session outdoors or to an easily mopped floor if the kit involves dyes, glitter, or fizzing reactions. Have your child wash their hands and put on safety glasses and an apron if the kit includes them.
Tip: A baking sheet under the working area catches 90% of spills and makes cleanup a single carry to the sink.
Check: All listed supplies are on the table, the surface is protected, and your child is ready before any package is opened.
Step 4: Unpack and inventory the kit together
Open the kit with your child and lay every component on the tray. Check each item against the parts list in the manual. Confirm nothing is missing or broken before you start. Ask your child to guess what each part is for — learning the names of the tools (pipette, beaker, circuit board, magnifier) builds science vocabulary before the experiments even begin.
Tip: If a part is missing, contact the manufacturer’s customer service immediately. Most major kit brands replace parts for free — but you’ll want to pause the session, so it’s better to know now than halfway through experiment three.
Check: Every item on the parts list is present and accounted for on the tray.
Step 5: Run the first experiment with your child doing the work
Hand the manual to your child (or read it aloud if they’re pre-reading age) and let them perform each step themselves. Take on the assistant role: read, hold things steady, ask questions, and manage anything unsafe. Resist the urge to take over — the learning happens in their hands, not yours. Ask one open question after each step, such as “What do you think will happen next?” or “Why did it change color?” These predictions and explanations are where kit play turns into scientific thinking.
Tip: If a step fails, don’t fix it silently. Say “Let’s check the instructions together” and re-read the step out loud. Troubleshooting is itself a core science skill.
Check: The experiment produces the result the manual describes — an eruption, a glow, a circuit that buzzes — or you’ve identified and corrected the error together.
Step 6: Record the results
Have your child draw or write what happened in a notebook, or take a photo of the result. Write one or two sentences together: what we did, what happened, what surprised us. Spend two minutes on this — it is the single highest-value addition to any kit session, because it converts a fun moment into a repeatable observation habit.
Check: There is a written or photographed record of today’s experiment that your child helped create.
Step 7: Clean up and store the kit properly
Wash and completely dry all beakers, tools, and containers before returning them to the box — leftover moisture ruins chemical packets and grows mold. Reseal every powder packet and bag. Store the kit in its box on a shelf out of reach of younger children and away from heat and humidity. Have your child wash their hands thoroughly, even if nothing looked messy.
Tip: Keep a small zip bag inside the kit box for leftover chemical packets and loose screws. Kits with all parts accounted for last for siblings and repeat use.
Check: The kit is dry, complete, sealed, and stored safely, and the workspace is back to normal.
Common Mistakes to Avoid
- Buying a kit above the child’s age range to ‘challenge’ them. — Follow the manufacturer’s age band. If you want stretch, choose a kit at the top of the range rather than above it, and be ready to do the fiddly steps yourself.
- Starting an experiment before checking whether household supplies are needed. — Read the manual fully a day ahead and stage all supplies — especially batteries and measuring cups — before opening any packet.
- The adult does the whole experiment while the child watches. — Treat yourself as the assistant. Your hands hold things and turn pages; your child’s hands pour, connect, and discover.
- Skipping experiments that failed once and rushing to the next one. — Treat a failed experiment as a puzzle. Re-read the step together, check measurements, and try once more. Figuring out why it failed teaches more than a success does.
Troubleshooting
Problem: An experiment doesn’t produce the promised result (no eruption, no glow, no crystal growth).
Solution: Check three things in order: exact measurements (kits use small quantities — a slightly overfull spoon matters), water temperature if specified, and whether reagents were expired or clumped. Redo the experiment precisely by the instructions. If it still fails with a reputable kit, contact the manufacturer for replacement reagents.
Problem: A part is missing from the box.
Solution: Check the packing material at the bottom of the box first — small parts often hide in cardboard or bags. If truly missing, email the manufacturer with the kit name, batch number, and part name from the parts list. Most replace parts free within the warranty period; meanwhile, substitute household items (a cup for a beaker, tape for a clip) where safe.
Problem: Your child loses interest halfway through.
Solution: Stop after the current experiment rather than pushing to finish. Short, successful sessions beat long, forced ones. Note which experiment type they engaged with most and choose kits in that direction next time.
Problem: A chemical or small part gets on skin, in an eye, or in a mouth.
Solution: Stop immediately. Rinse skin or eyes with clean water for 15 minutes, and call poison control or seek medical attention for any ingestion — kit chemicals are usually mild but should be treated as unsafe to ingest. Keep the kit box and its safety information on hand for ingredient details.
What Success Looks Like
You have succeeded when: (1) at least one experiment produced the result shown in the manual, (2) your child performed the hands-on steps themselves, (3) there is some record of what happened — a drawing, a sentence, or a photo, (4) the kit is clean, complete, and safely stored, and (5) your child asks when you can do the next one. That last signal matters most: repeated curiosity is the real outcome a science kit is designed to produce.
Next Steps
Schedule the next session within a week while interest is high — put it on the family calendar. If the kit has a waiting experiment (crystals, mold growth), check it daily with your child and record the changes. Once the current kit is exhausted, look for a kit one step deeper in the same branch of science: a crystal-growing child might move to a rock and mineral kit, then a geology excavation set. For free follow-up learning, the kit manual’s topic headings make good library or museum search terms. If your child remains hooked after several kits, consider a science club, a weekend museum membership, or a subscription box that delivers a new experiment monthly.
Frequently Asked Questions
What age should kids start with science kits?
Around age 4–5 with simple kits built for preschoolers — magnetic tiles, water-play science, or bug observation kits with no small loose parts. Real chemistry and electronics kits generally start at age 8, and kits with chemicals or heat sources at 10–12 with adult supervision.
Are science kits actually educational, or just toys?
They become educational based on how you use them. The hands-on part is engagement; the learning comes from asking your child to predict, observe, and explain what happened. A kit run in fifteen silent minutes is a toy. The same kit with two or three “why do you think that happened?” questions becomes a science lesson.
How much should a good science kit cost?
Reliable kits run roughly $15–40 for single-topic sets (slime, crystals, dig kits) and $40–80 for multi-experiment chemistry or electronics sets. Below $15, quality control gets inconsistent. Above that, you’re usually paying for a larger build or a subscription format, not better learning.
Can I refill or reuse a kit once the chemicals run out?
The tools — beakers, pipettes, magnets, circuit parts — are fully reusable. Many common kit chemicals can be replaced with household equivalents like baking soda, vinegar, and food coloring. Some brands also sell official refill packs, which are worth buying if your child loved the original experiments.
Do I need to supervise every experiment?
Stay in the room for every session with a child under 10, and directly handle or supervise any step involving heat, chemicals, sharp tools, or batteries. Older children can often run low-risk experiments (magnets, building, sorting) independently, but check the kit’s supervision warnings on the box first.
Halloween Picks
halloween
As an affiliate, we earn on qualifying purchases.





![Competitive Programmer's Handbook (2018) [Pdf]](https://geometr.info/wp-content/uploads/2026/10/competitive-programmer-s-handbook-2018-pdf-featured-260x140.jpg)