
To clean up a mesh, start by inspecting for holes caused by gaps in your topology and fix them using fill or bridge tools. Check for non-manifold edges, where geometry isn’t properly connected, and correct these to guarantee a clean structure. Simplify your mesh with decimation to reduce complexity while maintaining shape. Properly addressing these issues helps improve your model’s quality and performance. Keep exploring to discover more tips for effective mesh cleanup.
Key Takeaways
- Detect mesh holes early by inspecting wireframes for open edges and irregular faces.
- Fix holes by selecting surrounding edges and filling or bridging gaps using dedicated tools.
- Identify and repair non-manifold edges to ensure proper topology and prevent modeling issues.
- Use decimation techniques to reduce polygon count while maintaining essential details and shape.
- Maintain clean, quad-based topology and smooth surfaces to preserve mesh quality during cleanup.

Hasegawa Photo Etch Modeling Mesh 23 Hexagon Shape Medium Size for Duct Improvements
As an affiliate, we earn on qualifying purchases.
As an affiliate, we earn on qualifying purchases.
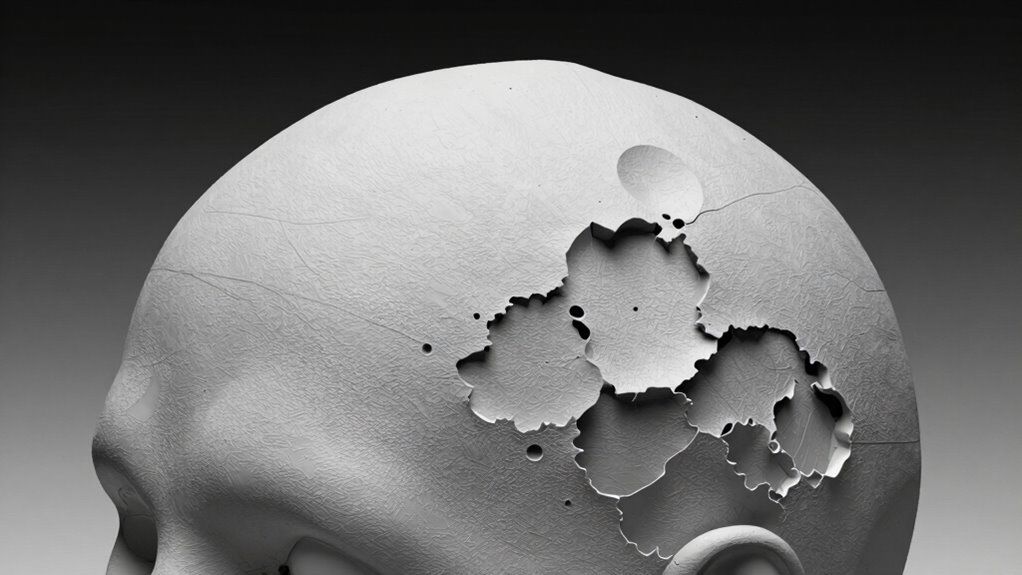
Mesh Holes: Causes, Detection, and Prevention

Mesh holes often occur when your model has gaps or missing faces, which can compromise the integrity of your 3D print or simulation. These holes typically happen due to poor wireframe topology, where edges and vertices aren’t properly connected, creating gaps in the mesh. Detecting these issues early involves inspecting the wireframe topology closely, looking for open edges or irregular face layouts. Preventive measures include maintaining uniform mesh density and applying mesh smoothing techniques to even out irregularities. Mesh smoothing helps improve the overall mesh quality, reducing the chances of holes forming during modeling or when preparing for printing. Additionally, utilizing European cloud infrastructure can facilitate more efficient processing and analysis of complex models, helping identify and resolve mesh issues proactively. Paying attention to wireframe topology and smoothing your mesh are crucial steps in minimizing holes and ensuring a more solid, reliable model. Proper mesh repair tools can further assist in automatically closing holes and fixing mesh defects, enhancing the overall model integrity. Regularly checking for topological issues during the modeling process can greatly decrease the likelihood of mesh holes developing later on. Incorporating dedicated mesh analysis tools can also aid in detecting subtle topological errors that might otherwise be overlooked.

Revopoint INSPIRE 2 3D Scanner for 3D Printing, Up to 0.03mm Precision, Multi-Line Laser&Structured Light, Handheld Wireless&Outdoor Scanning, Full-Color Scans, for iOS/Android/Windows/macOS, Premium
Wireless Scanning & Interactive Streaming: Built-in WiFi 6.0 enables on-the-go, structured light mobile scanning or real-time PC-to-mobile interactive…
As an affiliate, we earn on qualifying purchases.
As an affiliate, we earn on qualifying purchases.
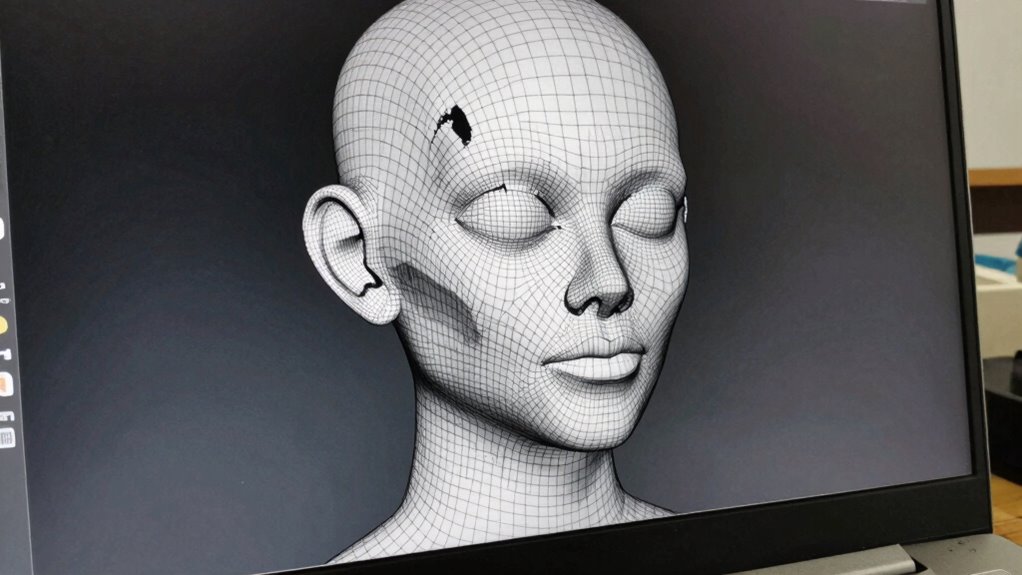
How to Fix Mesh Holes Step-by-Step
Wondering how to effectively repair holes in your mesh? Start by selecting the edges surrounding the hole. Use the fill or bridge tools in your 3D software to close the gap. Once the hole is filled, check your UV unwrapping to ensure proper texture mapping. You may need to re-unwrap the mesh to prevent stretching or distortions. When UV unwrapping, carefully adjust seams to minimize visible seams and maintain a clean texture flow. After filling the hole, smooth out the surrounding topology to create a seamless surface. This process helps preserve the mesh’s integrity, making the surface ready for detailed texturing. Additionally, paying attention to topology optimization can significantly improve the mesh’s overall quality and performance. Ensuring proper mesh cleanup contributes to a more efficient workflow and better final results. Fixing holes step-by-step ensures your mesh remains clean and optimized for further modeling, texturing, and rendering.

Algorithmic Decimation: The Geometric Architecture of Level of Detail: Polygons, Distance, and the Mathematical Deconstruction of 3D Meshes in Modern Game Rendering
As an affiliate, we earn on qualifying purchases.
As an affiliate, we earn on qualifying purchases.
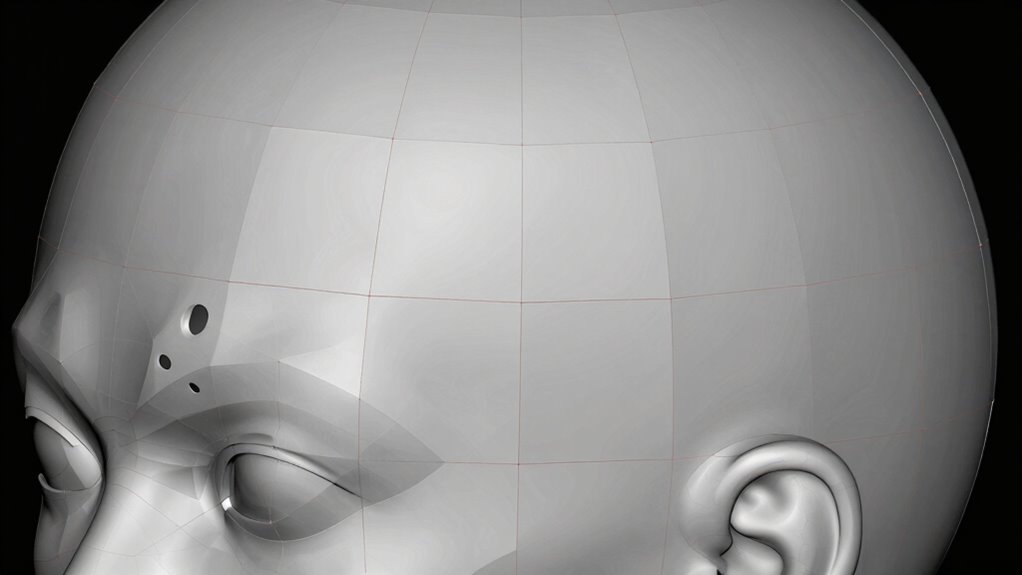
Repairing Non-Manifold Edges for Clean Topology
Non-manifold edges can cause serious issues in your topology, making your model difficult to edit, rig, or texture properly. To repair these, start by identifying non-manifold edges in your mesh, which often appear where multiple faces share a single edge or where edges connect in strange ways. To fix them, you need to remove or reconnect those problematic edges, ensuring each edge is shared by only two faces. Focus on maintaining proper edge looping and topology flow, as this helps your mesh deform smoothly and simplifies future edits. Use tools like dissolve, delete, or bridging to clean up non-manifold geometry. Keeping a clean, manifold mesh improves modeling efficiency and ensures your topology supports better subdivision, rigging, and texturing results. Attention to detail during this process is crucial for achieving a high-quality, clean topology. Understanding mesh topology principles can help prevent these issues from recurring and improve your overall modeling workflow. Additionally, regularly checking for non-manifold geometry can save time by catching problems early before they become complex to fix. Implementing regular topology checks ensures your mesh remains clean and optimized for any project, especially when dealing with complex models that require precise body jewelry measurements for proper fit.
non-manifold edge repair tools
As an affiliate, we earn on qualifying purchases.
As an affiliate, we earn on qualifying purchases.
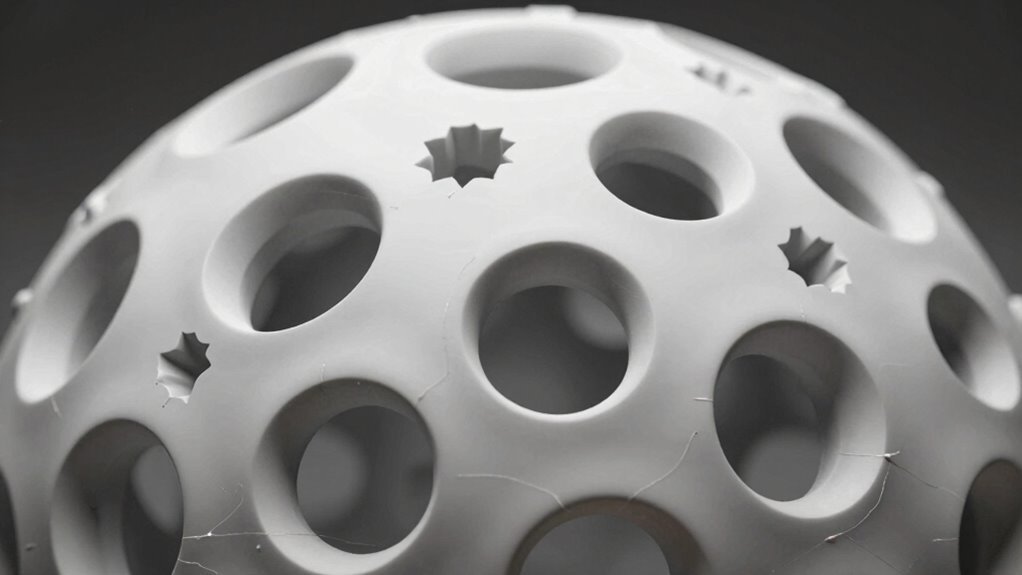
Simplify Your Mesh With Decimation Techniques
Decimation techniques provide an efficient way to reduce the complexity of your mesh without sacrificing essential detail. By applying vertex reduction, you can decrease polygon count while maintaining the shape’s integrity. This process helps improve performance and makes your model easier to handle. To get the best results, consider these key points:
- Balance vertex reduction with detail preservation to keep important features intact
- Use adaptive decimation to target areas with less visual importance
- Adjust decimation settings to control the level of simplification
- Regularly preview changes to ensure the mesh remains accurate and clean
These strategies help streamline your mesh, making it more manageable without losing vital details. Decimation is a powerful tool in your cleanup workflow, boosting efficiency while retaining essential visual fidelity.
Top Tips for Preserving Mesh Quality During Cleanup

While decimation techniques help reduce mesh complexity efficiently, maintaining high quality during cleanup requires careful attention. To preserve texture mapping, avoid excessive vertex removal that distorts UV layouts, which can cause stretching or seams. Focus on fixing non-manifold edges and holes early to prevent distortions that impact shader optimization. Keep an eye on mesh topology; clean, evenly distributed quads support better shading and surface detail. Use targeted smoothing instead of aggressive decimation, which can introduce artifacts. Regularly check how your mesh responds to texture mapping and shaders, adjusting vertices as needed. Maintaining good edge flow and avoiding unnecessary geometry helps ensure your cleanup process doesn’t compromise visual fidelity or rendering performance, resulting in a cleaner, more efficient mesh ready for further refinement. Additionally, understanding mesh topology is crucial for ensuring your mesh remains adaptable for future edits and deformations.
Frequently Asked Questions
How Does Mesh Cleanup Affect Rendering Performance?
Mesh cleanup improves rendering performance by optimizing your model’s geometry, which reduces the processing load on your graphics card. When you fix holes and non-manifold edges, you eliminate unnecessary data, making your mesh more efficient. Decimation simplifies complex models without sacrificing visual quality, further boosting rendering efficiency. Overall, these cleanup steps make certain your viewport navigation is smoother and faster rendering times, especially for detailed or high-poly models.
Can Automated Tools Fully Replace Manual Mesh Cleanup?
Automated tools can’t fully substitute manual mesh cleanup because they often miss subtle issues or make unwanted changes. While automated tools speed up the process and handle common problems, you still need manual cleanup for precision, complex repairs, and fine-tuning. Combining both approaches ensures a cleaner, more optimized mesh, improving rendering performance and visual quality. So, use automated tools as a starting point, but don’t skip manual inspection and adjustments.
What Are the Best Practices for Organizing Complex Meshes?
To organize complex meshes effectively, start with clear layer management—group related parts and keep your workspace tidy. Use consistent naming conventions for each layer and object, making it easier to identify and select elements quickly. Regularly clean up unused or redundant geometry, and keep your scene hierarchical. This approach saves time, reduces errors, and streamlines your workflow, ensuring your mesh remains manageable and easy to edit as it grows more complex.
How Do Different Software Handle Mesh Cleanup Differently?
Different software handle mesh cleanup differently by applying unique algorithms and cleanup techniques. Some prioritize automatic hole filling and edge merging, while others focus on manual control for precision. You’ll notice varied effectiveness with non-manifold edges and decimation processes, depending on the tool’s capabilities. To get the best results, explore each software’s algorithms and cleanup techniques, adapting your approach to match their strengths for a cleaner, optimized mesh.
Is There a Way to Prevent Mesh Issues During Initial Modeling?
To prevent mesh issues during initial modeling, focus on good modeling techniques and maintaining clean mesh topology. Use quads instead of triangles, avoid stretched or overlapping faces, and ensure edge flow supports deformation. Regularly check for non-manifold edges or holes, and keep your geometry simple and organized. These practices help create a solid foundation, reducing the need for cleanup later and guarantee your model stays clean from the start.
Conclusion
By understanding how to identify, fix, and prevent mesh holes, non-manifold edges, and excessive details, you guarantee your model remains clean, efficient, and ready for use. You maintain the integrity of your topology, streamline your workflow, and enhance your mesh’s quality. Focusing on detection, correction, and preservation, you build better models, avoid future problems, and elevate your 3D projects from rough to refined. Master these basics, and your mesh will always stand strong.