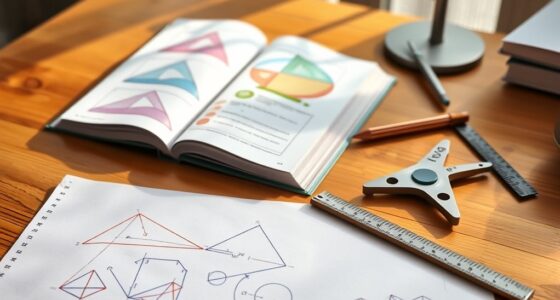
To build a minimalist home geometry lab, start with essential tools like a ruler, compass, protractor, and set square for precise drawing. Keep your space organized with labeled containers and dedicated zones for work and creativity. Use digital apps and puzzles to explore patterns and symmetry actively. Regularly update your setup and rotate projects to stay inspired. Continue exploring these tips to create an efficient, inspiring space for serious geometric learning and making.
Key Takeaways
- Use space-efficient furniture and organize tools with labeled containers to minimize clutter and maximize focus.
- Equip essential geometric tools like rulers, compasses, and protractors for precise drawing and measurements.
- Incorporate digital tools and software for exploring shapes, symmetry, and transformations without bulky equipment.
- Designate specific zones for different activities, keeping frequently used materials within easy reach.
- Regularly update and expand your setup with new tools or puzzles to sustain engagement and enhance learning.

STAEDTLER 10-Piece Math Set with Metal Compass, 6" Ruler & Triangle Squares, 45° & 30/60° Set Squares, Alphabet Stencil – Measuring Tools
COMPLETE DRAWING SET – This geometry set includes a metal compass, ruler, alphabet stencil, and two set squares…
As an affiliate, we earn on qualifying purchases.
As an affiliate, we earn on qualifying purchases.
Why a Minimal Setup Can Transform Your Home Geometry Experience
A minimal setup can substantially enhance your home geometry experience by removing unnecessary distractions and making tools more accessible. With space-saving furniture, you can create a clutter-free environment that maximizes your workspace without sacrificing comfort. This streamlined setup encourages focus, allowing you to concentrate on geometric concepts and projects. Digital design tools further simplify your process, offering powerful features without needing bulky equipment. These tools can be easily stored or accessed on a compact desk, keeping your area organized. A minimal approach minimizes stress and distraction, helping you develop a clearer understanding of geometric principles. Additionally, Free Floating techniques can be incorporated to optimize your layout and improve your learning environment. Incorporating ergonomic principles into your workspace design can also significantly enhance comfort and reduce fatigue during long study sessions. Embracing minimalist design can further promote a calm and efficient workspace, fostering better concentration. Implementing organized storage solutions can help keep your tools and materials in order, preventing clutter from accumulating over time. Overall, a simple, well-organized space boosts productivity, making your home geometry practice more effective and enjoyable.

GAOMON PD1161 Drawing Tablet with Screen, Digital Art Tablet with Battery-Free Stylus, Tilt, 8 Shortcut Keys for Paint, Design, Illustration, Editing, 11.6-inch Graphics Tablet for Mac, Windows PC
Please kindly note that GAOMON PD1161 drawing tablet is not a standalone tablet, It must be connected to…
As an affiliate, we earn on qualifying purchases.
As an affiliate, we earn on qualifying purchases.
Essential Tools and Materials for Your Home Geometry Setup
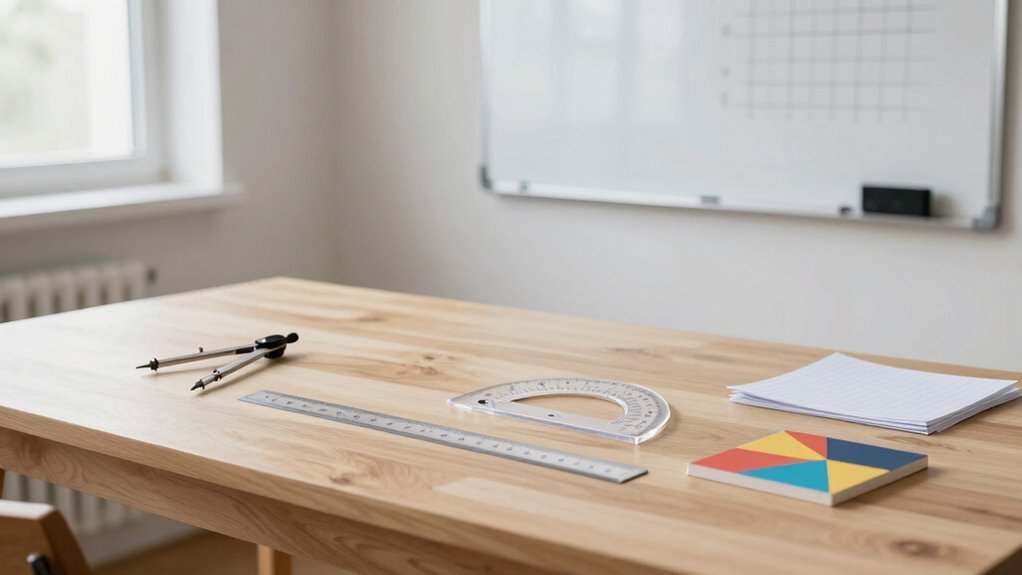
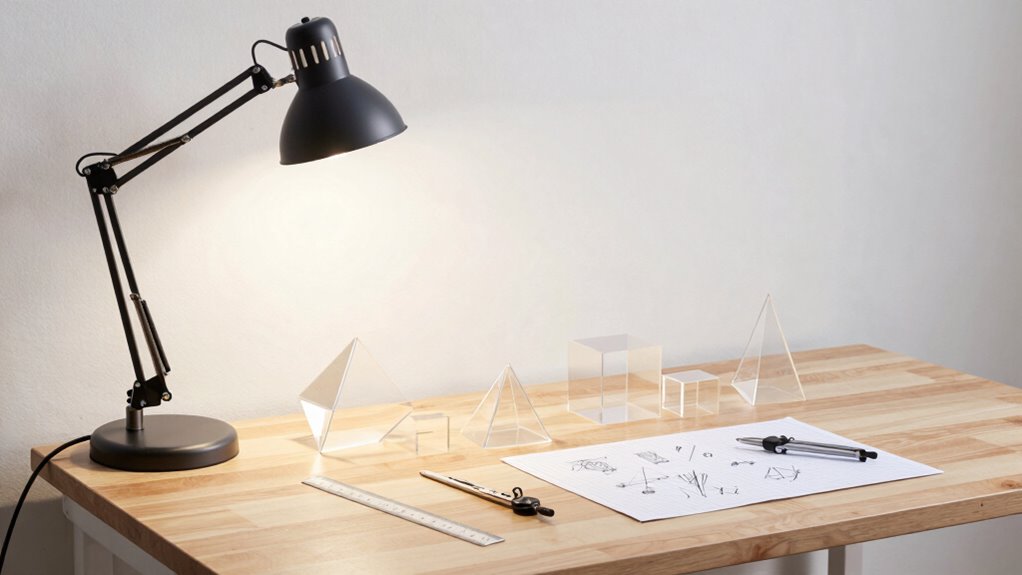
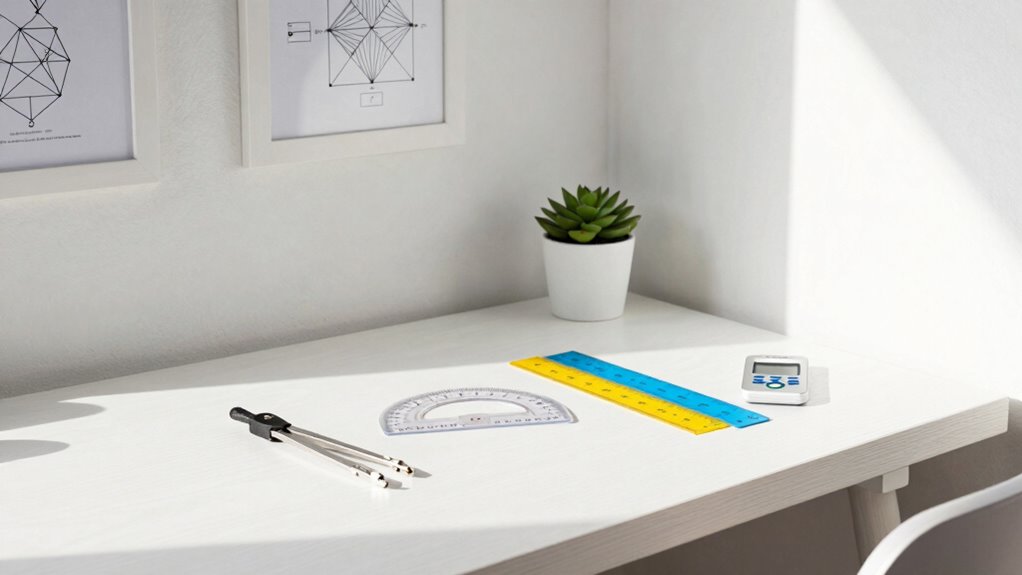
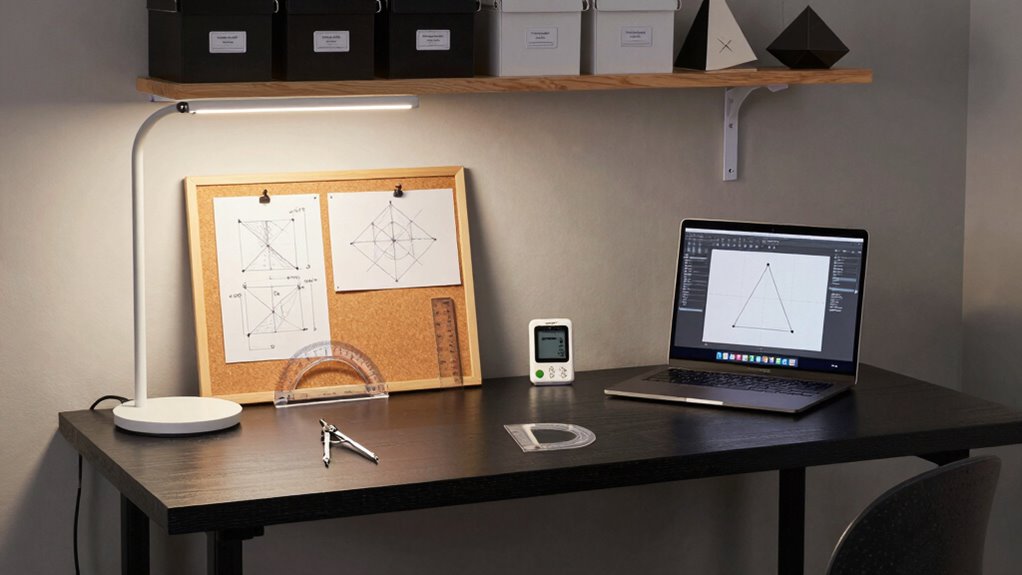
To create an effective home geometry setup, you’ll need essential tools that facilitate precise measurement and drawing. Geometric tools like a ruler, compass, protractor, and a set square are fundamental for accuracy. These tools help you construct accurate angles, circles, and lines, forming the backbone of your projects. In addition, gather creative materials such as graph paper, pencils, erasers, and colored markers to enhance your work and make learning more engaging. Quality tools improve the clarity and precision of your drawings, while creative materials inspire experimentation and visualization. Keep these items organized and within easy reach, so you can focus on exploring geometry concepts without interruption. This minimal collection sets a solid foundation for serious learning and creative problem-solving at home.

GeeBom 24QT 2Packs Clear Craft Organizers and Storage with Trays, Art Supply Organizer and Storage, Craft Storage Box with Lid for Beads, Markers, Coloring Books, Sewing, Playdoh and Tools
【Double-Layer Divided Design】This plastic storage box has compartment trays for classified storage. Great as a craft organizer, sewing…
As an affiliate, we earn on qualifying purchases.
As an affiliate, we earn on qualifying purchases.
Organize Your Space for Easy Access and Inspiration
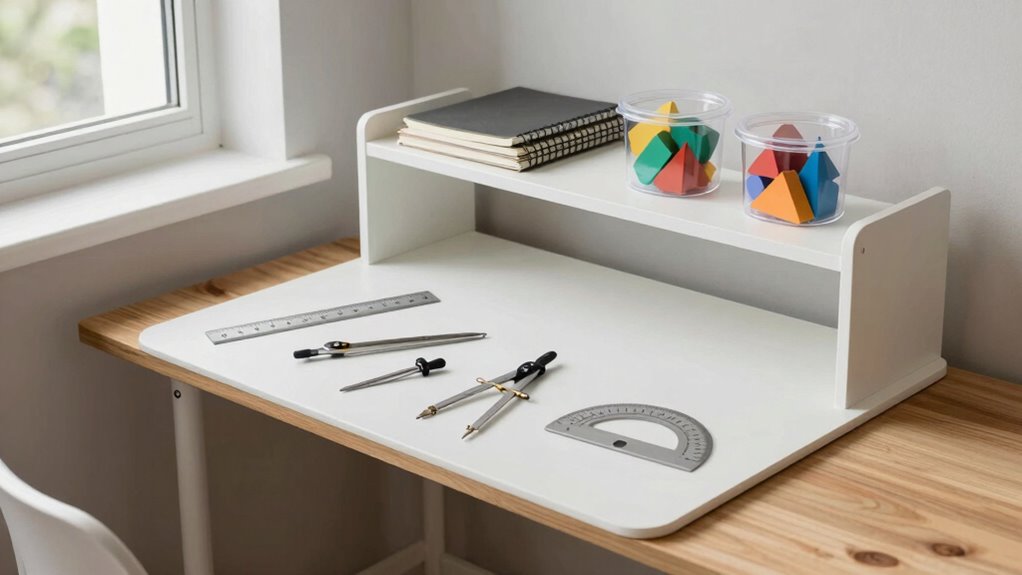
Creating an organized space for your home geometry lab guarantees that your tools and materials are always within reach, making your projects more efficient and enjoyable. Proper storage solutions keep everything tidy and accessible, reducing frustration. Consider using labeled containers, wall-mounted shelves, or drawers to categorize supplies. Pay attention to aesthetic considerations, like matching storage bins or using a clean, consistent color scheme, to inspire creativity. A well-organized environment encourages you to experiment freely without wasting time searching. Keep frequently used items nearby, and store less-used tools separately. Clear countertops and designated zones for different activities help maintain focus and flow. An orderly setup boosts motivation and makes your geometry projects more engaging and productive. Additionally, implementing storage organization principles can optimize your space and improve your workflow.

Armocity Small Folding Desk with Outlets, Convertible Writing Desk for Small Spaces/Home Office/Craft Room, Multi-Function Desk Workstation with Blackboard, Fold-Out Cabinet Table, White
Space-Saving Foldable Design – Maximize your living space effortlessly with Armocity's innovative foldable table. Its clever collapsible design…
As an affiliate, we earn on qualifying purchases.
As an affiliate, we earn on qualifying purchases.
Creative Activities and Projects to Maximize Your Geometry Lab
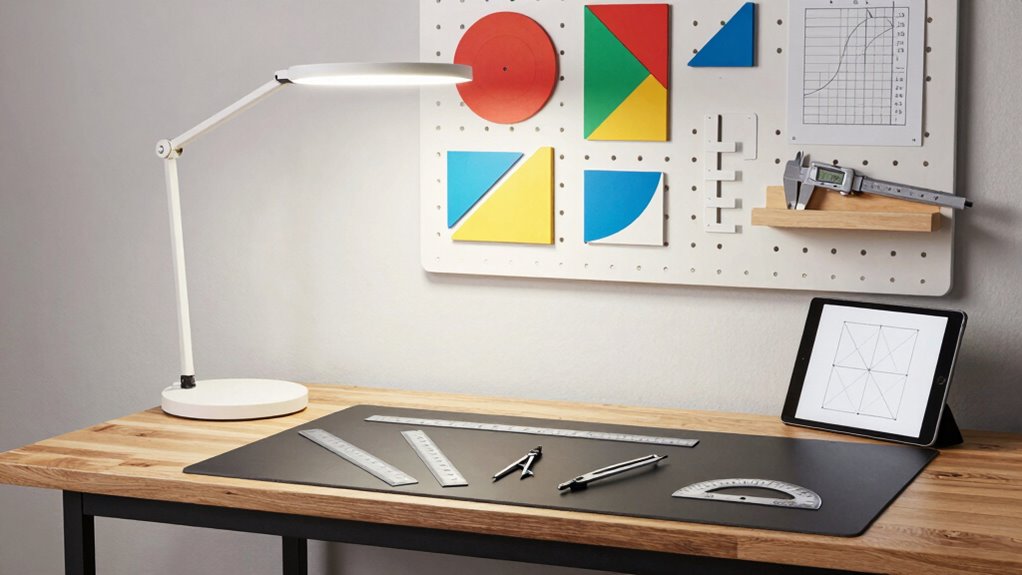
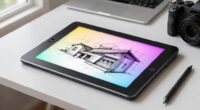
With your space organized and tools at the ready, it’s time to explore engaging activities that bring your geometry lab to life. Digital drawing lets you experiment with shapes, angles, and patterns effortlessly, sharpening your understanding of geometric concepts. Use simple software or apps to create intricate designs, analyze symmetry, or explore transformations. Additionally, tackle geometric puzzles—such as tangrams or pattern-based challenges—that test your spatial reasoning and problem-solving skills. These activities make learning active and fun, encouraging you to think critically about shapes and structures. Incorporating both digital drawing and puzzles keeps your practice dynamic, inspiring creativity while solidifying your grasp of geometry fundamentals. This approach transforms your setup into a vibrant lab for exploration and discovery.
How to Maintain and Expand Your Home Geometry Lab Over Time
Maintaining and expanding your home geometry lab requires regular updates and thoughtful organization to keep your exploration fresh and engaging. To support ongoing skill development, consider revisiting your storage solutions to keep tools accessible and organized. As you grow more confident, add new materials like advanced compasses or geometric modeling kits. Regularly evaluate your setup to identify what works best and what needs improvement. Keep your workspace flexible to accommodate new projects and ideas. You might also dedicate time to learning new techniques or exploring different branches of geometry. Staying proactive ensures your lab continues to inspire curiosity and learning.
- Refresh storage solutions for better organization
- Invest in new tools to challenge your skills
- Rotate projects to maintain engagement
- Schedule periodic evaluations of your setup
Frequently Asked Questions
How Much Space Do I Need to Create an Effective Geometry Lab at Home?
You’ll need at least a 6×8 foot space for an effective geometry lab, providing enough room for your work surface and movement. Opt for room dimensions that accommodate storage solutions like shelves or bins for tools and materials. A dedicated corner or small room works well, ensuring you have enough space to spread out, experiment, and learn comfortably without feeling cramped. Prioritize organization to maximize your setup’s efficiency.
Can I Include Digital Tools in My Minimal Geometry Setup?
Sure, you can totally include digital tools in your minimal geometry setup—because who doesn’t love a little tech magic? Integrating software like GeoGebra or CAD programs enhances your learning and makes geometric concepts come alive. It’s surprisingly simple to blend digital tools with traditional methods, giving you a versatile, modern lab. Just remember, the goal’s serious learning, so choose tools that genuinely boost understanding without turning your space into a tech jungle.
What Safety Precautions Should I Consider for At-Home Geometric Experiments?
You should wear protective gear like goggles and gloves during at-home geometric experiments, especially if you work with sharp tools or chemicals. Make sure good ventilation to prevent inhaling dust or fumes. Keep your workspace clean and organized to avoid accidents. Always read safety instructions for any materials or tools you use, and never skip safety precautions. These steps help keep your learning environment safe and enjoyable.
How Do I Personalize My Geometry Workspace for Different Learning Levels?
Did you know that personalized learning improves retention by 74%? To adapt your geometry workspace for different levels, incorporate flexible tools like adjustable protractors and rulers. Use colorful shapes for beginners, and move to more complex models for advanced learners. Set up a dedicated area that allows for hands-on activities and easy access to resources. This way, your workspace becomes a dynamic environment that fosters growth through adaptive tools.
Are There Affordable or DIY Options for Specialized Geometric Tools?
Yes, you can find affordable options or create DIY tools for specialized geometry needs. For example, use cardboard or plastic for makeshift compasses, protractors, and rulers. You can also repurpose household items like paper clips for drawing circles or use a protractor printed from online templates. These DIY tools are budget-friendly and effective, making it easy to customize your geometry workspace without spending much.
Conclusion
Setting up your home geometry lab is like planting a seed—you’ll nurture it with curiosity and watch your skills grow. Remember, even a simple setup can spark big ideas; I once started with just a ruler and a notebook, and soon I was creating intricate designs I never thought possible. Keep experimenting, organizing, and expanding, and your space will become a fertile ground for learning and discovery. Your geometric journey is just beginning—enjoy every step!