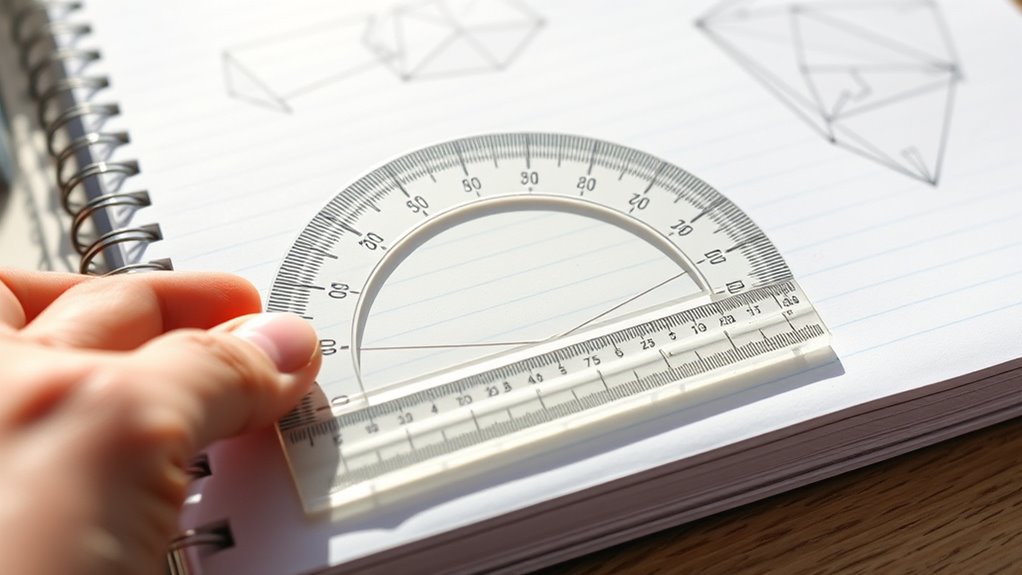

To measure angles with a protractor, start by drawing the angle and placing the protractor’s baseline along one side. Make sure the center hole or midpoint lines up with the vertex—where the lines meet. Keep the protractor steady and note where the other side crosses the curved edge, reading the degree mark carefully. Use the outer scale for angles less than 180°. Keep practicing, and you’ll gain confidence in accurately determining various angles.
Key Takeaways
- Draw the angle and align the protractor’s baseline with one side.
- Place the protractor’s center hole over the vertex of the angle.
- Ensure the zero mark on the protractor lines up with the baseline.
- Read the degree measurement where the second line crosses the protractor’s curved edge.
- Use the appropriate scale (inner or outer) depending on the angle size for accurate reading.

Have you ever wondered what shapes and sizes make up the world around you? When you look at a building, a piece of art, or even a simple slice of pie, you’re seeing angles in action. Understanding how to measure angles is a fundamental part of geometry, and the key tool for this is a protractor. Before you start measuring, it helps to know about different angle types—acute, right, obtuse, and straight angles—and how they relate to the way you use a protractor. Each of these angles has a specific measurement range, and recognizing them makes your measurements more meaningful. For example, an acute angle is less than 90 degrees, a right angle is exactly 90 degrees, an obtuse angle is more than 90 but less than 180 degrees, and a straight angle is exactly 180 degrees. Identifying these types helps you anticipate what to expect when measuring and ensures you read your protractor accurately.
Constructing a protractor might sound complicated, but it’s quite straightforward. Most protractors are semi-circular with degree markings from 0 to 180, and they often have a small hole or a notch at the center of the flat edge. To measure an angle, you start by drawing the two lines that form the angle on your paper. Make sure they intersect at a common point, which is the vertex of the angle. Place the protractor so that its baseline aligns with one of the lines, ensuring the midpoint or center hole sits directly over the vertex. This positioning guarantees that your measurement is precise. Next, carefully read the degree mark on the protractor where the second line crosses the curved edge. Be sure to look at the correct scale—most protractors have two, so double-check which one gives the smaller or larger measurement depending on the size of your angle.
If your angle is less than 180 degrees, you’ll typically use the outer scale, but for angles larger than 180 degrees, you might need to use the inner scale or simply subtract from 360. Once you identify the degree mark, you’ve successfully measured the angle! Remember, accuracy depends on how well you align the protractor and read the markings. With practice, you’ll become adept at constructing and reading protractors, enabling you to analyze and create precise angles in your drawings, projects, or everyday observations. Measuring angles accurately opens a window to understanding the world’s geometric structure, and mastering the protractor is your first step toward that understanding. Glycolic acid benefits for skin can include enhanced radiance and texture, much like the precise measurement of angles helps us understand shapes better.

Large Teaching Protractor – Large Classroom Protractor | Digital Design Math Teaching Protractor | Oversized Teaching Compass Protractor | Erase Board Teaching Protractor for Engineer Dry Erase Board
As an affiliate, we earn on qualifying purchases.
As an affiliate, we earn on qualifying purchases.
Frequently Asked Questions
How Do I Measure Reflex Angles With a Protractor?
To measure reflex angles with a protractor, first identify the angle’s vertex and draw the angle clearly. Measure the smaller, internal angle using the protractor, then subtract this measurement from 360 degrees to find the reflex angle. Reflex angles are larger than 180 degrees, so this subtraction gives you the correct angle measurement. Make sure your protractor is aligned properly for accurate results.
Can a Protractor Measure Angles in Three Dimensions?
A standard protractor measures angles in two dimensions, so it can’t directly measure angles in three-dimensional geometry. To find 3D angles, you need specialized tools like a goniometer or use mathematical methods involving projections and calculations. These tools help you understand the spatial relationships between planes and lines, giving you accurate angle measurements in three dimensions, which a regular protractor simply can’t do.
What Is the Difference Between a Protractor and a Ruler?
A protractor is specifically designed for angle measurement, helping you accurately determine the size of angles. A ruler, on the other hand, is a tool comparison used mainly for measuring lengths and drawing straight lines. While a ruler measures distances in inches or centimeters, a protractor helps you find the degree of an angle. Both are essential in geometry, but each serves a distinct purpose for different measurements.
How Do I Measure an Angle on a Curved Surface?
To measure an angle on a curved surface, you’ll need a flexible or adjustable tool like a custom angle gauge or a flexible ruler. Position it along the curve, ensuring it follows the surface’s shape. Mark the points where the angle begins and ends, then transfer those points onto a flat surface. Use a protractor to measure the angle, giving you an accurate angle measurement on curved surfaces.
Are Digital Protractors More Accurate Than Traditional Ones?
Digital protractors are like high-tech scouts, offering enhanced measurement precision over traditional ones. They often feature digital calibration, ensuring your readings stay accurate over time. This makes them more reliable when exact angles matter most. While traditional protractors are simple and straightforward, digital versions minimize human error, giving you confidence in your measurements. So, if precision is your goal, digital protractors are definitely more accurate and dependable.

GemRed 82305 Digital Angle Finder GemRed Protractor Stainless steel 7inch 200mm (Black Button)
PATENTED MEASURING TECHNOLOGY — Ruler and protractor combination for easy measuring inside and outside angles.
As an affiliate, we earn on qualifying purchases.
As an affiliate, we earn on qualifying purchases.
Conclusion
Now that you know how to measure angles with a protractor, you’re ready to explore more about geometry. Think of your protractor as a trusty compass guiding you through the world of shapes and angles, just like a lighthouse lights the way for ships. With practice, measuring angles will become second nature, opening doors to new mathematical adventures. Keep practicing, and soon you’ll be an angle-measuring pro, steering through geometry like a skilled captain steering through calm waters.

Mr. Pen Geometry Set with 6 Inch Swing Arm Protractor, Divider, Set Squares, Ruler, Compasses and Protractor, 15 Piece Set
Geometry Set For All Levels Designed in USA
As an affiliate, we earn on qualifying purchases.
As an affiliate, we earn on qualifying purchases.

4" Protractor, Open Center – Clear Plastic, Set of 12
Base Ten Block Representation: Visualize hundreds, tens, and ones on one side of the mat.
As an affiliate, we earn on qualifying purchases.
As an affiliate, we earn on qualifying purchases.