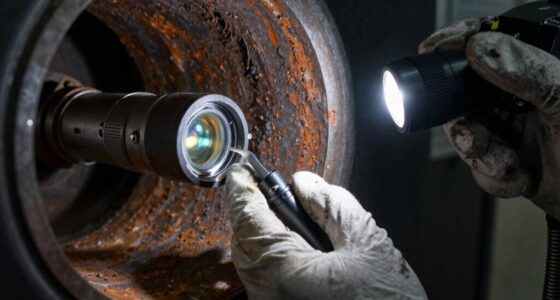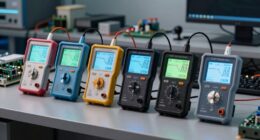

To make your measurement reports look professional, set up your photos with a clear background and even, diffused lighting to eliminate shadows. Use a stable camera position, like a tripod, and frame your shots carefully to highlight measurement points while including reference scales nearby. Focus sharply and keep settings consistent across images. Avoid common mistakes like poor lighting or inconsistent angles. Following these tips guarantees your photos add credibility and clarity—continue exploring for detailed techniques to perfect your setup.
Key Takeaways
- Use consistent, neutral backgrounds and diffuse lighting to ensure clarity and minimize shadows or glare.
- Incorporate measurement scales or reference objects close to measurement points for accurate sizing.
- Stabilize your camera with tripods or steady surfaces to prevent blurriness and ensure sharp images.
- Choose optimal angles and framing to clearly highlight measurement areas, avoiding distortion or obstructions.
- Maintain uniformity in lighting, positioning, and composition across all photos for cohesive, professional reports.
Why Clear Measurement Photos Are Key for Professional Reports

Clear measurement photos are essential because they provide undeniable visual evidence that supports your report’s findings. Following measurement standards ensures your photos are accurate and consistent, which bolsters your credibility. Proper photo documentation captures precise details, making it easier for others to verify measurements and understand your data. When photos are clear and well-lit, they eliminate ambiguity and reduce the risk of misinterpretation. Consistent photo documentation also helps create a professional appearance, demonstrating your attention to detail. Using established measurement standards in your photos ensures uniformity across reports, which is crucial for comparison and validation. Additionally, understanding the importance of calibration can improve the accuracy of your measurement photos. Implementing standardized procedures for documentation further enhances the reliability of your visual data. Incorporating smart home technology can also streamline your measurement process and improve consistency. Being aware of measurement accuracy and how it impacts your reports can help you maintain high-quality documentation. Recognizing the role of measurement standards helps ensure your photos meet industry expectations. Ultimately, clear measurement photos strengthen your report’s integrity, providing a solid visual foundation that enhances its reliability and professionalism.
Pick the Best Background and Lighting for Consistent Results
Choosing the right background and lighting is essential for capturing consistent measurement photos. Start with background selection that’s neutral and uncluttered, such as plain white or gray, to avoid distractions and guarantee measurements stand out clearly. Lighting consistency is equally important; use even, diffused light to eliminate shadows and glare that can distort measurements. Position your light source so that it evenly illuminates your subject without creating harsh shadows. Avoid direct sunlight or uneven lighting setups, as these can cause variations in your photos. Consistent background and lighting conditions help maintain uniformity across your images, making it easier to compare measurements accurately. Incorporating energy-efficient lighting solutions can further enhance the quality and sustainability of your setup. Additionally, selecting appropriate crochet or knitting tools can help ensure your setup remains organized and professional-looking. Maintaining proper lighting techniques is crucial for achieving reliable and professional results in your documentation process, especially when aiming for consistent measurement accuracy. Using proper setup planning can also help streamline your process and improve overall results.
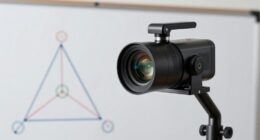
How to Set Up Your Camera or Smartphone for Sharp Photos

To capture sharp photos, prioritize good lighting to prevent blur and guarantee clarity. Use stabilization equipment like a tripod or steady surface to keep your camera or smartphone still during the shot. Proper setup makes a noticeable difference in the crispness of your images. Additionally, understanding your camera or smartphone’s sensor capabilities can help you optimize settings for clearer photos. Being aware of how different lighting conditions affect your camera’s performance can further enhance image quality. Regularly checking and maintaining your camera equipment, such as cleaning lenses and sensors, also contributes to achieving sharper images. Paying attention to camera settings and adjusting them appropriately can make a significant difference in your results. Familiarizing yourself with photo composition techniques can also improve the professionalism of your reports.
Focus on Lighting
Lighting plays a crucial role in capturing sharp, well-defined photos with your camera or smartphone. Natural light is ideal because it provides even, soft illumination that reduces shadows and enhances detail. Whenever possible, shoot during the day near windows or outdoors in diffused sunlight. When natural light isn’t available, artificial lighting becomes indispensable. Use consistent, bright light sources to prevent shadows and blurry images. Position your light source to evenly illuminate your measurement area, avoiding harsh shadows or reflections. Adjust the brightness or add diffusers if needed. Remember, good lighting ensures your photos are clear, detailed, and professional-looking. Proper lighting setup minimizes the need for post-editing and ensures your measurements are accurately documented. Additionally, understanding lighting techniques can help you optimize your setup for the best results. Using the right lighting equipment can also make a significant difference in your photo quality. Taking the time to learn about lighting setup can greatly improve the clarity and professionalism of your reports, especially when you incorporate proper lighting positioning for optimal results. Incorporating consistent lighting conditions helps maintain uniformity across all your documentation.
Use Stabilization Equipment
Using stabilization equipment helps guarantee your photos stay sharp and clear, especially when documenting measurements. A sturdy tripod ensures maximum stability, preventing blur caused by hand movement. When using handheld techniques, keep elbows close to your body and steady your breathing for better results. If a tripod isn’t available, consider using a monopod or stabilization tools like gimbals. These options boost tripod stability and reduce camera shake. To help you compare, here’s a quick overview:
| Stabilization Method | Best For |
|---|---|
| Tripod | Precise, long exposure shots |
| Handheld techniques | Quick, flexible shots |
| Monopod | Moderate stability, mobility |
| Gimbals | Moving shots, video recording |
| Wall or surface | Extra support for sharpness |
Choose the right method to keep your photos crisp and professional. Additionally, camera sensors and lens quality also influence image sharpness, so selecting the right equipment can make a significant difference. Proper stabilization techniques are especially important when working with low-light conditions, as they help prevent blurring caused by longer exposure times. Incorporating navigation and mapping knowledge can further improve your setup by ensuring your camera remains steady when capturing complex measurement environments. Using additional stabilization accessories like remote triggers can also help minimize vibrations during long exposures. Understanding tool ergonomics can further enhance your ability to hold equipment steadily during critical shots.
Frame and Position Your Shots for Maximum Clarity

Properly framing and positioning your shots is essential for capturing clear and impactful images. Start by choosing the right camera angles to highlight the measurement area clearly. Use shot framing techniques to focus on the object or measurement point, keeping it centered and well-lit. Avoid awkward angles that distort proportions or obscure details. Keep your camera level and steady to prevent blurring, and position your shot to minimize background distractions. Adjust your distance so the entire measurement is visible without unnecessary space. Consistent framing ensures your images are easy to interpret and compare. Additionally, proper lighting plays a crucial role in enhancing clarity and detail in your photos. Remember, clear camera angles and precise shot framing are key to producing professional-quality documentation that accurately conveys measurements.
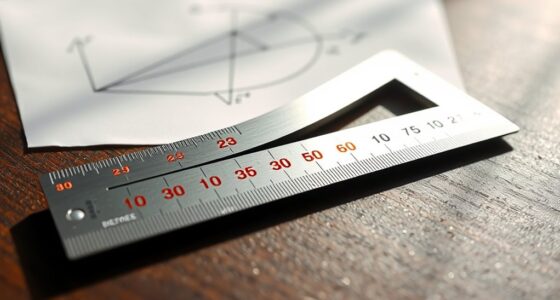
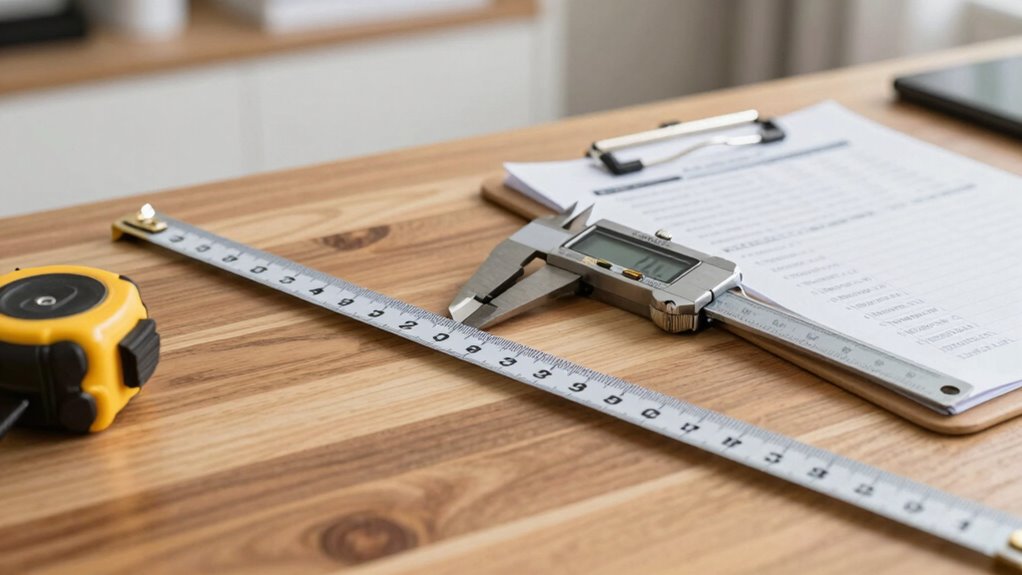
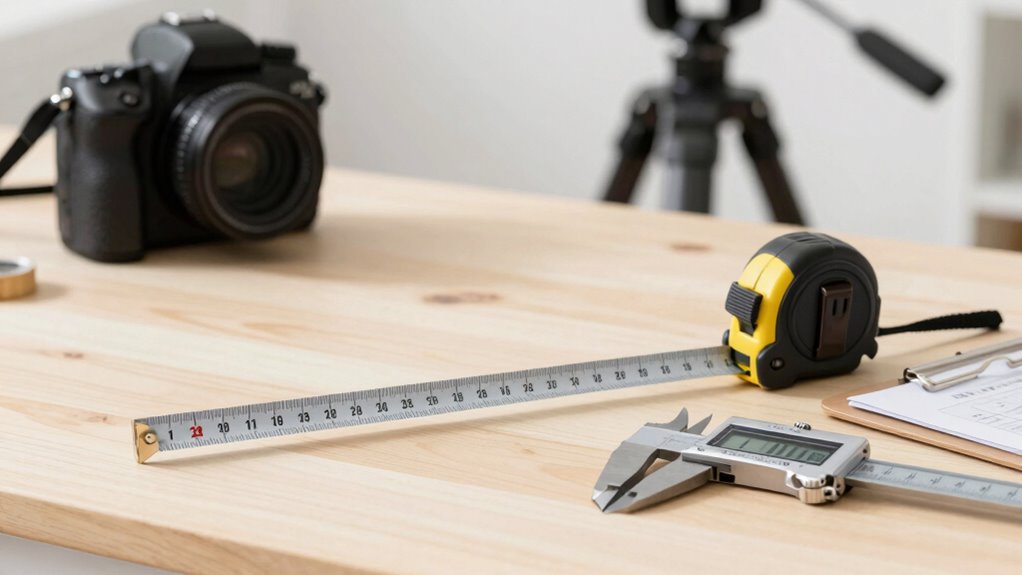
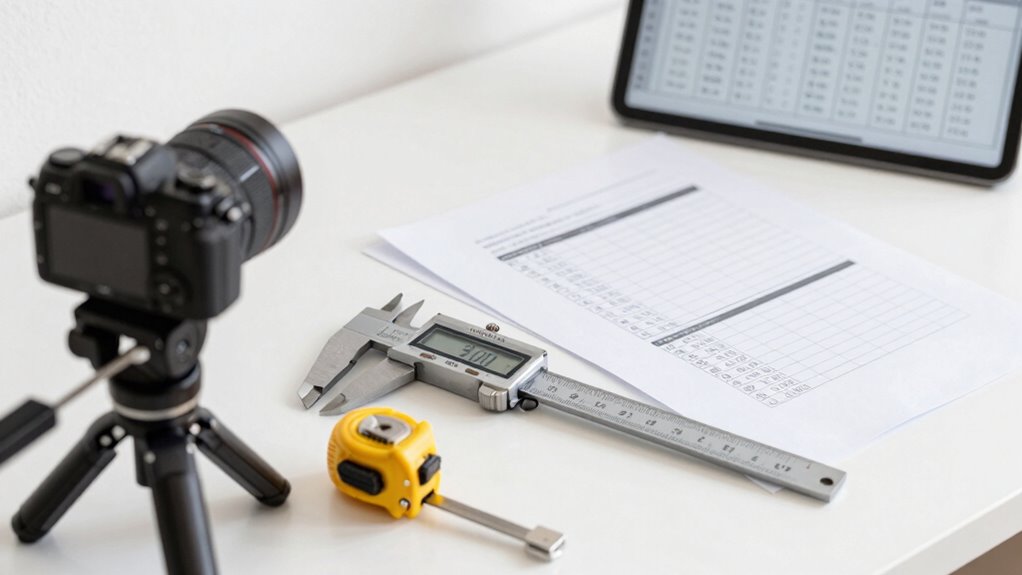
Add Scale References to Show Exact Dimensions

Adding scale references to your photos guarantees that viewers can accurately interpret the measurements. By including objects like rulers, measuring tapes, or standardized items, you establish clear points of reference. This enhances measurement accuracy, guaranteeing that anyone reviewing the photos can determine exact dimensions without ambiguity. Place the scale reference close to the object or area being documented, and ensure it’s visible and in focus. Use consistent lighting and positioning to prevent distortion. When presenting measurement data, clear scale references eliminate guesswork and improve credibility. Remember, the goal is to make measurements understandable at a glance. Properly added scale references give your photos a professional edge, making your reports precise and trustworthy.
Focus and Exposure Tips for Highlighting Details

To effectively highlight details, you need to use proper focus techniques that keep your subject sharp and clear. Adjust your exposure settings carefully so that important features aren’t overexposed or lost in shadow. By highlighting key details clearly, you ensure your measurements are accurately represented and easy to interpret.
Use Proper Focus Techniques
When you want to highlight intricate details in your photographs, mastering focus techniques is essential. Use autofocus settings that prioritize the subject’s sharpness and enhance depth perception, making details stand out. Focus on the precise point you want to emphasize, and consider using manual focus for fine control. Adjust your aperture to increase depth of field, ensuring more of the detail remains in focus. Here’s a quick guide:
| Focus Technique | Best Use | Tips |
|---|---|---|
| Autofocus Mode | Moving subjects or quick captures | Use single-point focus |
| Manual Focus | Fine detail or stationary objects | Use live view for accuracy |
| Focus Lock | Re-composing shots with precise focus | Lock focus before framing |
| Deep Depth of Field | Highlighting fine textures and details | Use smaller aperture (f/8-f/16) |
Adjust Exposure Settings Precisely
Adjusting exposure settings accurately is key to capturing detailed photographs that truly stand out. Start by calibrating your light meter to ensure correct exposure readings, preventing overexposure or underexposure. Use your light meter to measure the light falling on your subject, and make adjustments accordingly. Focus on aperture optimization: a wider aperture lets in more light, which is ideal for low-light conditions, while a narrower aperture provides greater depth of field for sharpness across your image. Keep your ISO settings low to avoid noise, and fine-tune shutter speed to balance brightness without causing motion blur. By carefully calibrating your light meter and optimizing your aperture, you’ll achieve precise exposure that highlights minute details, making your measurements look professional and clear.
Highlight Key Details Clearly
Highlighting key details in your photographs requires careful control of focus and exposure. To guarantee measurement accuracy, focus sharply on the measurement markings or areas of interest. Use manual focus if possible, so you avoid accidental blurring. Adjust exposure settings to prevent overexposure, which can wash out important details, or underexposure, which hides critical features. Proper lighting and a balanced exposure help emphasize the measurement points clearly. When details are highlighted effectively, your report presentation becomes more professional and credible. Clear visuals aid viewers in understanding precise measurements, reducing misinterpretation. Consistent focus and exposure adjustments make your documentation reliable and precise, ultimately enhancing the overall quality and trustworthiness of your reports.
Keep Photos Consistent for Cohesive Reports
Have you ever noticed how inconsistent photos can disrupt the flow of a report? To keep your reports professional and cohesive, focus on maintaining lighting consistency and uniform photo framing. Use the same light sources and settings for all shots to avoid distracting shadows or glare. Consistent framing means keeping the subject centered and at a similar distance across photos, which helps viewers easily compare measurements. Take time to establish a clear shot composition and stick to it. This uniformity not only improves the report’s visual appeal but also makes it easier for others to interpret your data accurately. Remember, small adjustments in lighting and framing can considerably enhance the overall quality, creating a seamless, polished presentation of your measurements.
Common Mistakes to Avoid When Documenting Measurements
While maintaining consistent photos improves report professionalism, overlooking common mistakes during measurement documentation can undermine your efforts. One common pitfall is neglecting proper scale references, which compromises documentation accuracy. Be sure to include a clear, visible scale in every shot. Another mistake is inconsistent angles or lighting, making comparisons difficult and reducing clarity. Avoid rushing through photos; poor focus or blurry images hinder analysis. Also, failing to record measurements immediately can lead to errors or forgotten details. Confirm each photo is timestamped and labeled accurately. Finally, don’t ignore environmental factors like shadows or obstructions, which can distort measurements. Recognizing these common pitfalls helps you produce precise, reliable documentation that enhances your report’s credibility and professionalism.
Final Tips: Editing and Annotating for Clear Reports
To guarantee your report is clear and professional, focus on thorough editing and precise annotation of your photos and measurements. Effective photo editing enhances clarity, while annotation techniques highlight key details. Use consistent fonts, labels, and arrows to direct attention. Review each image carefully, removing distractions and sharpening important features. Annotate with clear, concise notes that complement your measurements. Consider this emotional impact:
| Confidence | Clarity | Credibility |
|---|---|---|
| Precise edits | Clear labels | Trustworthy data |
| Sharp images | Highlighted details | Professional appearance |
| Consistent style | Easy to understand | Accurate reporting |
| Proper annotations | Visual emphasis | Reliable results |
| Well-organized | Clear communication | Expert impression |
Mastering these tips ensures your reports are not only accurate but also visually compelling and easy to interpret.
Frequently Asked Questions
What Camera Settings Are Ideal for Low-Light Measurement Photos?
For low-light measurement photos, you should set your camera to a wide aperture, like f/2.8 or lower, to let in more light. Use a slow shutter speed, but avoid motion blur, and increase ISO cautiously to enhance brightness without introducing noise. Employ lighting techniques such as additional light sources if possible. Confirm proper camera calibration before shooting to maintain measurement accuracy and consistency in your reports.
How Can I Ensure Consistent Photo Angles Across Multiple Reports?
To guarantee consistent photo angles across reports, you should use calibration techniques like marking your setup or using a tripod with adjustable guides. Focus on maintaining proper photo composition by aligning your camera at the same height and distance each time. Take your shots systematically, double-checking angles before capturing. This consistency improves report professionalism and accuracy, making your measurements clear and reliable for future comparisons.
What Accessories Improve Measurement Photo Accuracy and Clarity?
Want clearer, more accurate measurement photos? You should use accessories like a sturdy tripod to guarantee stability and prevent blurriness. Lighting diffusers help reduce shadows and glare, making details pop. These tools improve both accuracy and clarity, giving your reports a professional look. Are you maximizing your setup? Investing in quality accessories ensures consistent, precise photos that impress clients and streamline your documentation process.
How Do I Choose the Best Resolution for Detailed Measurement Images?
You should choose a high resolution for detailed measurement images to guarantee superior resolution optimization and maximum image clarity. Aim for the highest quality your camera allows without sacrificing file manageability. Use the camera’s settings to increase pixel count and avoid compression. This way, your photos will capture fine details precisely, making measurements more accurate and reports look professional. Always review images on a larger screen to verify clarity before finalizing.
Are There Specific Apps or Tools for Annotating Measurement Photos?
You can find excellent measurement annotation tools within popular photo editing apps like Adobe Photoshop, Lightroom, or even free options like GIMP and Pixlr. These tools let you add precise labels, arrows, and scales directly onto your measurement photos. By choosing apps with robust photo editing features, you guarantee your annotations are clear and professional. This saves you time and makes your reports more effective and visually appealing.
Conclusion
Mastering measurement photos isn’t just about looks—accurate images build trust and credibility in your reports. When you follow proper setup, lighting, and framing, you guarantee your measurements are clear and reliable. Think of it like a well-constructed argument: every detail matters. By avoiding common mistakes and adding helpful annotations, you create professional reports that stand out. Trust in your process, and your documentation will always impress, proving that quality visuals truly make a difference.