TL;DR
Open a free Amazon Business account
Business pricing, bulk buying and tax-exempt orders.
Create a free accountAs an affiliate, we earn on qualifying purchases.
The right gimbal stabilizer enhances photogrammetry by providing sharp, consistent images with accurate orientation. The best choice depends on your platform, payload, and project specifics, not just stabilization features.
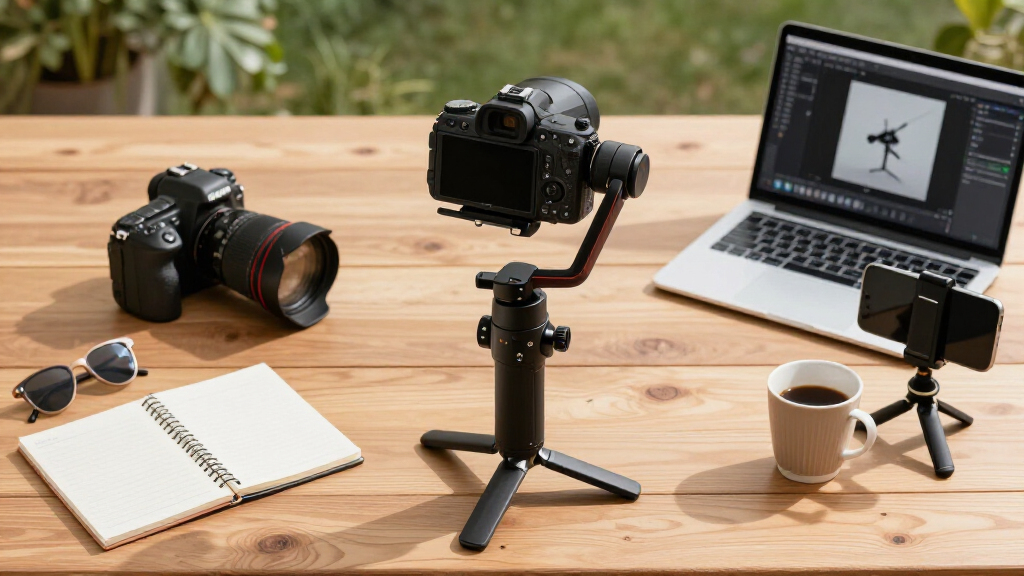
Photogrammetry demands more than just a steady hand or smooth footage — it requires precise, repeatable camera positioning and sharp images. When your goal is detailed 3D models or accurate mapping, a gimbal isn’t just a stabilizer; it’s a vital part of the measurement chain.
Choosing the best professional camera gimbal stabilizer depends on your platform — handheld, vehicle, drone — and your project’s accuracy needs. This guide will walk you through the options, criteria, and latest innovations to help you select a system that makes every shot count.
Choose a gimbal with sufficient payload capacity and high repeatability features to ensure consistent, accurate imagery.
Prioritize systems that support precise orientation logging, trigger synchronization, and environmental durability for survey-grade results.
A gimbal is most valuable for handheld, vehicle, or oblique captures; for aerial grid mapping, a rigid, calibrated mount often suffices.
Keep your gear well-calibrated, plan your overlaps, and lock camera settings to maximize data quality.
Stay aware of recent innovations like high-precision encoders and automation tools that improve measurement accuracy and workflow efficiency.
Why Your Gimbal Must Do More Than Just Smooth Your Video
For photogrammetry, stability isn’t just about eliminating jitters. It’s about ensuring every image is sharp, consistently oriented, and precisely timed. A gimbal that only smooths footage may fail to provide the repeatability and accuracy needed for high-quality 3D reconstruction.
Imagine capturing a building façade. A cinematic gimbal might produce beautiful, flowing shots, but slight variations in angle or position across frames can distort the final model. Instead, you need a gimbal that locks axes, provides repeatable angles, and supports accurate metadata logging. These features allow for precise georeferencing and reduce the need for post-processing corrections, which can be time-consuming and introduce errors. The tradeoff is that measurement-grade gimbals often require more careful calibration and may be heavier or more complex to operate, but the benefits in accuracy outweigh these drawbacks for professional surveying applications.
professional camera gimbal stabilizer for photogrammetry
As an affiliate, we earn on qualifying purchases.
As an affiliate, we earn on qualifying purchases.
How to Pick the Right Gimbal Based on Your Platform and Payload
- Assess your camera and lens: Include everything from sensor size to lens extension, filters, and external accessories. Heavier or longer lenses demand higher payload capacity. This is crucial because an underpowered gimbal can lead to vibrations, drift, and inconsistent data, which compromise the accuracy of your models. Additionally, heavier payloads often require more robust motors, which might increase power consumption and weight, impacting flight time or portability.
- Check payload capacity and balance: Choose a gimbal rated for 20-30% above your total payload to prevent motor strain and allow for future gear upgrades. Overestimating capacity ensures smoother operation and reduces the risk of motor overheating or failure during long shoots or complex maneuvers. Proper balancing also minimizes vibrations and prolongs motor life, directly influencing the stability and quality of your imagery.
- Evaluate orientation accuracy features: Lockable axes, repeatable presets, and high-precision encoders help reproduce exact camera angles. These features are vital because they enable you to return to the same orientation across multiple passes, which is essential for aligning images during stitching and 3D reconstruction. The tradeoff is that advanced features often increase the complexity and cost of the gimbal, so consider your operational expertise and project budget.
- Consider environmental durability: Weather-sealed units or ruggedized options are vital if working outdoors in challenging conditions. Exposure to dust, moisture, or temperature fluctuations can impair electronics and mechanical parts, leading to inaccuracies or equipment failure. Investing in durable gimbals ensures consistent performance and reduces downtime, though it may add weight and cost.
- Match control and integration capabilities: Does the gimbal support SDK access, remote control, or integration with autopilot systems? These features can automate and improve data collection, allowing for precise control over camera orientation and timing. The tradeoff involves increased setup complexity and the need for technical expertise, but the gains in automation and data consistency often justify the investment for professional workflows.
For example, a surveyor using a large-format camera on a drone needs a gimbal with high stability, precise orientation logging, and weather resistance, unlike a filmmaker prioritizing smoothness for cinematic shots. Understanding these nuances ensures you select a system aligned with your specific needs, ultimately saving time and enhancing data quality.
high precision drone gimbal for mapping
As an affiliate, we earn on qualifying purchases.
As an affiliate, we earn on qualifying purchases.
Top Gimbals for Different Photogrammetry Scenarios
| Use Case | Best Candidates | Why They Stand Out |
|---|---|---|
| Handheld, close-range or interior capture | DJI RS 4 Pro | High payload, broad compatibility, axis locking, remote control; excellent for handheld mapping and detailed scans |
| Vehicle-mounted or large payloads | Freefly Mōvi Pro, DJI Ronin 2 | Robust mounting options, high payload capacity, professional control systems, suited for rugged outdoor mapping |
| Aerial survey-grade mapping | DJI Zenmuse P1, Phase One systems | Designed for integration with GNSS/IMU, precise timing, and stable, calibrated mounts for accurate georeferencing |
| Drone-based inspection or small camera work | Gremsy T3V3, Pixy series | Lightweight, aerial optimized, with reliable control for mapping payloads in UAV platforms |
For example, a drone operator capturing urban facades benefits from a gimbal like Gremsy T3V3, which balances weight, stability, and integration with autopilots—delivering repeatable, high-quality images. Choosing the right gimbal for your scenario ensures you maximize both data accuracy and operational efficiency, reducing post-processing time and minimizing errors caused by instability or misalignment during capture.
survey-grade handheld gimbal stabilizer
As an affiliate, we earn on qualifying purchases.
As an affiliate, we earn on qualifying purchases.
Critical Features That Make or Break Your Photogrammetry Results
- Payload capacity and balance: Ensure the gimbal can comfortably hold your entire camera setup, including lenses and accessories. Overloading or poor balance leads to motor strain and vibration, which can introduce motion blur or misalignment in your images. Proper payload management directly affects the stability and precision of your data collection, making this a fundamental consideration.
- Orientation repeatability: Lockable axes, repeatable presets, and high-precision encoders help reproduce exact camera angles — essential for consistent data. This feature minimizes variability between shots, reducing the need for extensive post-processing adjustments and improving the accuracy of 3D models. The tradeoff is that high-precision systems may require more meticulous calibration and setup, but the payoff is significantly improved data reliability.
- Trigger synchronization: Hardware triggers, GNSS timestamps, and event logging link images to precise locations and times, vital for georeferenced models. Synchronization ensures that each image is accurately tied to spatial data, which is crucial for mapping workflows where positional accuracy impacts the final model quality. Neglecting this can lead to misaligned datasets and increased post-processing correction efforts.
- Environmental durability: Weatherproofing, rugged construction, and stable power systems keep your gear working in harsh conditions. This resilience is essential for outdoor surveys, where exposure to elements can cause equipment malfunction or data loss. Investing in durable gimbals reduces downtime and maintains data integrity, though it may add weight and cost.
- Control and integration: SDK access, remote commands, and autopilot compatibility enable automated, accurate data collection workflows. These capabilities allow for precise, repeatable camera positioning, minimizing human error and increasing operational efficiency. The tradeoff involves potential complexity in setup and the need for technical expertise, but the benefits often outweigh these considerations in professional environments.
For instance, a mapping project in cold, windy conditions demands a weather-sealed gimbal with reliable remote control, ensuring data integrity despite environmental challenges. These features collectively contribute to high-quality, consistent datasets that are critical for producing accurate 3D reconstructions and maps.
automated camera gimbal with repeatable angles
As an affiliate, we earn on qualifying purchases.
As an affiliate, we earn on qualifying purchases.
When a Gimbal Is a Game-Changer — and When It’s Not
A gimbal shines when capturing complex architectures, moving vehicles, or handheld scans, reducing large platform vibrations and maintaining consistent framing. It’s especially helpful when you need to record oblique or multi-angle shots with repeatability. The ability to control and lock axes ensures that each shot aligns perfectly with previous ones, which is vital for accurate 3D reconstruction. However, this added control comes with increased complexity and weight, which might not be justified for simpler tasks.
Conversely, when doing traditional aerial grid flights where the aircraft’s stability already ensures steady images, a gimbal’s added weight and complexity may be unnecessary. In those cases, a rigid, calibrated mount offers more geometric stability and a simpler workflow, minimizing potential failure points. The tradeoff is that without a gimbal, you lose some flexibility in capturing oblique or angled shots, which can be valuable for detailed modeling of complex structures. The choice depends on your specific survey needs—if your work involves diverse angles and handheld operation, a gimbal is a game-changer; for straightforward grid flights, simplicity may be preferable.
How to Get the Most Out of Your Gimbal for Photogrammetry
- Calibrate thoroughly: Balance the payload, run motor and horizon calibration, and check for vibrations regularly. Proper calibration ensures the gimbal maintains accurate orientation over time, which is critical for repeatability. Neglecting calibration can lead to drift, reducing the reliability of your data and increasing post-processing correction efforts.
- Use the right settings: Lock focus, set appropriate shutter speeds (fast enough to avoid motion blur), and disable auto exposure where possible. These settings help produce sharp, well-exposed images with minimal motion artifacts. Inconsistent settings can introduce variability, making it harder to align images accurately during reconstruction.
- Plan your shots: Overlap at least 70% forward and 60% side, with sufficient angle diversity for 3D modeling. Proper planning maximizes coverage and ensures enough data redundancy, which improves model detail and reduces gaps. It also minimizes the need for re-shoots, saving time and resources.
- Synchronize data: Integrate GNSS and trigger logs with camera timestamps for precise georeferencing. Synchronization is essential for mapping accuracy, as misaligned data can lead to errors in spatial positioning, affecting the overall quality of the final model. Investing in reliable synchronization tools can significantly improve workflow efficiency.
- Control environment factors: Protect gear from wind, dust, and cold. Use vibration isolators if necessary. Environmental factors can cause subtle shifts or vibrations that compromise image sharpness and orientation accuracy. Proper protective measures and stabilization help maintain data integrity, especially in challenging outdoor conditions.
Imagine a survey team on a windy day. Proper calibration and environmental controls ensure the images remain sharp and correctly oriented, even under challenging conditions. This attention to detail directly impacts the precision and usability of your photogrammetric outputs, ultimately enabling more accurate and reliable 3D reconstructions.
Recent Innovations Improving Photogrammetry Gimbal Use
Newer gimbals feature high-precision encoders, automated axis locks, and advanced stabilization algorithms. These improvements help achieve sub-degree repeatability and reduce orientation drift—key for high-accuracy mapping. The implications are significant: increased consistency reduces the need for extensive post-processing corrections, saving time and minimizing errors in the final models.
Some models now offer integrated LiDAR or focus-assist sensors, enabling faster, more reliable data collection. AI-driven image quality checks and automated planning tools are also emerging, making complex surveys easier and more precise. These technological advances allow operators to focus more on data analysis rather than manual adjustments, improving overall workflow efficiency.
For example, the DJI RS 3 Pro offers improved motor torque, better power management, and SDK integration, enabling automation of complex mission sequences. These advances mean fewer manual adjustments and more consistent data, even in challenging environments. The tradeoff is that such advanced systems can be more expensive and may require more technical expertise to operate effectively, but the gains in accuracy and efficiency often justify the investment for professional users.
Avoid These Common Mistakes When Choosing Your Gimbal
- Relying solely on maximum payload ratings: Overloading causes vibrations and reduces accuracy. Always include a safety margin. Overestimating payload capacity can lead to motor overloads, vibrations, and inconsistent data, which degrade the quality of your reconstructions. Understanding the true operational limits and ensuring your gear stays within them is crucial for reliable results.
- Ignoring calibration and environmental factors: Failing to calibrate or protect gear leads to inconsistent results. Calibration ensures the gimbal’s axes are aligned and functioning correctly, while environmental protection prevents damage and performance degradation. Overlooking these can cause subtle errors that accumulate over time, reducing the accuracy of your models.
- Choosing based only on cinematic features: Smooth footage isn’t enough; focus on repeatability, orientation control, and integration capabilities. Cinematic gimbals prioritize aesthetic motion, but in photogrammetry, precision and repeatability are paramount. A gimbal with excellent stabilization but poor orientation control will compromise data quality, leading to inaccuracies in 3D models.
- Assuming video stabilization replaces precise setup: High-quality photogrammetry needs sharp, well-exposed, correctly oriented images, not just smooth video. Relying solely on stabilization can mask underlying issues like misalignment or exposure errors, which are detrimental to reconstruction accuracy. Proper setup and calibration are essential to achieve the best results.
- Neglecting the impact of cabling and mounting: Loose cables or soft mounts can subtly shift geometry, ruining accuracy. Even minor shifts caused by cable tugging or inadequate mounting can introduce errors into your dataset. Ensuring firm, vibration-isolated mounting and cable management preserves the integrity of the captured data, which is vital for precise 3D reconstruction.
Imagine capturing a building façade with a loose cable tugging the camera slightly. That tiny shift can throw off your entire 3D model’s accuracy. Recognizing and mitigating these common pitfalls ensures your survey results are reliable and precise, saving time and effort in post-processing corrections.
Stills or Video for Photogrammetry? What Works Best
While video offers rapid coverage and dynamic capture, individual high-resolution stills generally produce better results for photogrammetry. They provide RAW files, precise exposure, and less compression, all of which improve 3D model fidelity. Still images allow for better control of camera parameters, leading to higher-quality datasets that are more easily aligned and processed.
When using video, extract frames at high bitrate and fast shutter speeds, and avoid scenes with motion blur or rolling shutter artifacts. However, this process can be labor-intensive and may not always guarantee the same level of detail or consistency as dedicated still photography. For detailed, accurate models, dedicated still images remain the gold standard because they provide the highest resolution, best exposure control, and minimal compression artifacts, all critical for capturing fine details in complex structures.
For example, a surveyor shooting a historic site might prefer high-res RAW images for maximum detail, while a quick urban façade inspection might rely on steady video frames for rapid documentation. The choice depends on the project’s accuracy requirements and available resources, but understanding these tradeoffs helps in planning efficient and effective data collection strategies.
Smart Questions About Gimbals and Photogrammetry
Do I need a gimbal for photogrammetry? Not always. Gimbals excel for handheld, vehicle, or oblique capture, but rigid mounts suit aerial grid surveys better. The choice depends on the specific capture method; for example, handheld or moving platforms benefit from gimbal stabilization to ensure consistent orientation, while fixed mounts or automated drone systems often prioritize mechanical stability and calibration over active stabilization.
Will a gimbal improve model accuracy? Indirectly—by producing sharper, more consistent images. But it won’t fix calibration issues or poor overlap. The real benefit is in reducing image variability caused by platform movement, which enhances the quality of the input data. However, if calibration or planning is flawed, a gimbal alone cannot compensate for these issues.
Is a three-axis gimbal better than two-axis? Usually yes. It offers full control, especially for oblique or complex angles. The third axis provides additional stabilization for tilt or roll, enabling more precise angle control necessary for detailed modeling. The tradeoff is increased complexity and weight, which may impact portability or power consumption.
Can I use a DJI RS-series for survey work? Yes, especially for close-range or handheld projects. Just remember to integrate trigger and position data for best results. Ensuring compatibility with data logging and synchronization tools is key to maintaining accuracy during surveys.
Does stabilization telemetry mean survey-grade orientation? Not necessarily. The telemetry can be good, but quality depends on encoders, calibration, and how you process the data. High-quality orientation data requires precise sensors and careful calibration; telemetry alone doesn’t guarantee survey-grade accuracy but can be a valuable component when combined with proper calibration and data processing.
Conclusion
Choosing the right gimbal stabilizer is about more than smooth footage. It’s about integrating stability, repeatability, and precise control into your workflow to produce reliable, high-quality 3D models. When aligned with your platform and project needs, a well-selected gimbal becomes a powerful tool for accurate mapping and reconstruction.
Remember: stability is a means, not an end. Focus on how your setup supports sharp, consistent images and precise orientation. That’s what makes your photogrammetry truly stand out.
Flea & tick season Picks
flea and tick prevention
As an affiliate, we earn on qualifying purchases.