
To create easy, eye-catching symmetry projects, start by folding your paper in half or along specific lines. Then, cut out shapes or patterns along the folded edge, keeping the design simple yet striking. When you unfold the paper, you’ll reveal a perfect mirrored, symmetrical pattern that looks impressive with minimal effort. By mastering these quick techniques, you’ll unveil stunning designs, and if you explore further, you’ll discover even more ways to amaze with paper creations.
Key Takeaways
- Fold paper in half or along specific lines to create perfect mirror images for stunning symmetrical designs.
- Use simple cutting patterns along the folded edge to produce intricate, symmetrical shapes when unfolded.
- Combine basic folds like valley or accordion folds with cutting to develop more complex, eye-catching patterns.
- Add color or layered folds to enhance vibrancy and depth in your symmetrical paper cut projects.
- Focus on precision in folding and cutting to ensure clean, professional-looking symmetry in your designs.
Creating Stunning Symmetrical Paper Art
Have you ever wondered how symmetry can transform a simple design into something striking and harmonious? When you explore paper folding and mirror images, you release a world of creative possibilities that are both fun and impressive. With just a few basic techniques, you can create stunning symmetrical artworks that captivate anyone who sees them. The beauty of paper folding lies in its simplicity—by carefully folding your paper in half or along specific lines, you produce perfect mirror images that serve as the foundation for many symmetry projects. These mirror images are the key to achieving balance and visual appeal, making your designs look professional and polished, even if you’re just starting out.
Discover how simple paper folding creates stunning, professional-looking symmetrical designs with minimal effort.
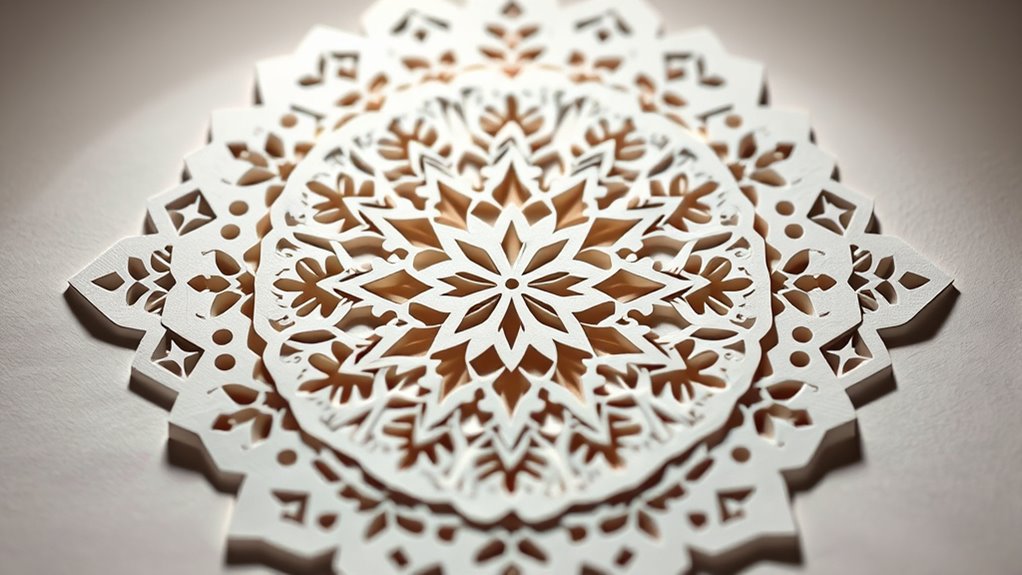
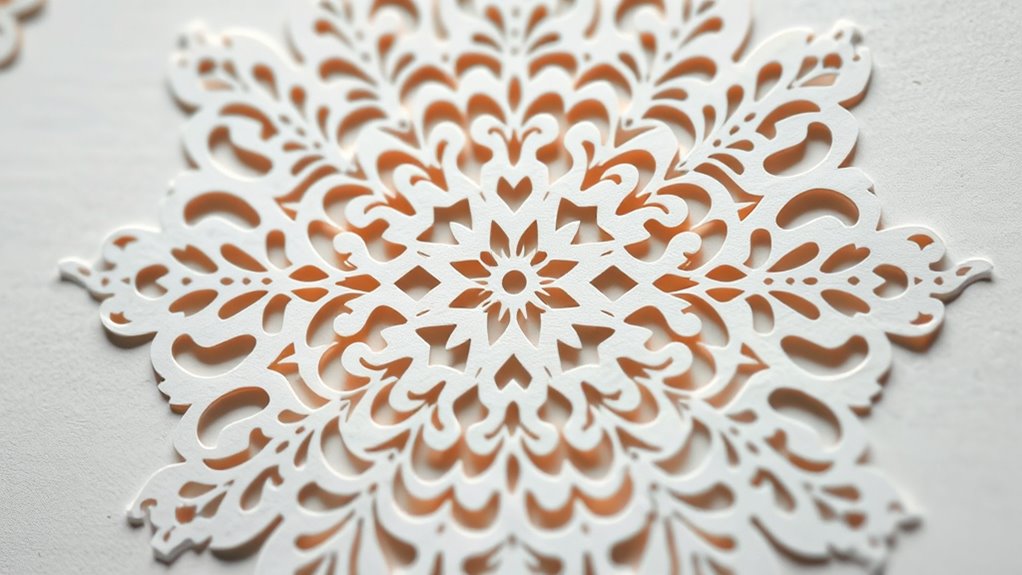
The process begins with selecting a piece of paper and deciding on your design. Once you fold the paper in half, you can cut out shapes, patterns, or intricate designs along the folded edge. When you unfold the paper, a symmetrical pattern emerges, with each side mirroring the other perfectly. This technique is incredibly satisfying because it requires minimal effort but results in a highly polished look. For example, you could create snowflakes or mandalas by folding and cutting in specific ways. The symmetry adds a sense of harmony and order to your work, making even simple shapes look complex and beautiful.
Practicing paper folding and creating mirror images also sharpens your attention to detail. As you fold and cut, you develop a sense of how lines and shapes align, which enhances your spatial awareness. This kind of mindfulness can be both relaxing and rewarding. Plus, you don’t need fancy tools—just a pair of scissors, a sheet of paper, and your imagination. You can experiment with different folding techniques, such as accordion folds or valley folds, to produce various symmetrical effects. As you gain confidence, try combining multiple folded layers or incorporating color to add depth and vibrancy to your designs.
Another advantage of working with paper folding and mirror images is that your projects can be easily customized. Whether you’re making decorations for a party, creating greeting cards, or designing wall art, symmetry elevates your work effortlessly. The simple act of folding and cutting transforms plain paper into intricate patterns that look like they took hours to craft. Additionally, exploring sound healing principles can inspire new ways to approach pattern creation, as both rely on harmony and balance. Sharing your creations with friends or family adds an element of surprise and delight, as they marvel at how a few folds and cuts can yield such complexity.
Frequently Asked Questions
What Types of Paper Are Best for Symmetry Projects?
For symmetry projects, you want paper that’s easy to fold and holds its shape well. Think about using lightweight, smooth paper like origami paper or craft paper, which works great with origami techniques. The paper texture matters too—smoother surfaces help achieve clean cuts and precise folds. Avoid thick or rough paper, as it’s harder to manipulate symmetrically. Choose quality paper that’s flexible yet sturdy for the best results.
How Do I Troubleshoot Uneven Cuts?
Troubleshooting uneven cuts is like smoothing out a ripple in water. First, make sure your paper is properly prepared—place it on a sturdy, flat surface and secure it with tape if needed. Use steady, consistent cutting techniques, applying even pressure and following a straight line. Keep your blade sharp and replace it if it’s dull. Practicing these steps helps achieve neat, symmetrical cuts every time.
Can Symmetry Projects Be Made With Children?
Yes, you can definitely make symmetry projects with children. Just guarantee you prioritize child safety by choosing age-appropriate scissors and supervising closely. Keep craft storage organized so they can easily access supplies without mess. Kids love creating symmetrical designs, and it’s a fun way to develop their fine motor skills and understanding of symmetry. Always encourage their creativity, and you’ll both enjoy making beautiful paper art together.
Are There Digital Tools to Assist With Symmetry Designs?
Did you know that over 60% of artists now use digital design tools? When it comes to symmetry designs, you’ll find many symmetry software options that make creating perfect patterns easier. These tools help you mirror and duplicate designs effortlessly, saving time and boosting creativity. Whether you’re a beginner or experienced, digital design offers an accessible way to explore symmetry, making your projects more precise and impressive.
How Do I Preserve My Finished Paper Art?
To preserve your finished paper art, you should consider proper preservation techniques like mounting it on acid-free backing and using archival-quality materials. Framing options are vital; opt for UV-protective glass and make sure it’s sealed well to prevent damage from light and moisture. Handle your piece carefully and store it in a cool, dry place when not on display. These steps help keep your artwork vibrant and intact for years to come.
Conclusion
Now that you’ve explored these simple yet impressive paper cutting techniques, you’re ready to create your own symmetrical masterpieces. With a little patience and practice, you’ll be amazed at how easily stunning designs come to life. Why settle for ordinary when you can craft intricate, eye-catching art right at home? So, what masterpiece will you create next? Let your creativity soar and turn simple paper into extraordinary works of art.