
To explore conic sections in GeoGebra, start by setting up algebra and graphics views, then either enter equations like (x-h)^2 + (y-k)^2 = r^2 for circles or use tools for constructing ellipses, hyperbolas, and parabolas. Adjust parameters with sliders to see how shapes change, and use measurement tools to analyze properties like focus and directrix. By building geometric constructions, you’ll deepen your understanding—continue exploring to discover more advanced features.
Key Takeaways
- Utilize GeoGebra’s input bar to directly enter and manipulate standard conic equations for exploration.
- Use built-in tools like “Circle” and “Ellipse” to construct conic sections based on centers, foci, or points.
- Adjust sliders linked to parameters such as eccentricity or focal distance to observe conic shape changes dynamically.
- Create focus and directrix constructions; measure distances to understand focus-directrix properties.
- Save, share, and export your geometric constructions for further analysis or collaborative study.
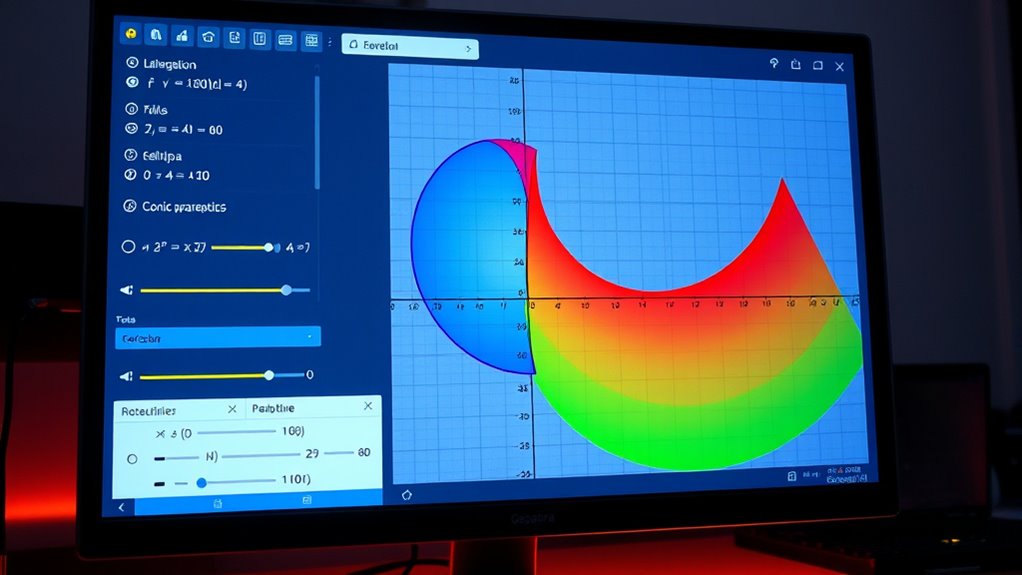
GeoGebra software for conic sections
As an affiliate, we earn on qualifying purchases.
As an affiliate, we earn on qualifying purchases.
Setting Up GeoGebra for Conic Section Exploration

To begin exploring conic sections in GeoGebra, you first need to set up the software properly. Start by opening GeoGebra and selecting the Algebra and Graphics views for a clear workspace. To analyze conics through coordinate transformations, familiarize yourself with entering algebraic equations directly into the input bar. You can input the standard forms of conics, such as ((x-h)^2 + (y-k)^2 = r^2) for circles or (Ax^2 + Bxy + Cy^2 + Dx + Ey + F = 0) for general conics. Understanding how to manipulate these algebraic equations helps you explore how transformations affect conic shapes. Setting up the axes and grid also makes visualizing changes easier, giving you a solid foundation for further exploration. Additionally, learning about the contrast ratio of different conic representations can help you better understand their visual differences and properties.

Nicpro 22 PCS Compass Geometry Tools with Case, Drafting Tools Geometry Set with Swing Arm Protractor, Rulers, Metal Compass, Square Set, Mechanical Pencil, Back to School Supplies for Students
Complete Compass Geometry Set – This all-in-one compass geometry set includes 3 types of compasses (study, graphic, bow),…
As an affiliate, we earn on qualifying purchases.
As an affiliate, we earn on qualifying purchases.
Drawing Basic Conic Sections Using GeoGebra Tools
You can quickly construct circles and ellipses using GeoGebra’s built-in tools, making the process straightforward. By selecting the appropriate tool, you’ll efficiently create these conic sections with minimal effort. This approach helps you focus on understanding their properties rather than complex drawing steps. Additionally, exploring automation in business can provide insights into how technological tools like GeoGebra streamline educational workflows.
Constructing Circles Efficiently
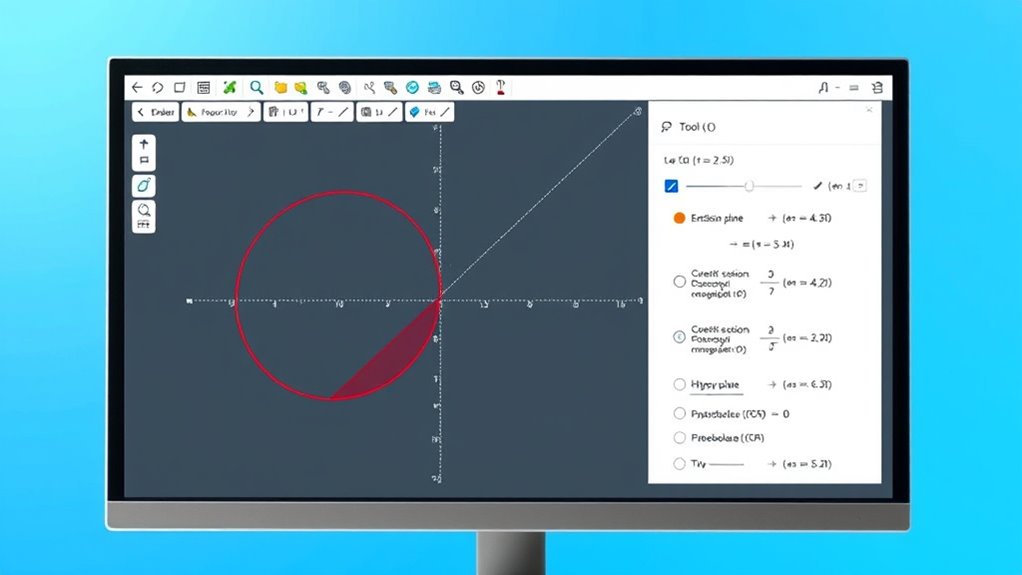
Constructing circles efficiently in GeoGebra is essential for exploring conic sections without wasting time on repetitive steps. You can quickly create circles by using tools like the “Circle with Center and Radius” or the “Circle through Three Points.” This approach leverages circle symmetry, allowing you to reflect or rotate circles easily, saving time. To streamline your process, consider these tips:
- Use the “Distance or Length” tool for precise radius calculation.
- Employ the “Point” and “Segment” tools to define centers and radii accurately.
- Duplicate circles with the “Copy” and “Paste” functions for consistency.
- Adjust circle parameters dynamically to observe changes in real-time.
- Mastering these techniques helps you construct circles efficiently, improving your workflow, making your exploration of conic sections more productive and precise.
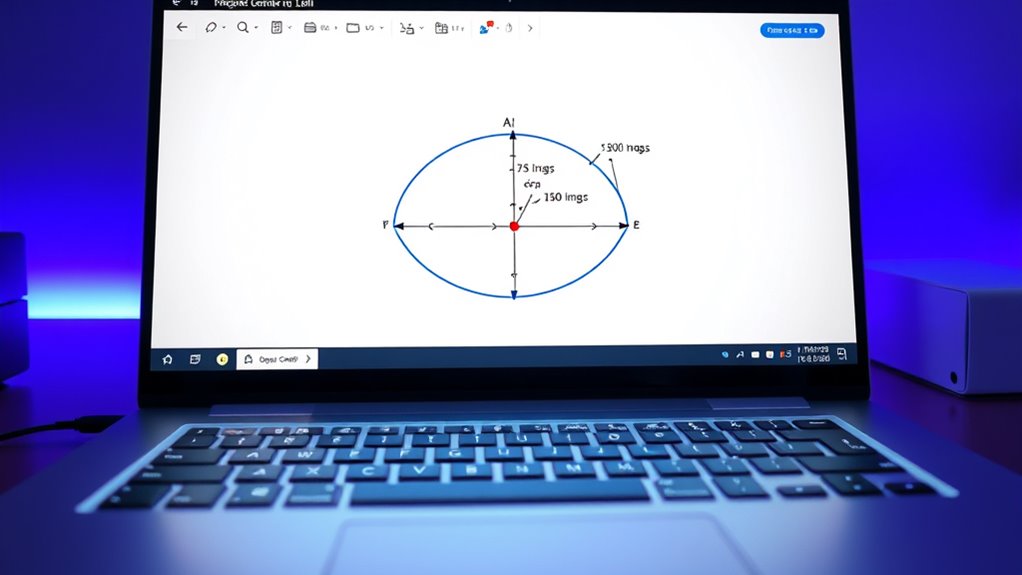
Drawing Ellipses Easily
Drawing ellipses in GeoGebra becomes straightforward once you understand the right tools and techniques. Start by selecting the Ellipse tool, then click two points to set the foci, which define the ellipse’s shape. To create an accurate ellipse, you can adjust the eccentricity, controlling how elongated it appears. Use the slider to modify eccentricity, observing how the ellipse focus shifts and the shape changes accordingly. This adjustment helps you explore different conic sections and understand how the ellipse focus influences its form. GeoGebra’s dynamic environment allows you to experiment easily, providing visual insight into the relationship between the focus, eccentricity, and the ellipse’s shape. With these tools, drawing and exploring ellipses becomes a simple, interactive process. Understanding city dynamics can also enhance your exploration by providing context for how conic sections relate to real-world applications.
Nicpro 22 PCS Compass Geometry Tools with Case, Drafting Tools Geometry Set with Swing Arm Protractor, Rulers, Metal Compass, Square Set, Mechanical Pencil, Back to School Supplies for Students
Complete Compass Geometry Set – This all-in-one compass geometry set includes 3 types of compasses (study, graphic, bow),…
As an affiliate, we earn on qualifying purchases.
As an affiliate, we earn on qualifying purchases.
Adjusting Parameters to Customize Ellipses, Parabolas, and Hyperbolas

Adjusting parameters in GeoGebra allows you to customize the shape and size of conic sections like ellipses, parabolas, and hyperbolas with ease. You can modify their features using slider controls linked to parametric equations, giving you real-time visual feedback. These sliders adjust variables such as the axes lengths or focal distances, helping you see how each parameter impacts the curve’s form. For example, understanding how conic sections respond to parameter changes can deepen your grasp of their geometry. Using slider controls makes experimentation straightforward, and understanding how parameters influence conic sections deepens your grasp of their geometry.

ManimCE For Beginners: A Step-by-Step Beginner's Guide to Python Animation, Math Visualization, and Video Creation
As an affiliate, we earn on qualifying purchases.
As an affiliate, we earn on qualifying purchases.
Analyzing Conic Properties With Geogebra’S Measurement Features
By utilizing GeoGebra’s measurement tools, you can directly analyze key properties of conic sections, such as lengths, angles, and distances. This helps you better understand their focus symmetry and geometric relationships. For example, measuring distances from the focus to points on the conic reveals how focus properties influence shape. You can also measure angles to verify symmetry about axes or the focus. GeoGebra’s measurement accuracy guarantees your data is reliable, allowing precise comparisons and explorations. Using the tools actively, you’ll see how focus symmetry affects the conic’s structure, reinforcing theoretical concepts. This hands-on approach makes properties more tangible, deepening your comprehension of conic sections through direct, accurate measurements.
Using Geometric Constructions to Understand Focus-Directrix Definitions
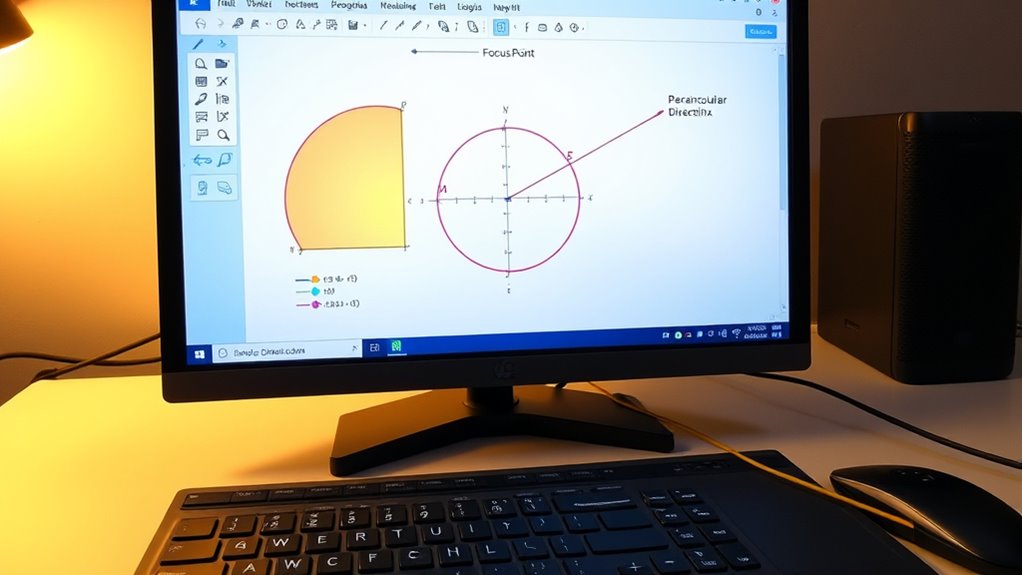
Using geometric constructions with GeoGebra allows you to visualize and understand the focus-directrix definition of conic sections more intuitively. You can explore how focal properties determine the shape of ellipses, parabolas, and hyperbolas through directrix methods. By constructing the focus, directrix, and points on the conic, you see how each point maintains a constant ratio of distances to the focus and directrix. This hands-on approach clarifies how conics form based on these properties.
- Create a fixed focus and a perpendicular directrix line.
- Use the point tool to generate points on the conic.
- Measure distances to observe focal ratios.
- Adjust the focus or directrix to see how the conic’s shape changes.
These geometric constructions enhance your understanding of the fundamental principles behind conic sections.
Saving and Sharing Your Conic Section Constructions

Once you’ve created your conic section construction in GeoGebra, saving and sharing it guarantees your work can be revisited or shared with others. You can save your file in common sharing formats like GeoGebra files (.ggb) or export images for reports. Sharing your constructions enables online collaboration, allowing classmates or teachers to view, modify, or analyze your work directly. To share, upload your file to GeoGebra’s cloud platform or embed it in websites and presentations. This makes it easy for others to access your conic section explorations anytime. Whether for classroom projects or collaborative learning, saving and sharing your work ensures your geometric insights are preserved and easily accessible, fostering a collaborative understanding of conic sections. Additionally, understanding how to properly store and identify your constructions can help maintain their quality over time.
Frequently Asked Questions
Can Geogebra Animate Conic Sections Dynamically?
You can definitely animate conic sections dynamically in GeoGebra. The software allows you to create interactive animations that showcase how conic sections change with different parameters. By using dynamic transformations, you can manipulate sliders or points, making the conics expand, contract, or shift seamlessly. This feature helps you visualize the properties and variations of conic sections in an engaging, hands-on way, enhancing your understanding.
How Can I Create 3D Representations of Conic Sections?
To create 3D representations of conic sections, you can use GeoGebra’s 3D Graphics view for spatial modeling and 3D visualization. Start by plotting the conic’s defining equations in three variables, then manipulate parameters to see how the shapes change in space. Use the tools to rotate and explore the models from different angles, gaining a better understanding of their three-dimensional structure and spatial relationships.
Is It Possible to Export Conic Section Graphs for Presentations?
Yes, you can export conic section graphs for presentations using GeoGebra. The software offers various export options, such as saving images in formats like PNG or PDF, which are ideal for slides. Additionally, GeoGebra’s presentation features allow you to embed graphs directly into documents or slideshows, making it easy to include your conic sections in your presentations seamlessly.
Can I Incorporate Real-World Data Into Geogebra Conic Analyses?
You can incorporate real-world data into GeoGebra for conic fitting by importing datasets through CSV files or manually entering data points. Once you have your data, use GeoGebra’s tools to perform conic fitting, allowing you to analyze how well the conic matches your real-world data. This interactive approach helps you visualize and explore conic sections based on actual measurements, enhancing your understanding of their practical applications.
How Do I Compare Multiple Conic Sections Simultaneously in Geogebra?
You can perform an interactive comparison of multiple conic sections in GeoGebra by overlaying their graphs. Use the overlay techniques by plotting each conic on the same axes, then adjust colors and labels for clarity. This way, you can analyze their features side by side. You might also create sliders for parameters to see how changes affect each conic, making your comparison dynamic and insightful.
Conclusion
Now that you’ve uncovered the geometric symphony of conic sections with GeoGebra, you’re equipped to paint these curves on your mathematical canvas. Like a master artist, manipulate parameters and constructions to reveal each conic’s unique personality. With your newfound tools, you hold the brush to explore, analyze, and share these elegant curves—transforming abstract equations into vivid visual stories that breathe life into geometry’s timeless dance.